How to increase and decrease virtual RAM capacity on Windows PC
This quick fix can help ease the load on your system.

There are times when your computer doesn’t seem to keep up. You click on something, and it takes ages to respond. Probably because your browser freezes or you have a software crash.
In moments like these, increasing your Virtual RAM can help ease the load on your system. Think of it as giving your PC a little extra space to breathe, allowing it to handle multiple tasks more smoothly. While this fix is a helpful workaround, especially when dealing with memory-intensive applications., it can't replace physical RAM.
In fact, if set too high, it can cause your computer to slow down rather than speed up. If it is too low, your system may struggle with multitasking. The key is finding the right balance for your needs. In this guide, learn how you can increase or decrease Virtual RAM on your Windows PC.
Steps to Manage Virtual RAM on Windows PC
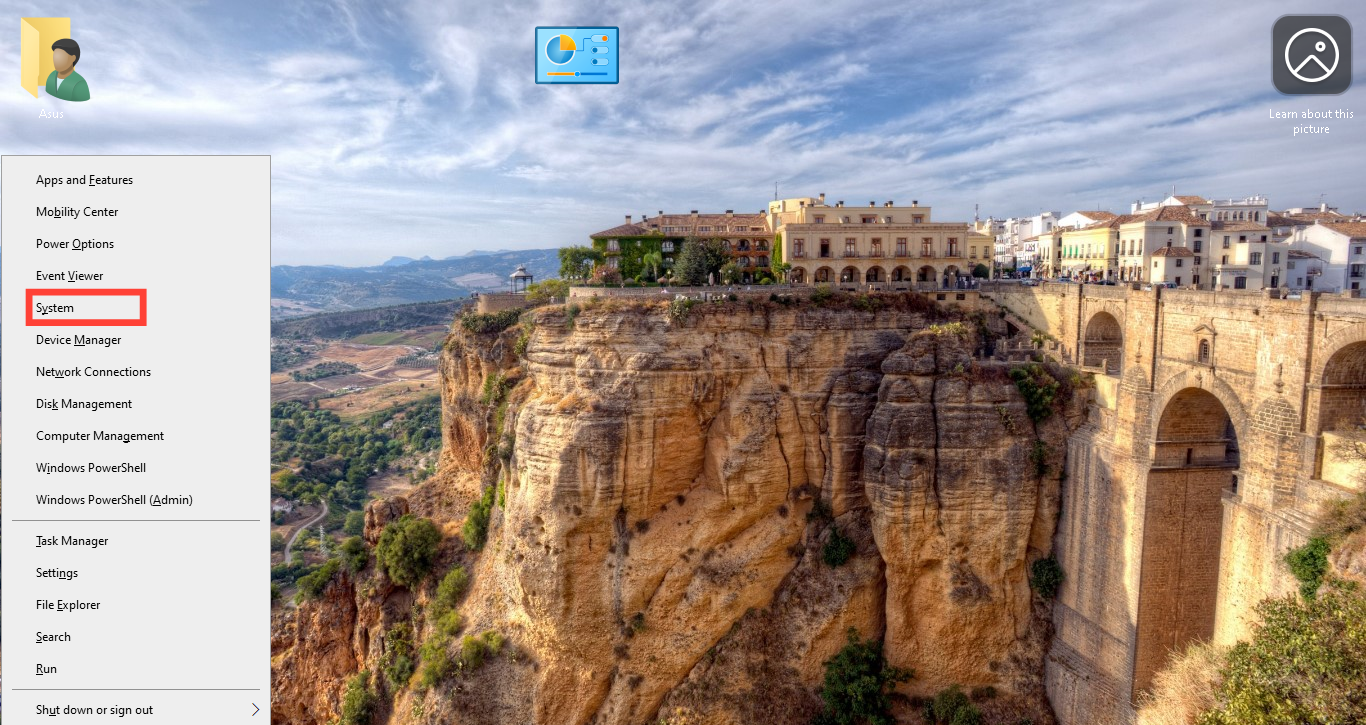
Step 1. Press Win + X and select "System" to open your system settings
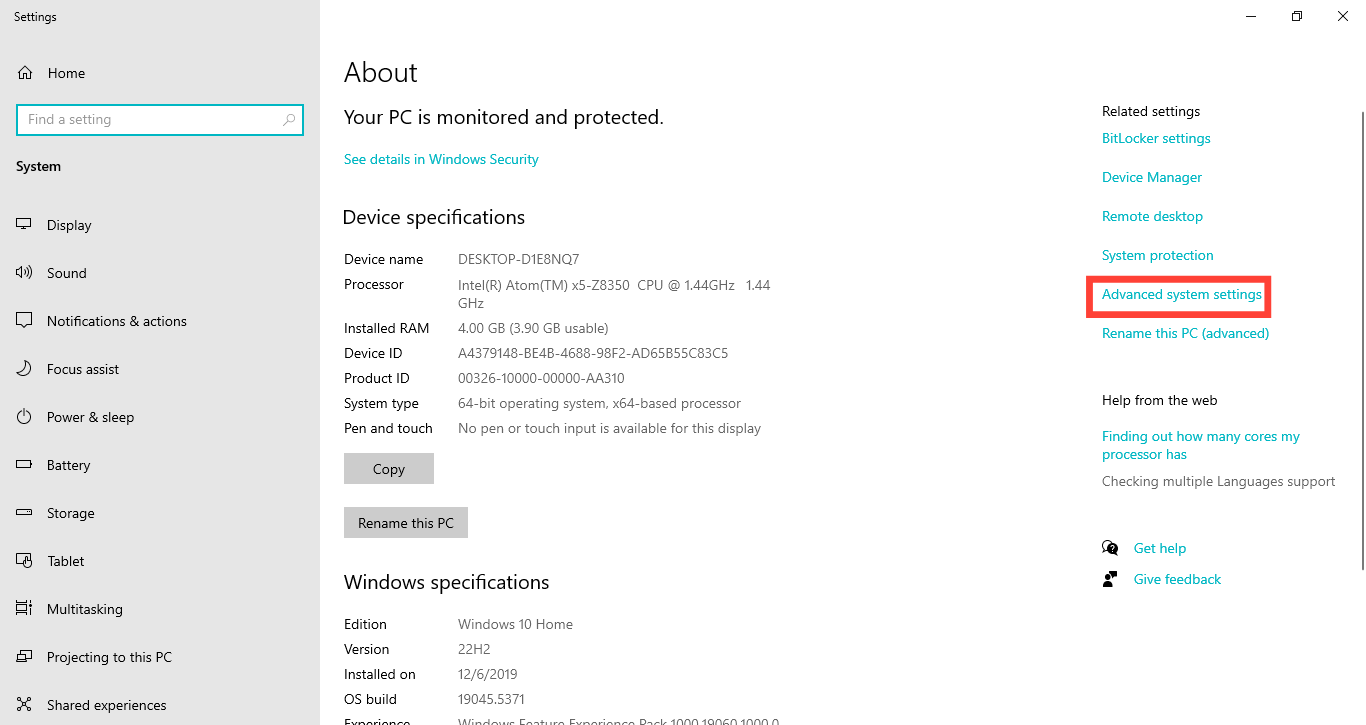
Step 2. Click "Advanced system settings" on the right panel to go to your system's advanced settings
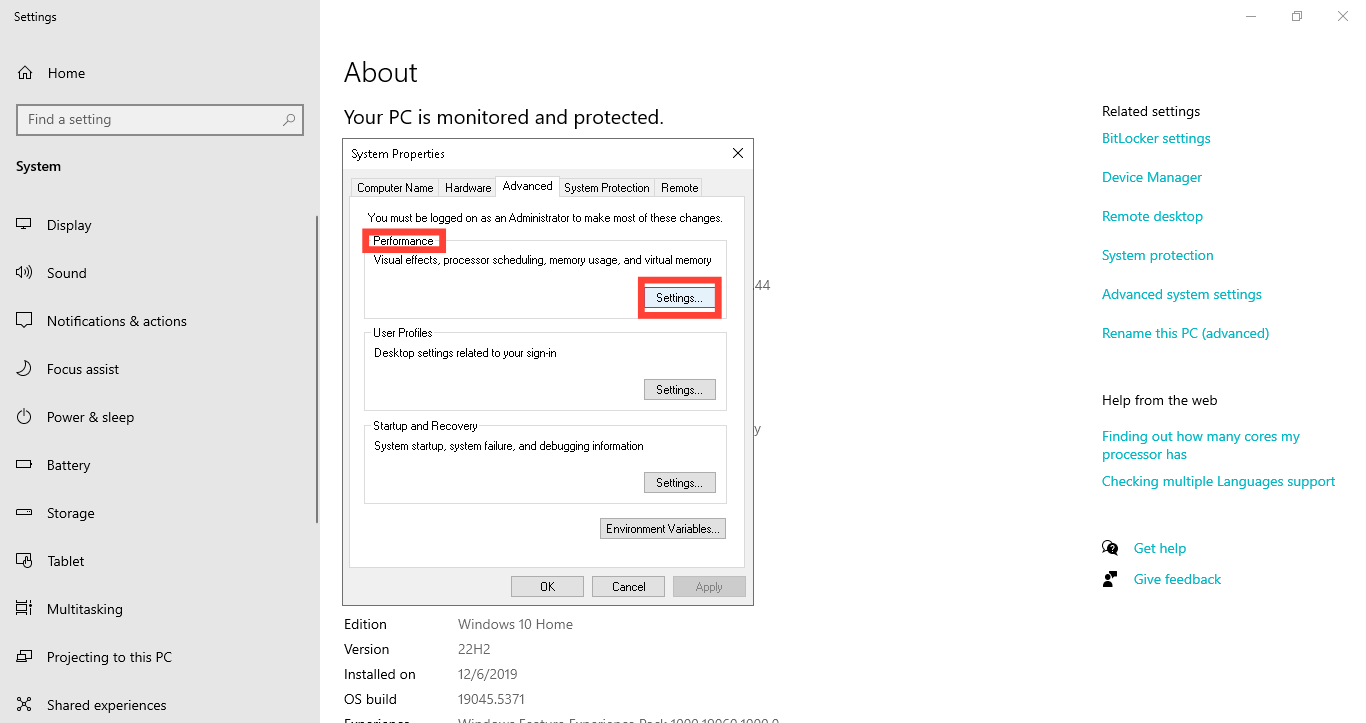
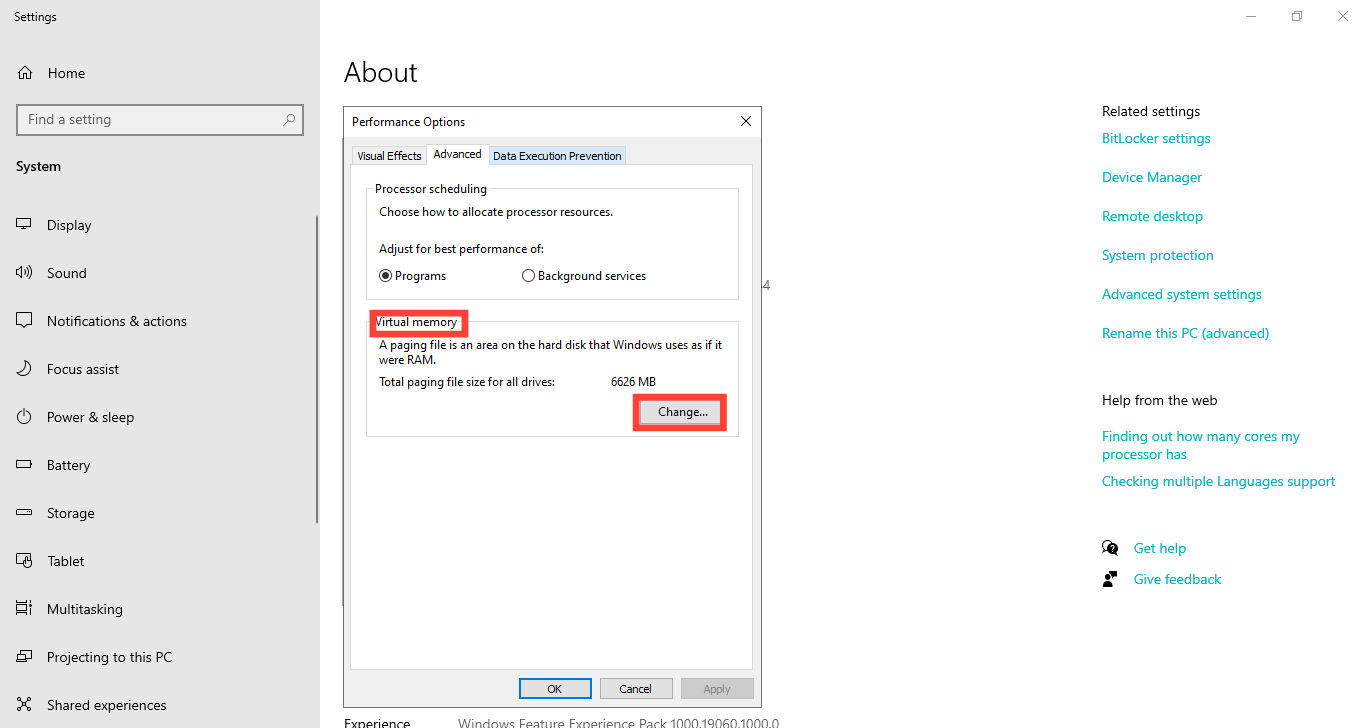
Step 3. Under the "Performance" section, click "Settings," then go to the "Advanced" tab.
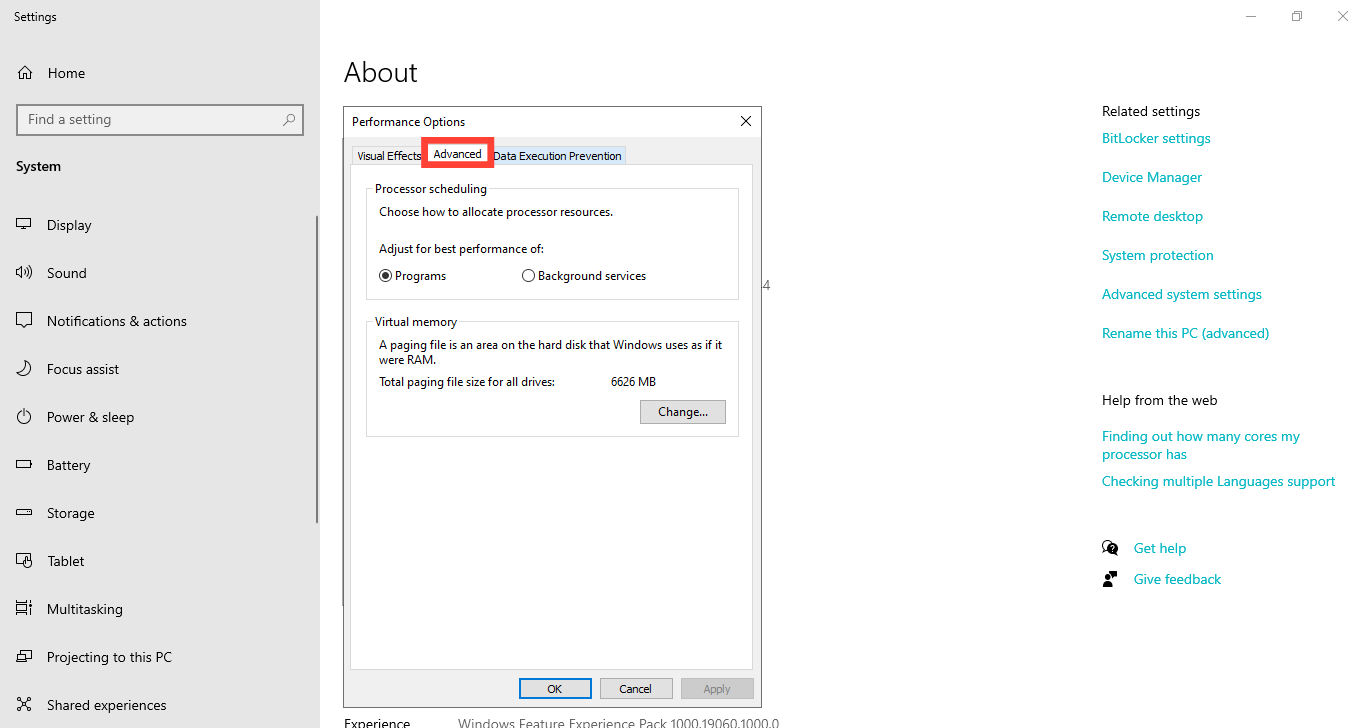
Step 4. Under Virtual Memory, click "Change" to modify your PC's virtual memory
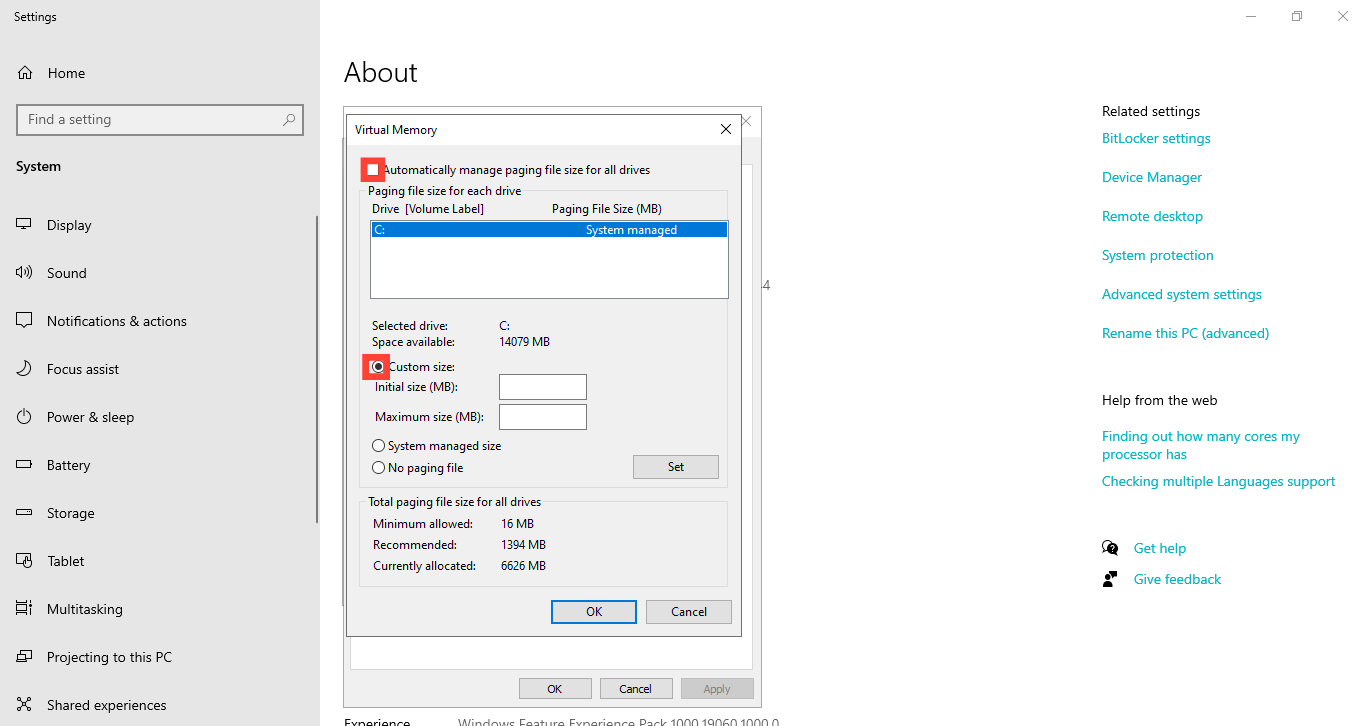
Step 5. Uncheck "Automatically manage paging file size for all drives" and select "Custom Size."
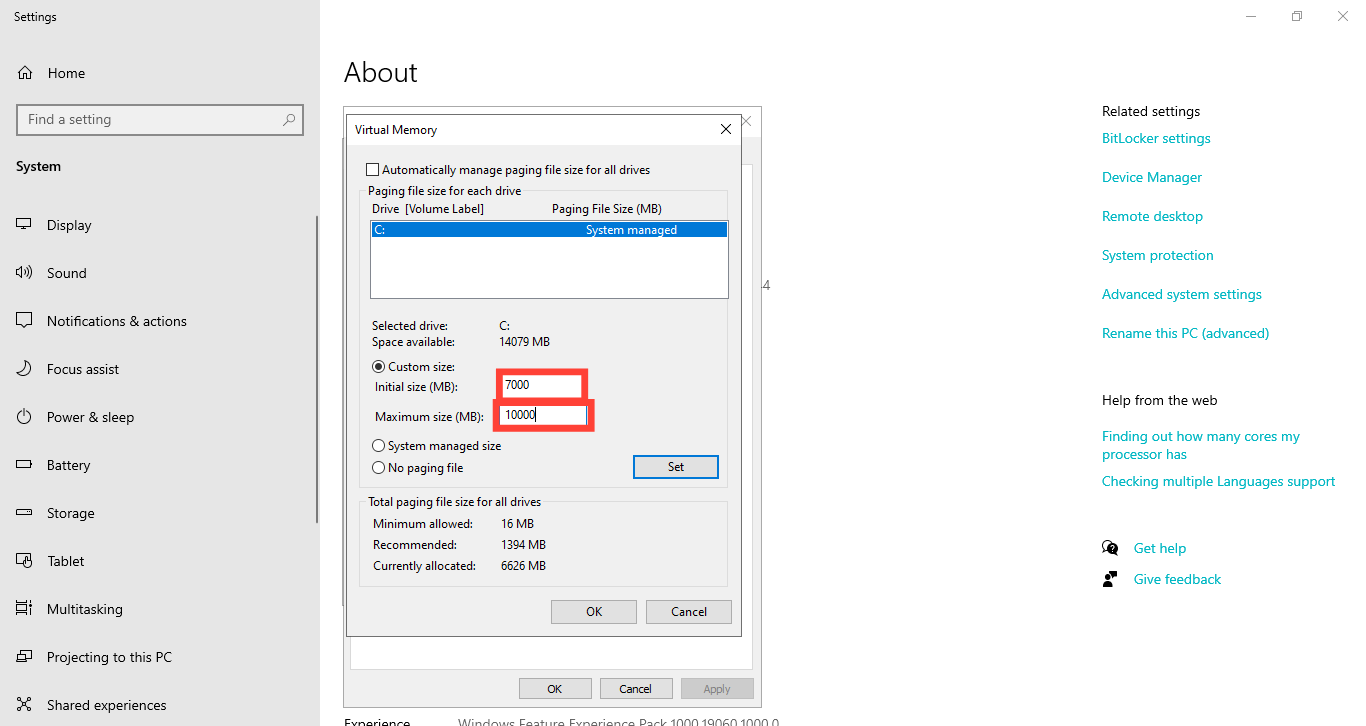
Step 6. Set an Initial size (recommended to be at least 1.5x your RAM) and a Maximum size (up to 3x your RAM).
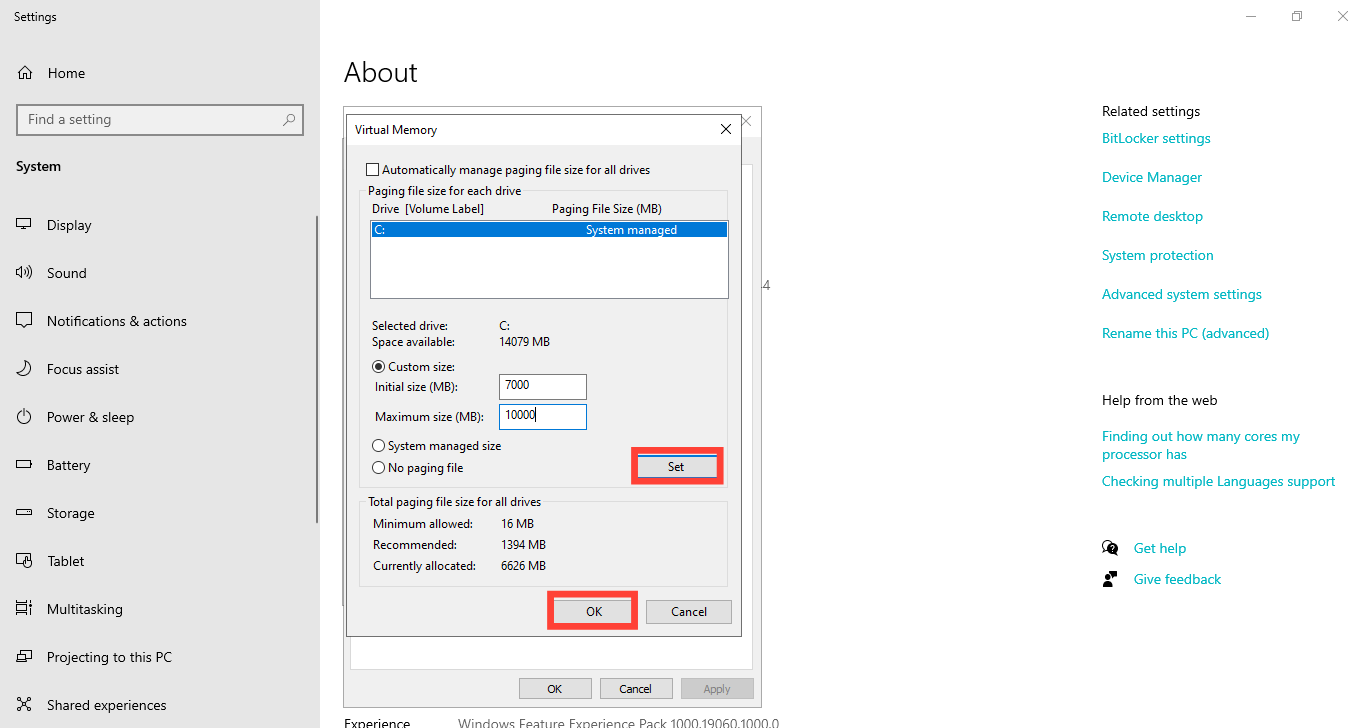
Step 7. After that, click "Set," then "OK," and restart your PC.

With these adjustments, your PC can handle more applications at once without slowing down as much.
Conclusion
You can use the Virtual RAM as a safety net when needed, but you don’t want to rely on it all the time. If your PC frequently runs out of memory, it's best to consider upgrading your physical RAM as the best long-term solution. This will give your computer a real energy boost rather than just a temporary workaround.
Image credit: David Adubiina/Techloy.com


