How to change mouse speed on Windows 11
Learn to adjust the pace of your on-screen pointer to match your touch.

Have you ever found yourself struggling with a mouse pointer that's either too fast or too slow? I've been there, especially when switching between different setups or trying to work with precision on a multi-monitor configuration.
Whether you're a gamer, a graphic designer, or just someone who wants to optimize their workflow, adjusting the mouse speed can make a big difference. Windows 11 offers several ways to fine-tune this setting, and I'm here to guide you through each method.
Change Mouse Speed via Settings
Step 1: Right-click on the Start button and select Settings
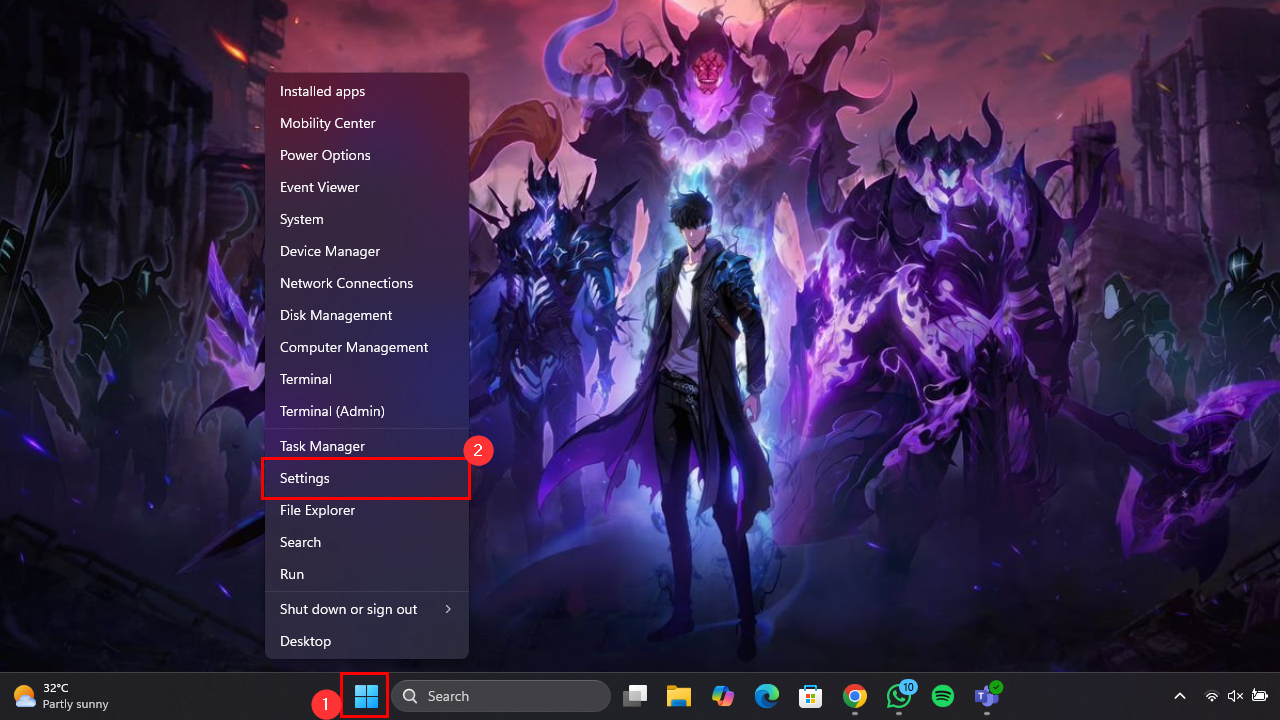
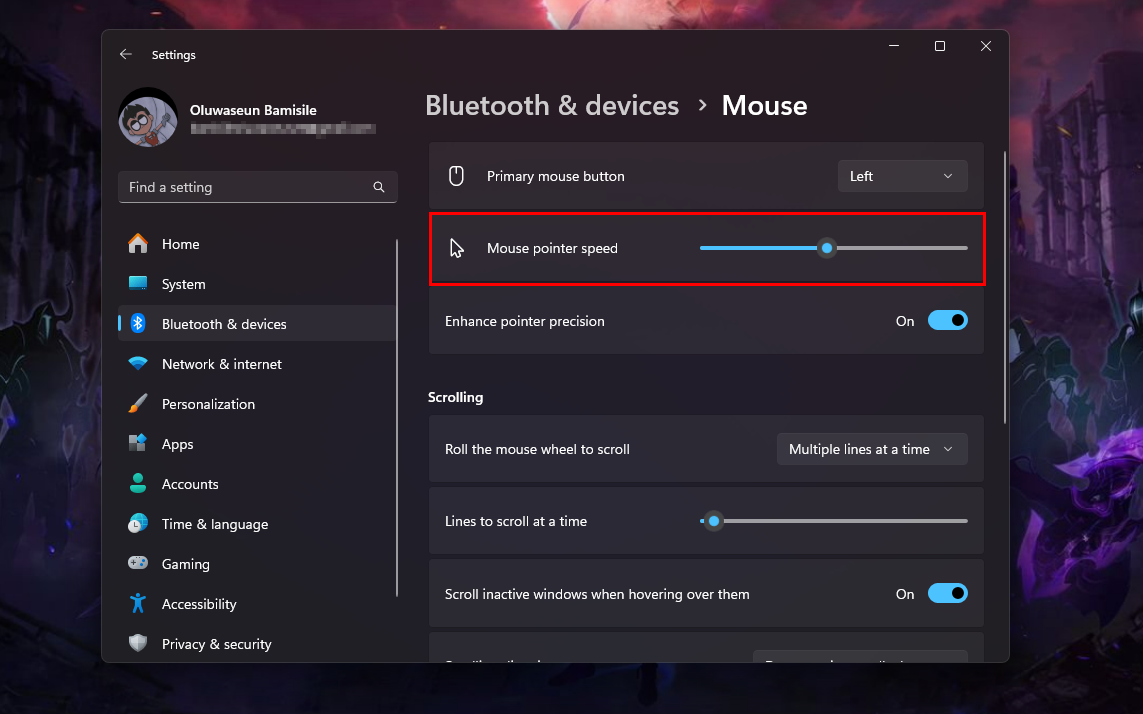
Step 2: In the Settings menu, select "Bluetooth & devices"
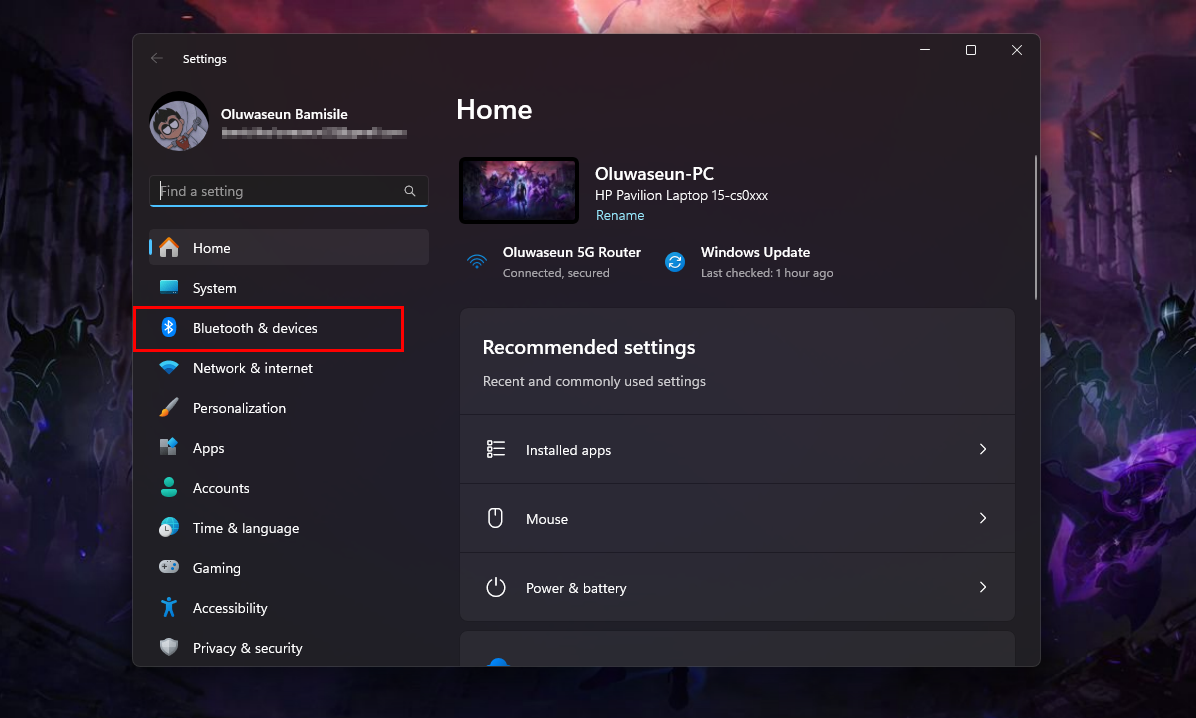
Step 3: On the Bluetooth & devices page, click "Mouse"
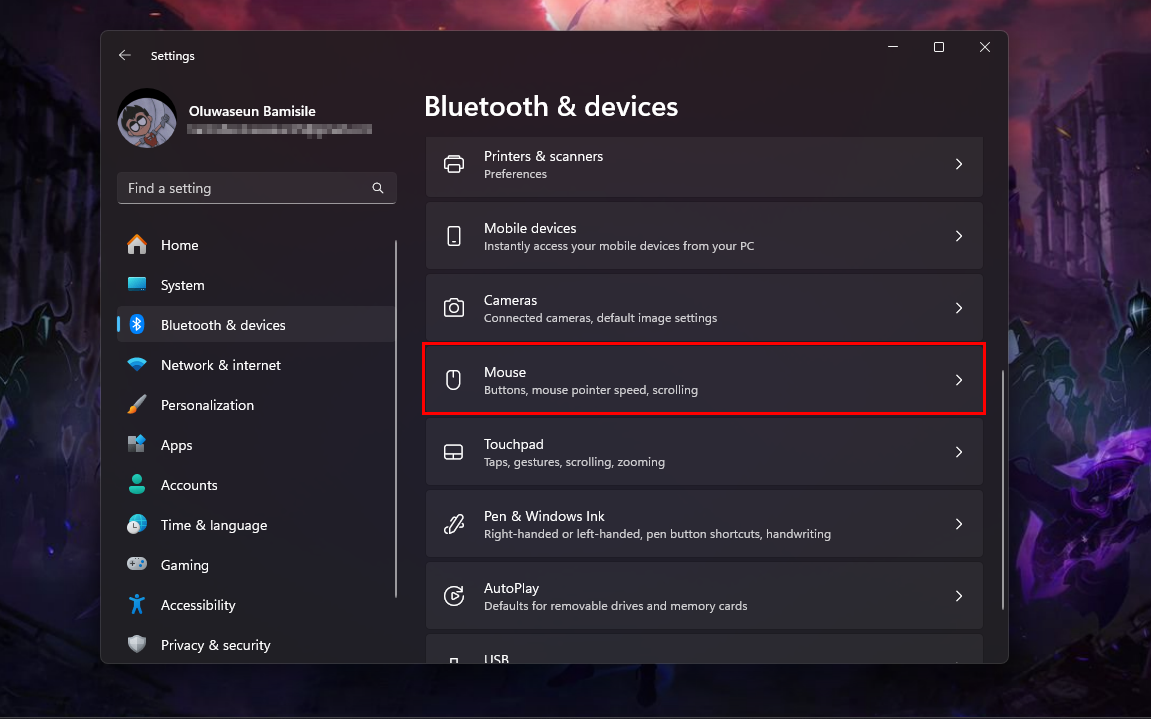
Step 4: Finally, use the "Mouse pointer speed" slider to adjust the pointer speed to your liking. Move the slider to the right to increase the speed or to the left to decrease it
Change Mouse Speed Through the Control Panel
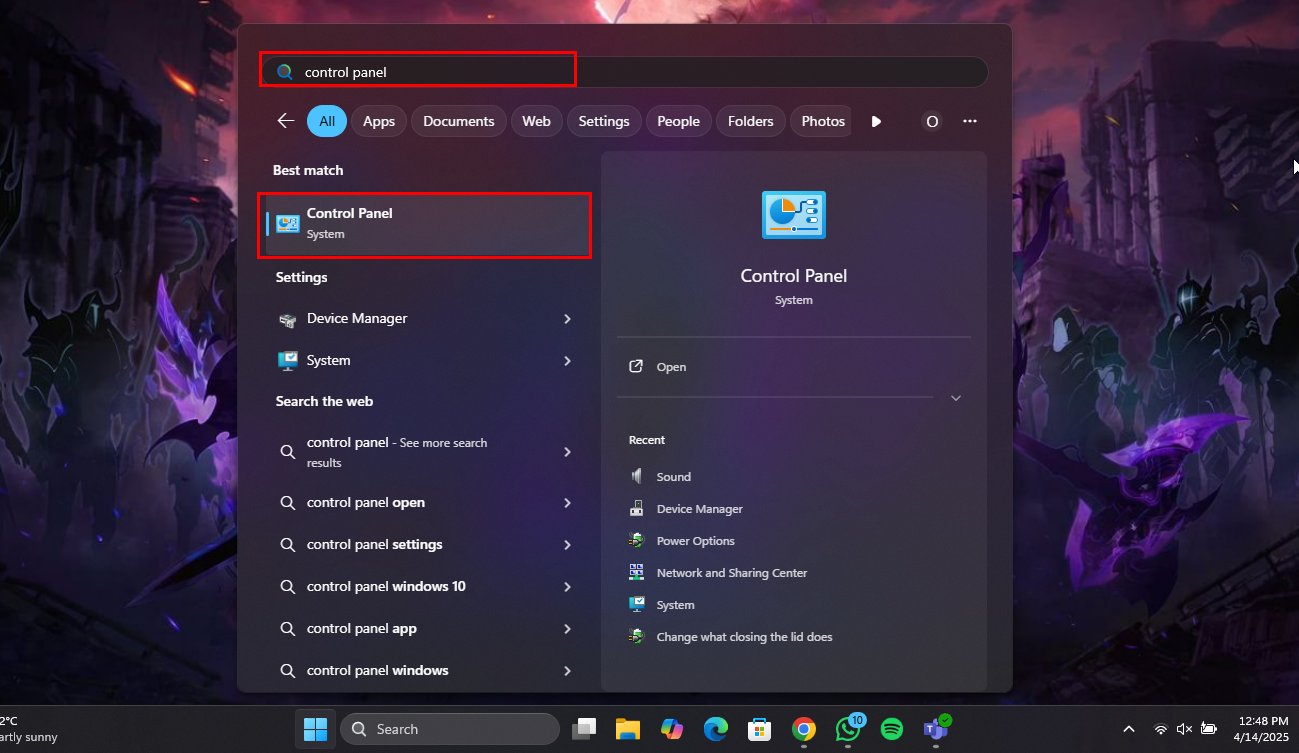
Step 1: Open the Start Menu, search for "control panel", and open it
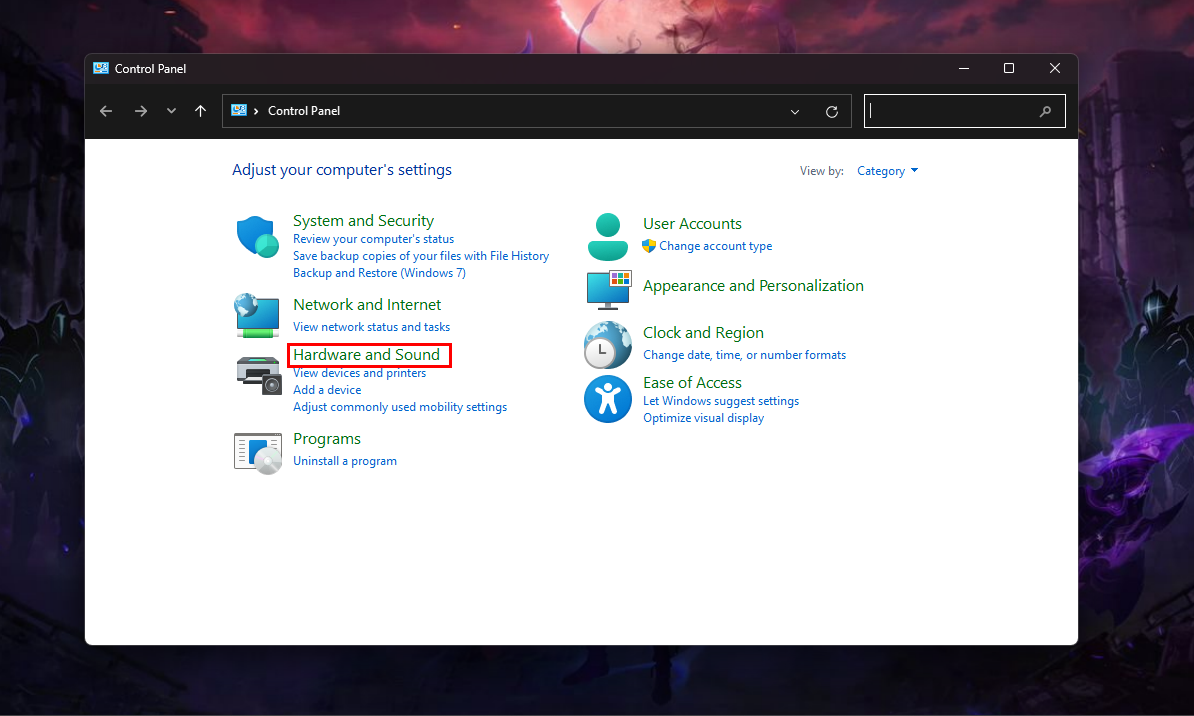
Step 2: In the Control Panel window, click on "Hardware and Sound"
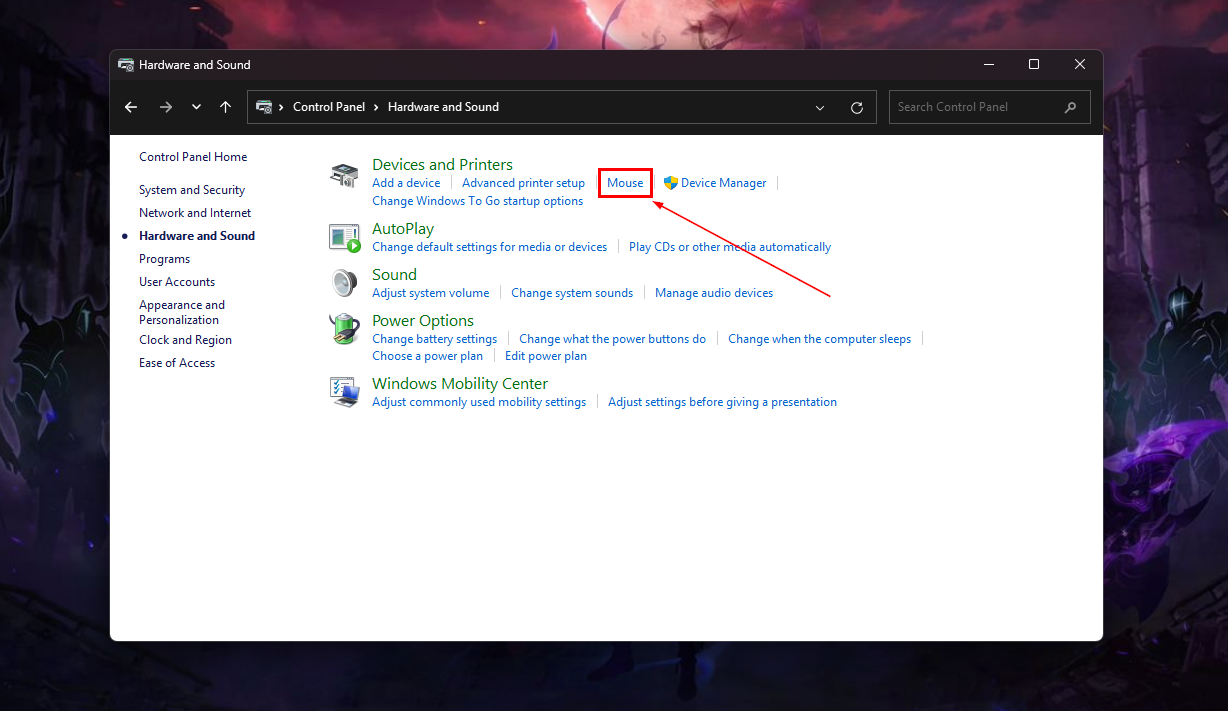
Step 3: Select "Mouse" under the Deveice and Printers category. That should automatically open the Mouse Properties window
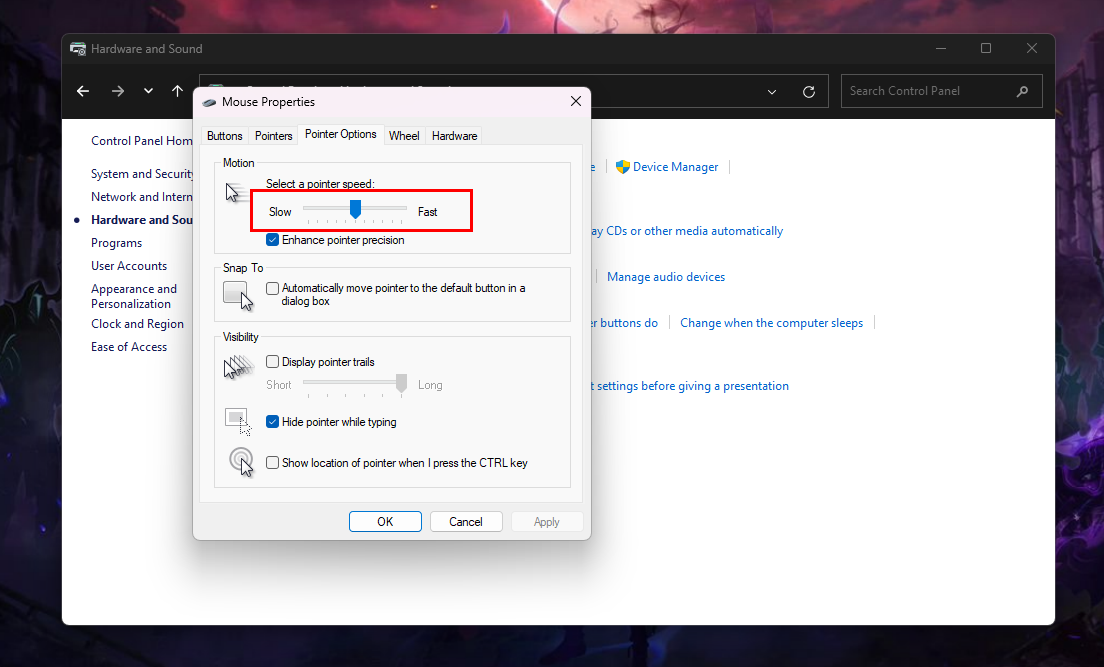
Step 4: In the Mouse Properties window, navigate to the Pointer Options tab

Step 5: Under the Motion section, use the slider to increase or decrease the speed of the mouse pointer
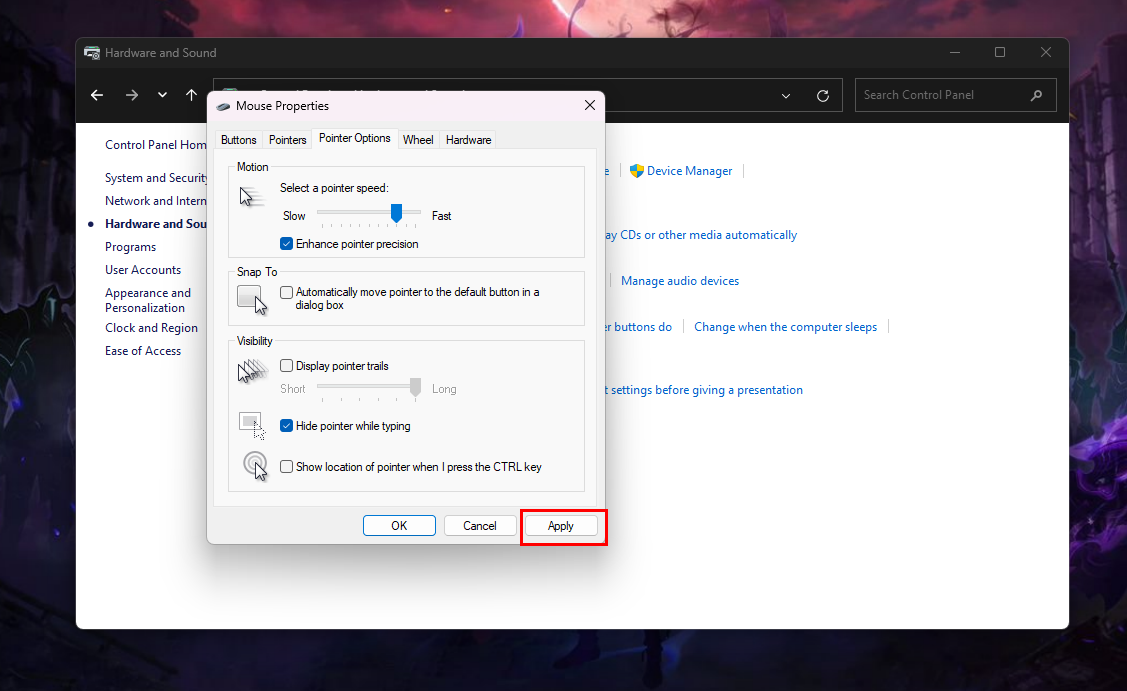
Step 6: After adjusting the slider, click Apply to save your changes
Conclusion
Finding the right mouse speed can make a big difference in your day-to-day experience, especially if you're at your computer for hours. Whether you're working, gaming, or just browsing, it’s worth taking a few minutes to get the settings dialed in. Personally, tweaking it even just a bit made things feel way smoother—and way less frustrating. So, if your cursor’s been driving you nuts, now you know how to fix it.
Image credit: Oluwaseun Bamisile/Techloy.com