How to Contribute to a GitHub Repository
From forking and cloning the repository to configuring remotes, making changes, and making a pull request.


As a software developer, contributing to open-source projects and collaborating with teams is an excellent way to gain experience and build your reputation. Whether you're fixing bugs, adding new features, or enhancing existing ones, your contributions can have a significant impact on the project's success as well as yours.
Now, contributing to someone else's repository can be intimidating, especially if you're new to open-source and collaboration. You might wonder how to fully utilize version control, collaborate with other contributors, and ensure that your changes are properly reviewed and integrated. Fortunately, the process is more straightforward than you might think.
In this guide, we'll teach you how to contribute to a GitHub repository, from forking and cloning the repository to configuring remotes, making changes, and making a pull request.
How to contribute to GitHub Repository
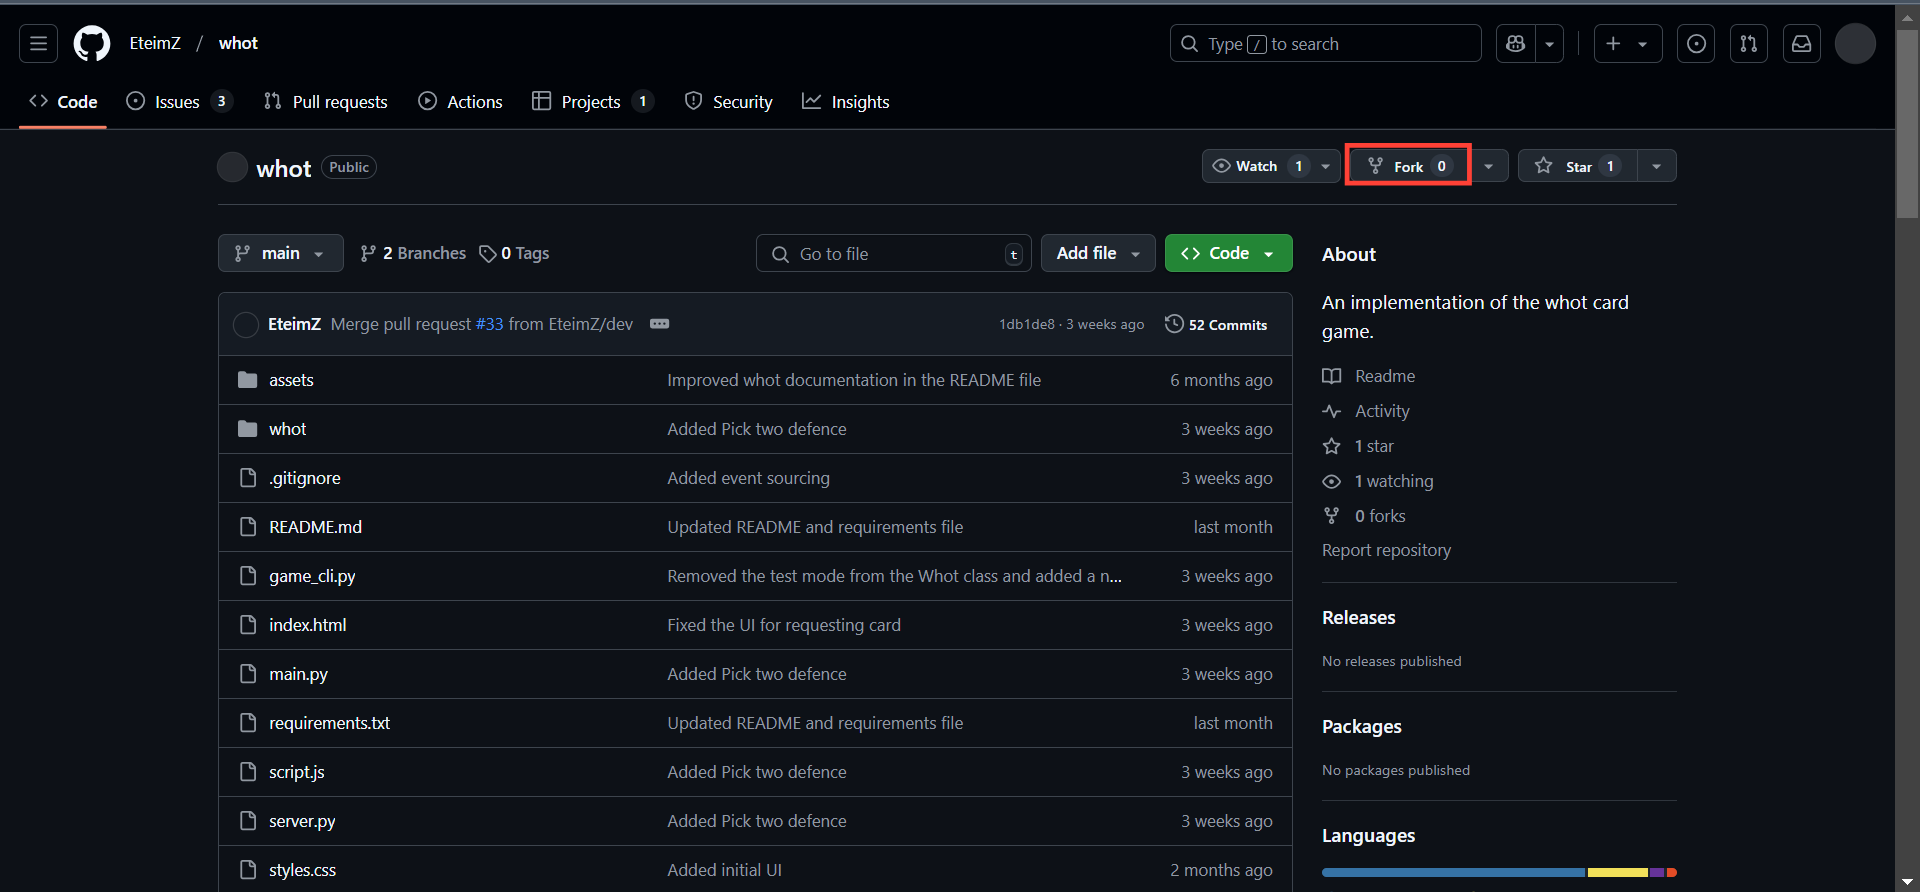
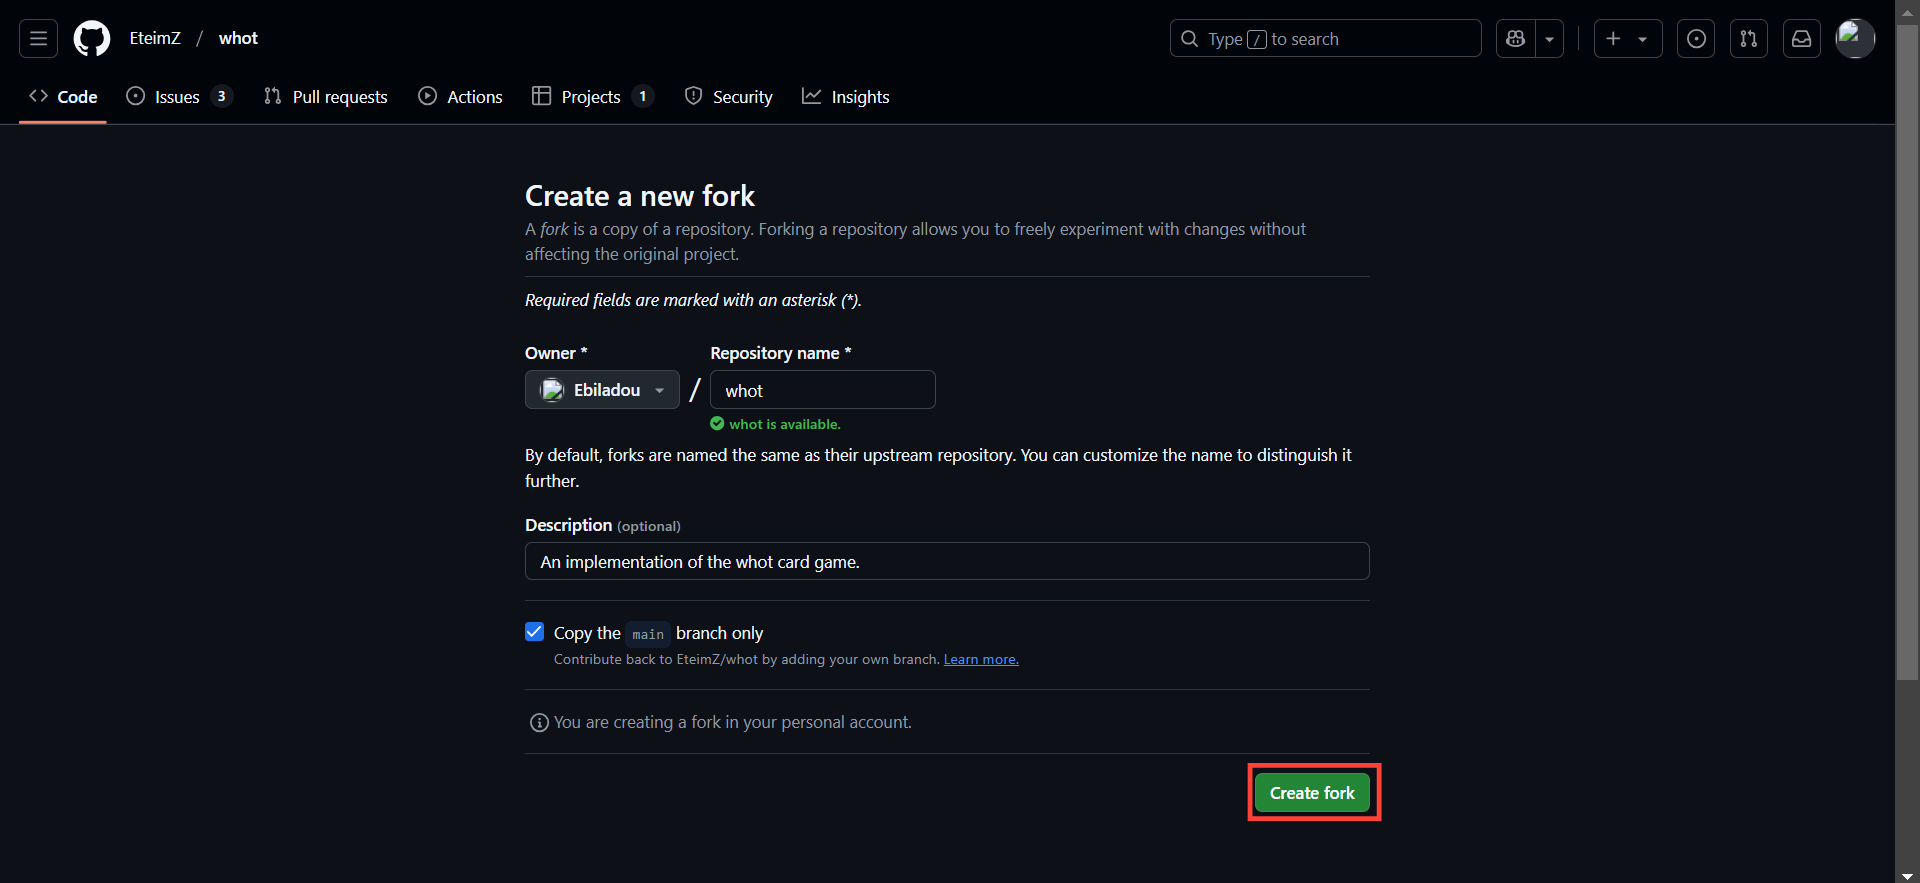
Step 1: Fork the Repository
What fork does is it makes a copy of the repository for you by adding it to your Repository so your changes can be staged in it since you cannot directly contribute to the original Repository.
- Open Github and click on the Repository to which you want to contribute.
- Click on the Fork icon to fork the Repository.
- Click "Create Fork"
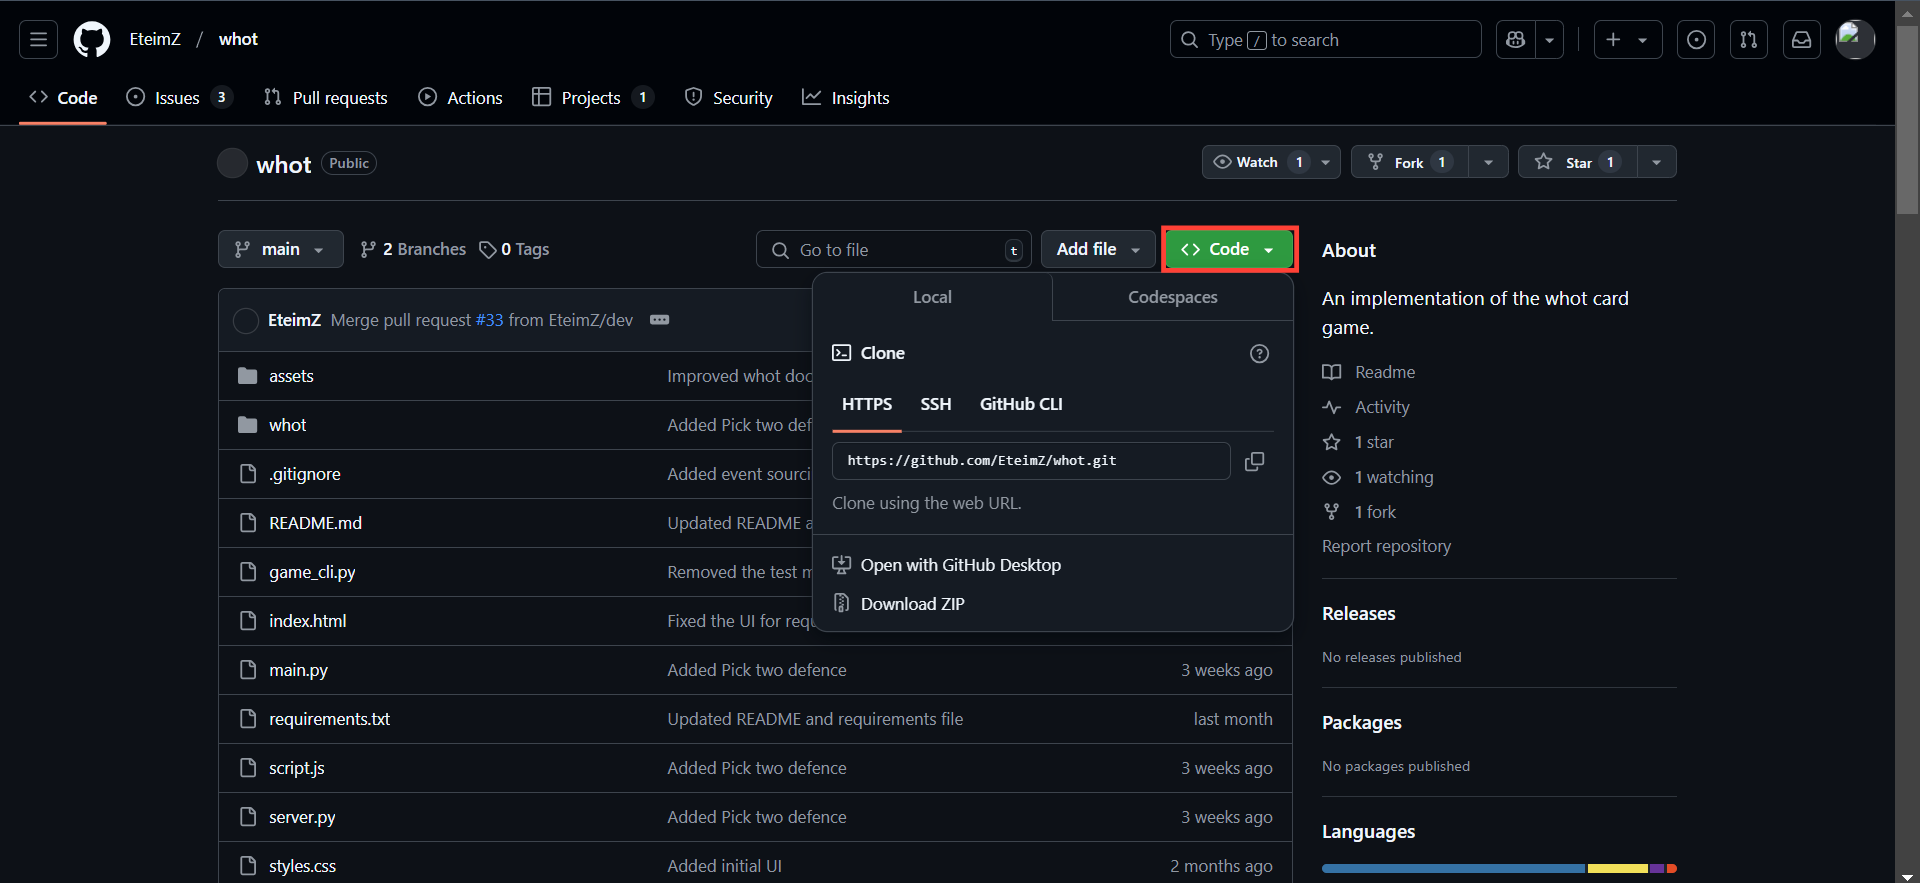
Step 2: Clone the Repository
Cloning makes a full copy of the repository available to your local Git instance for you to work with.
- Go to the original repository to which you want to contribute. A copy of the Repository is already in your Repository courtesy of fork, but that is not the instance you'll be cloning, so open the original Repository.
- Click on the "code" button and copy the Https URL.
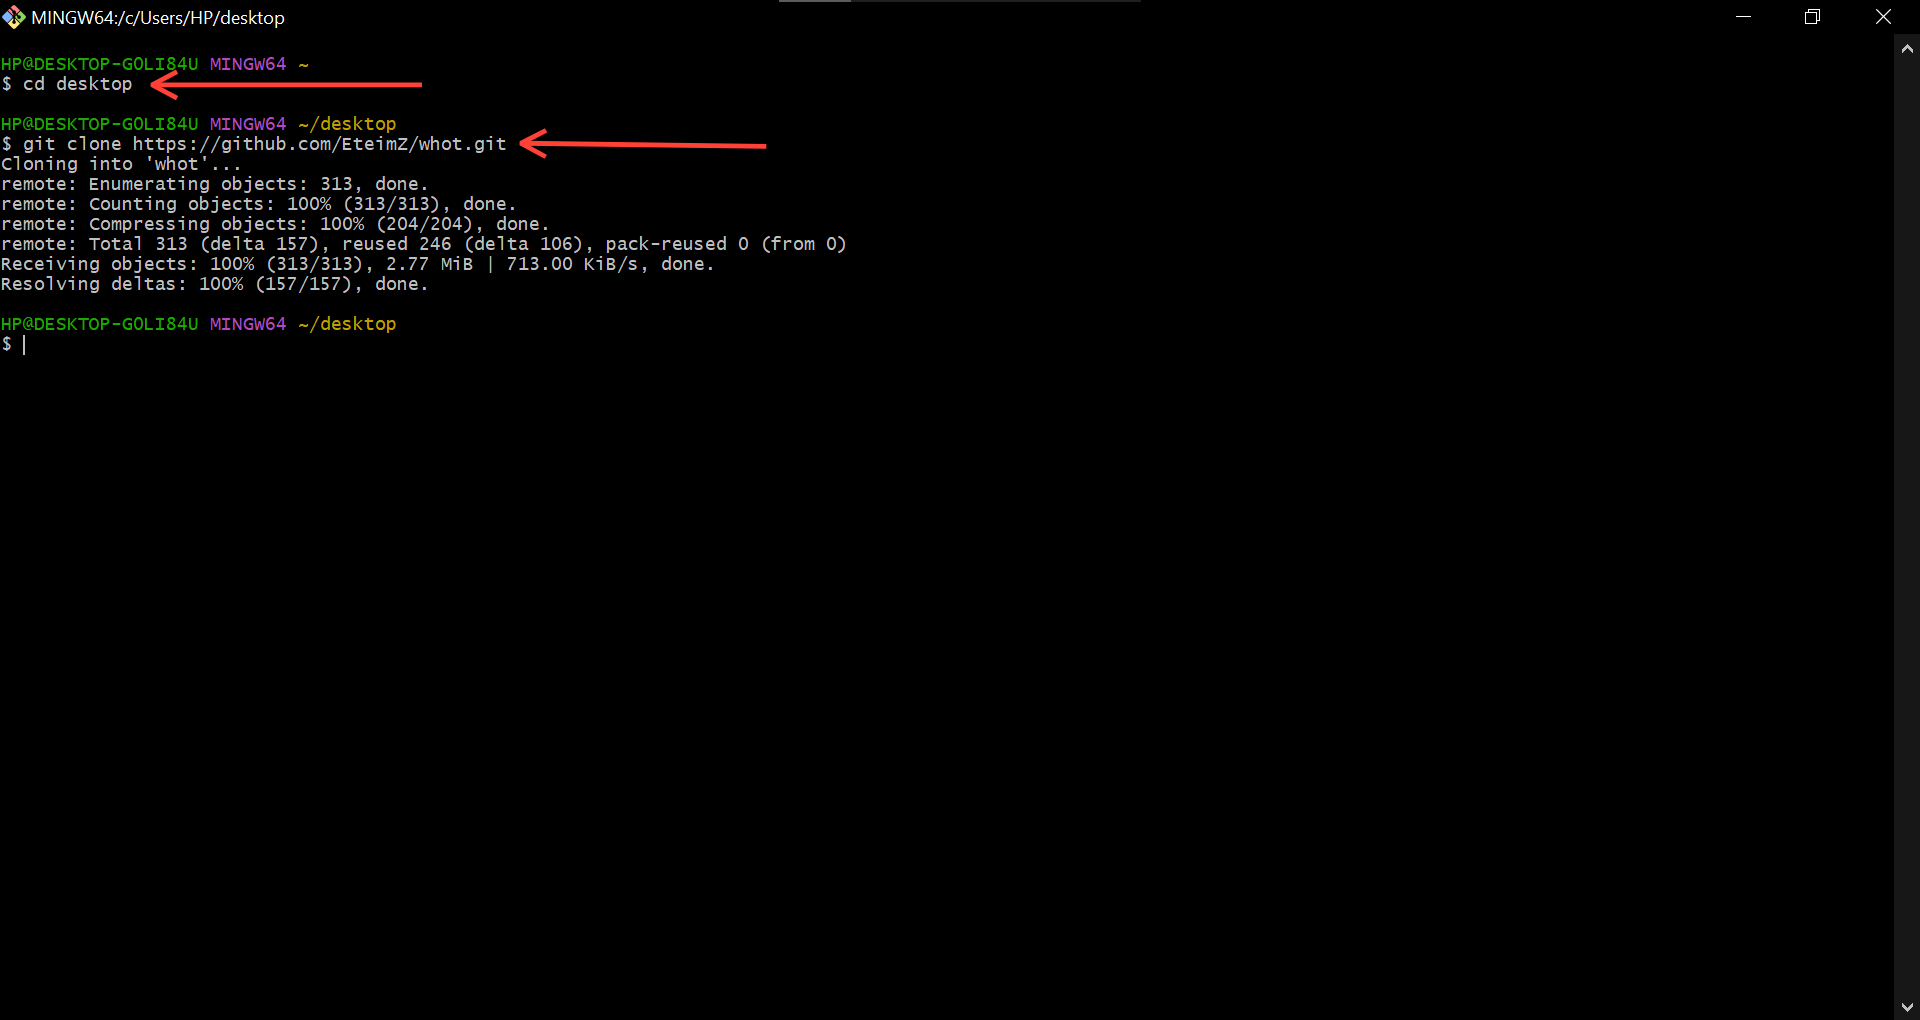
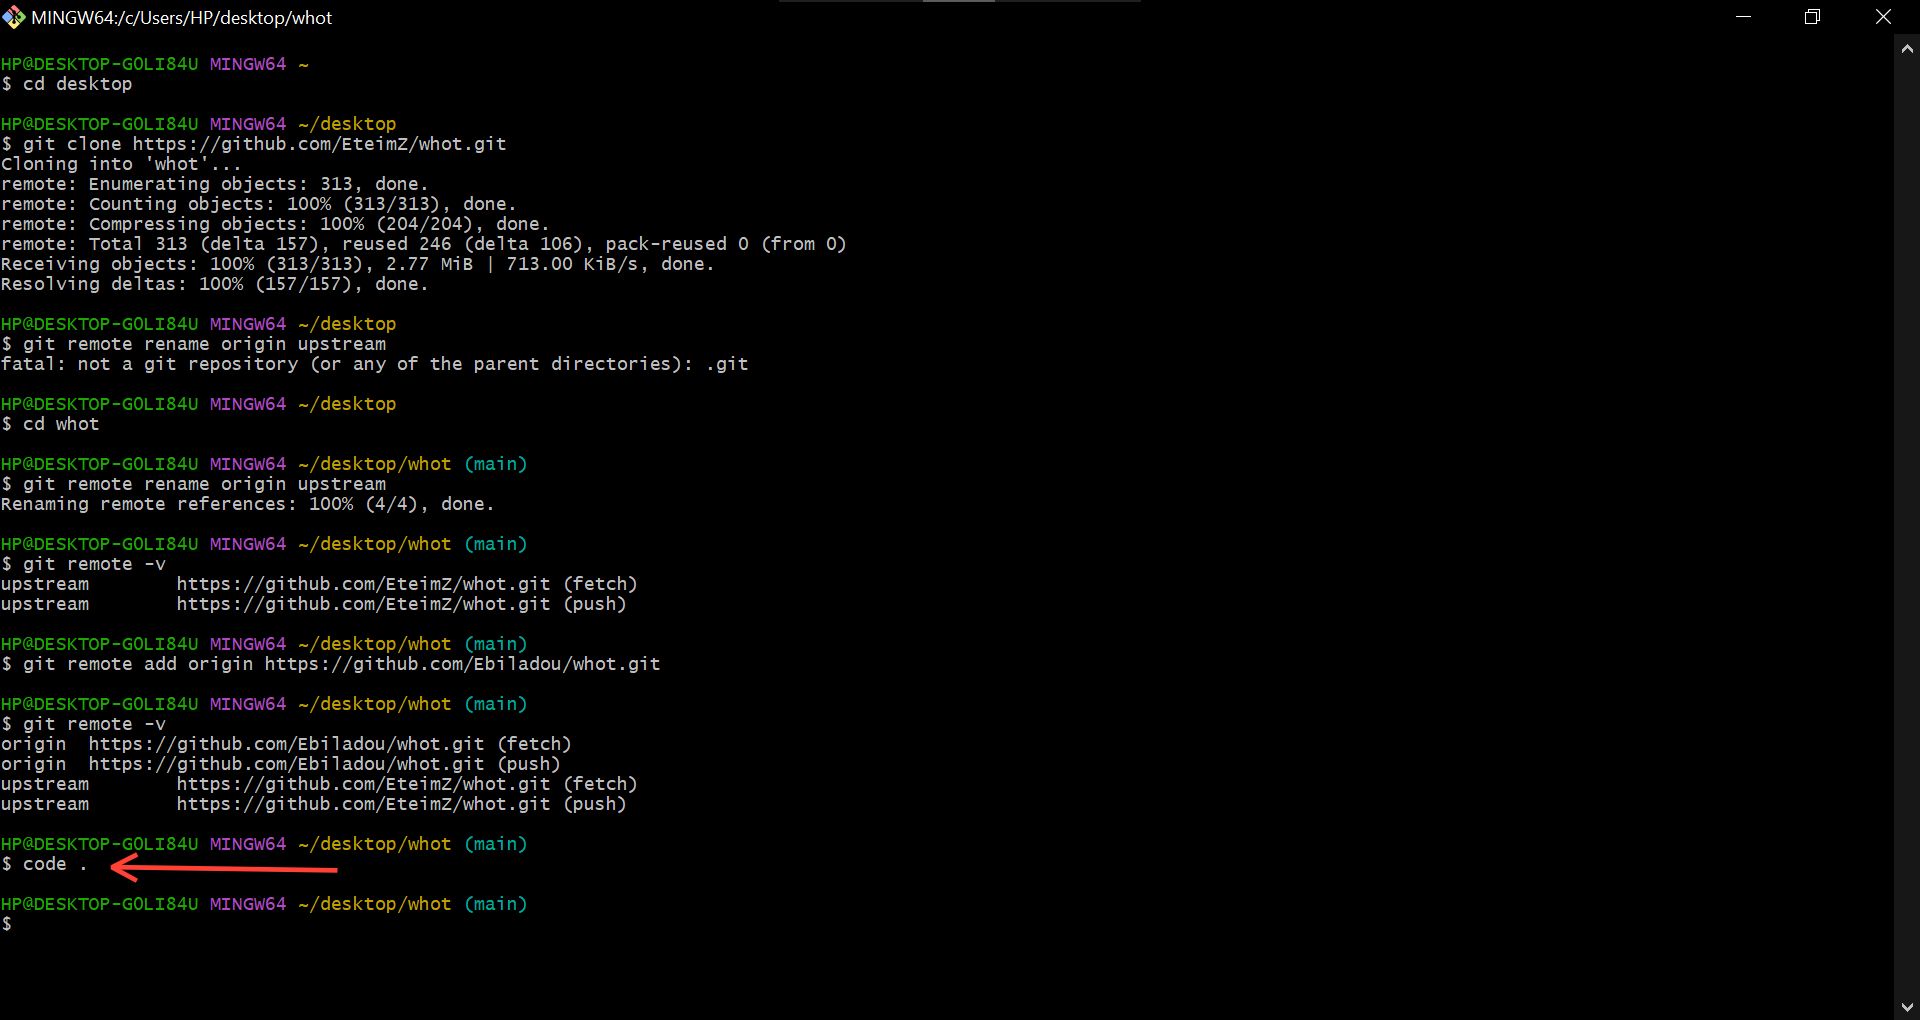
- Open git bash or any terminal of your choice, change directory (cd) to the path you want the project to be. I want to keep my copy on my Desktop, so I'll change directory into the desktop.
- Type in
git clonethen paste the repository URL next to it, and hit enter.
Step 3: Configure remotes
Configuring remotes allows you to add a new connection to your fork, so you can make changes and push them to your (forked) repository, rather than the original one.
By default, Git is configured to push changes to the remote repository named "origin". When you fork a repository, the connection to the original repository is named "origin" by default. However, this can cause confusion when you try to push changes to your fork, as Git may try to push changes to the original repository instead.
To avoid this, you have to configure the remotes by renaming the connection. By Git naming conventions, it is recommended to name your repository (forked) "origin," and the original "upstream." To do this;
- Change directory into the cloned project
cd project_name. If you're not inside the project, you'll get an error. - Type in/paste
git remote rename origin upstreamin your terminal to rename the original Repository "upstream".
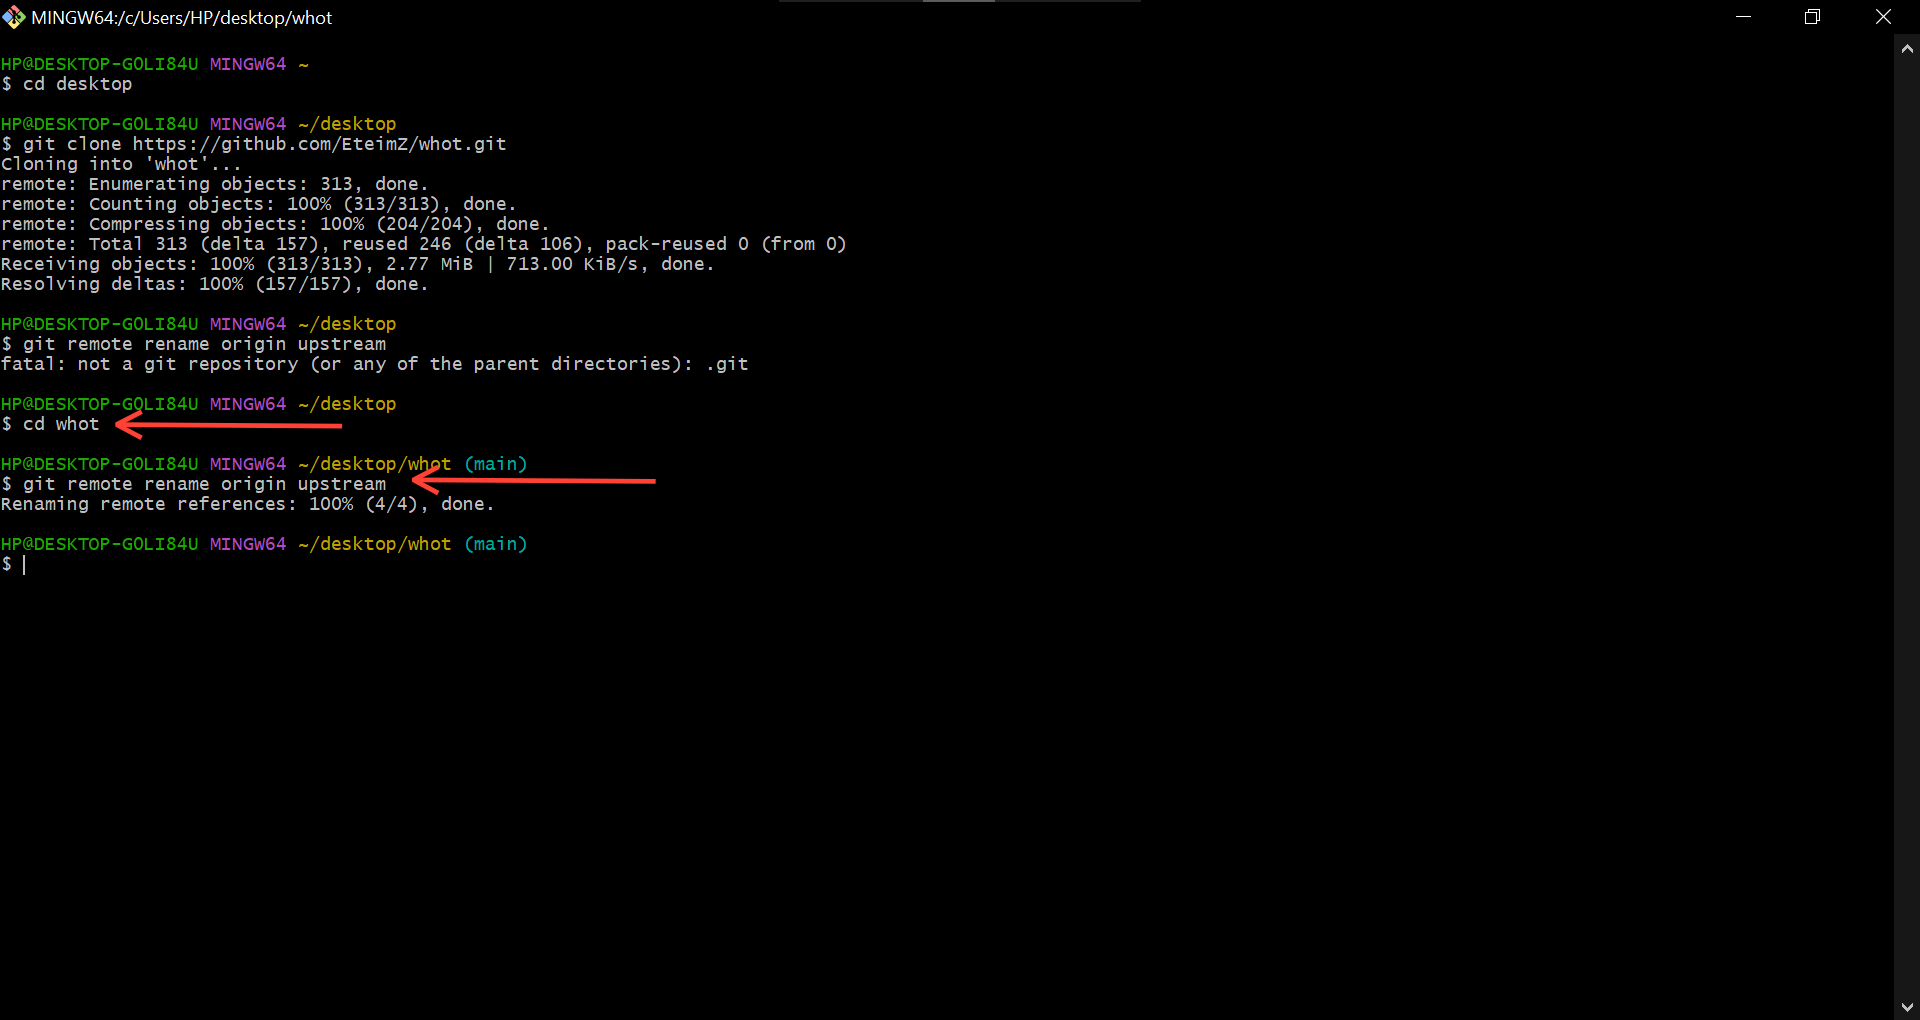
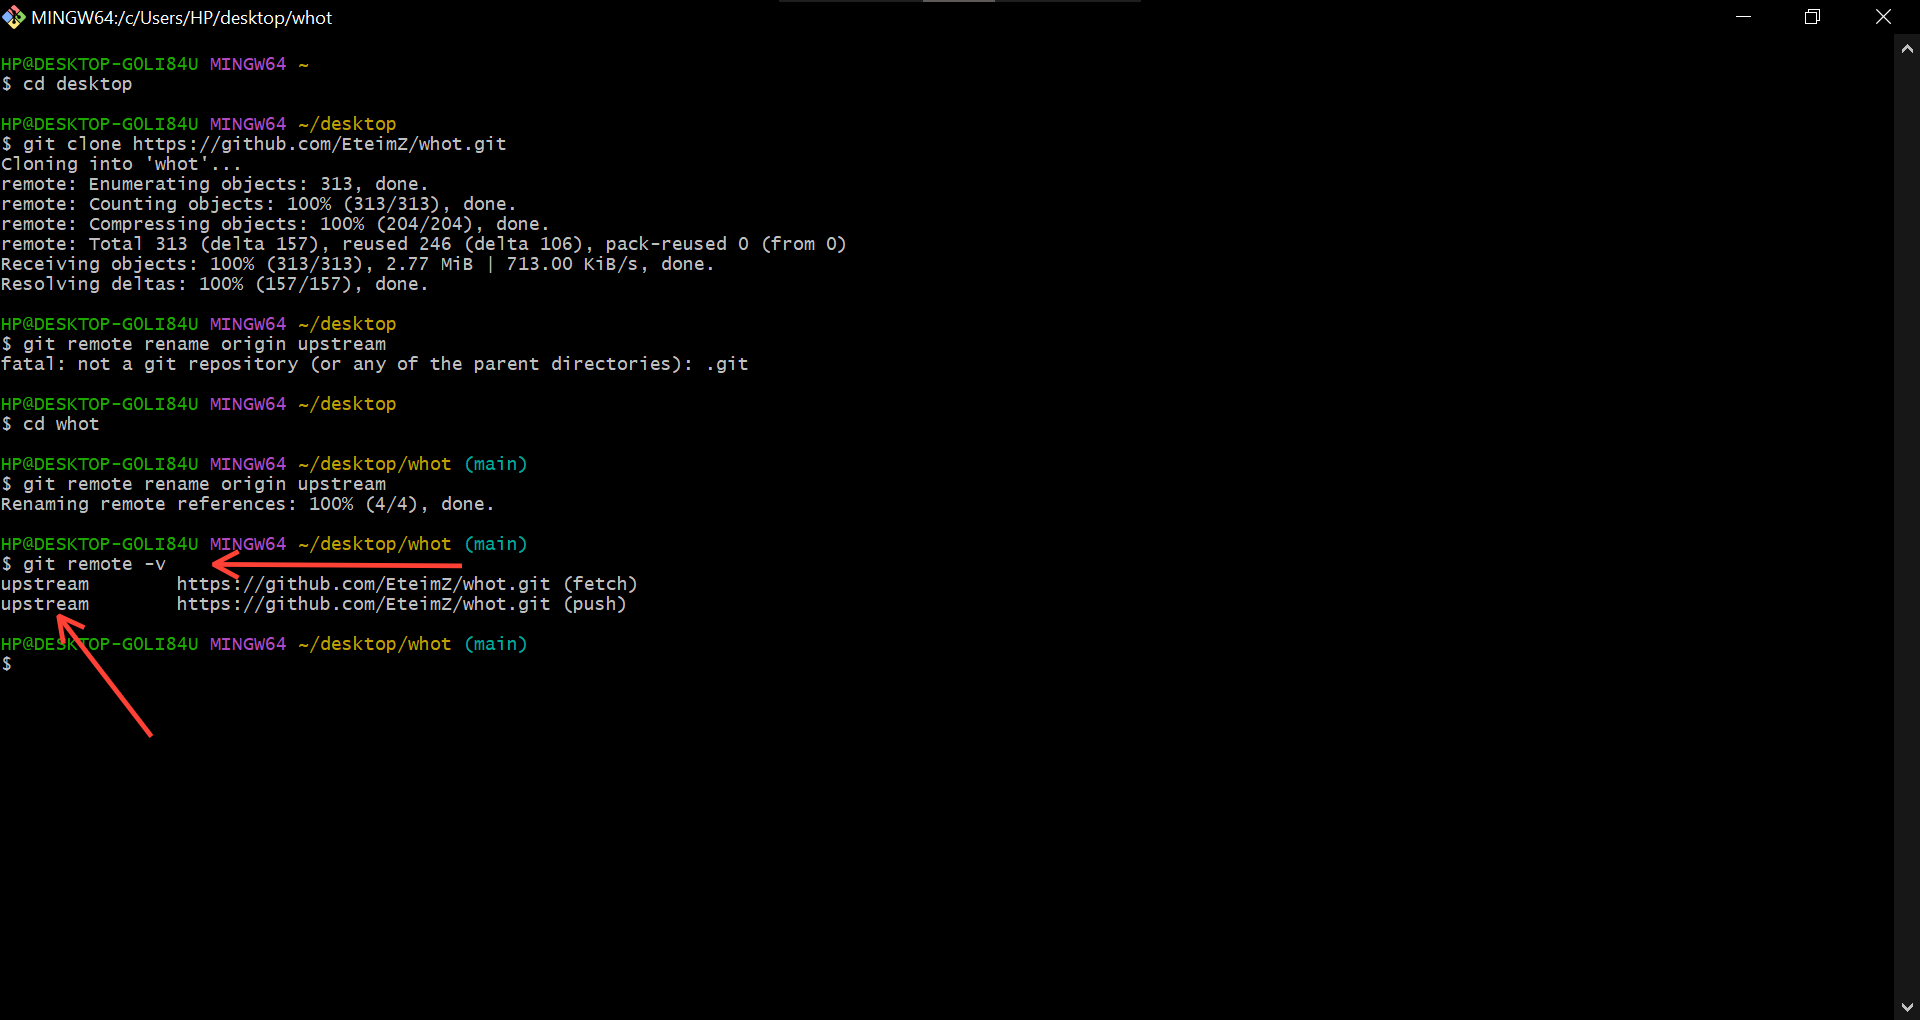
To confirm that it has been renamed, run the command git remote -v. You should see "upstream" prefixed to the repository URL.
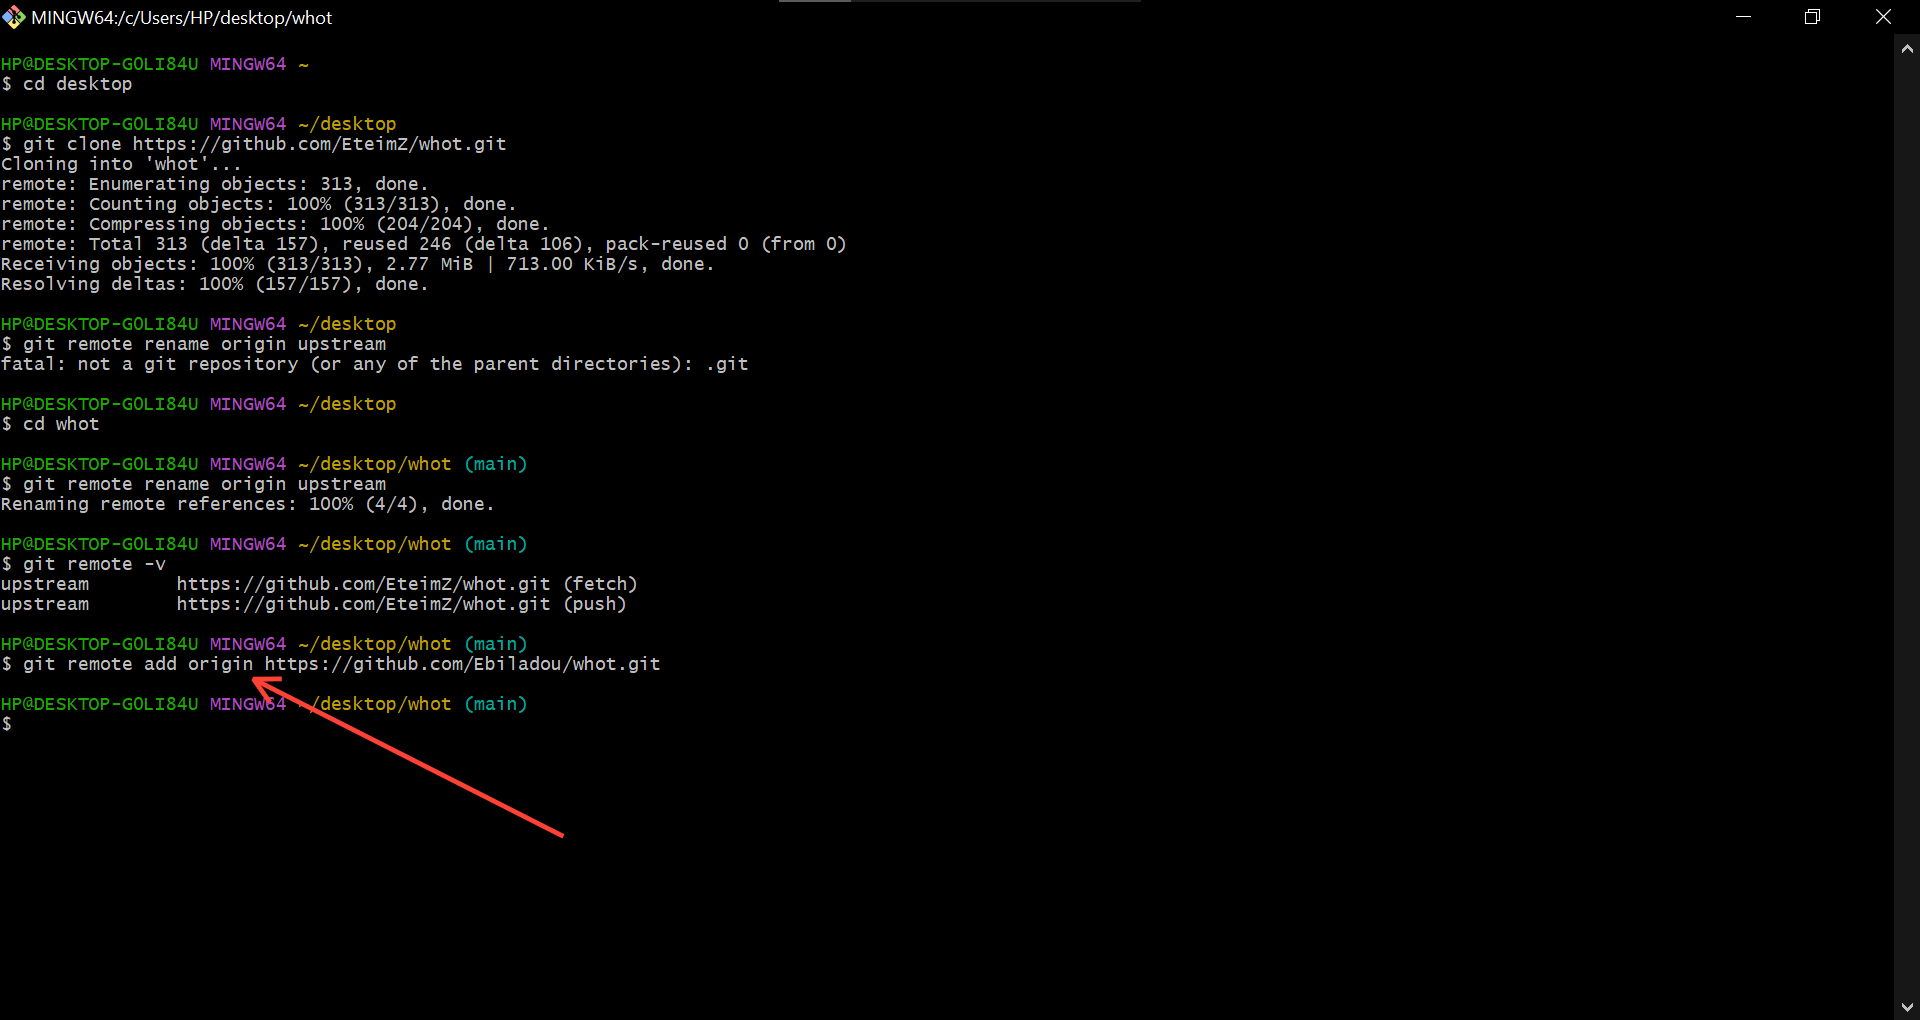
- Go to your Repositories on your GitHub account. You should see the forked repository there, open it.
- Click on the "code" button, then copy the URL.

- Add your forked Repository as the Origin. To do this, type in
git remote add originthen paste the URL of your forked Repository next to it.
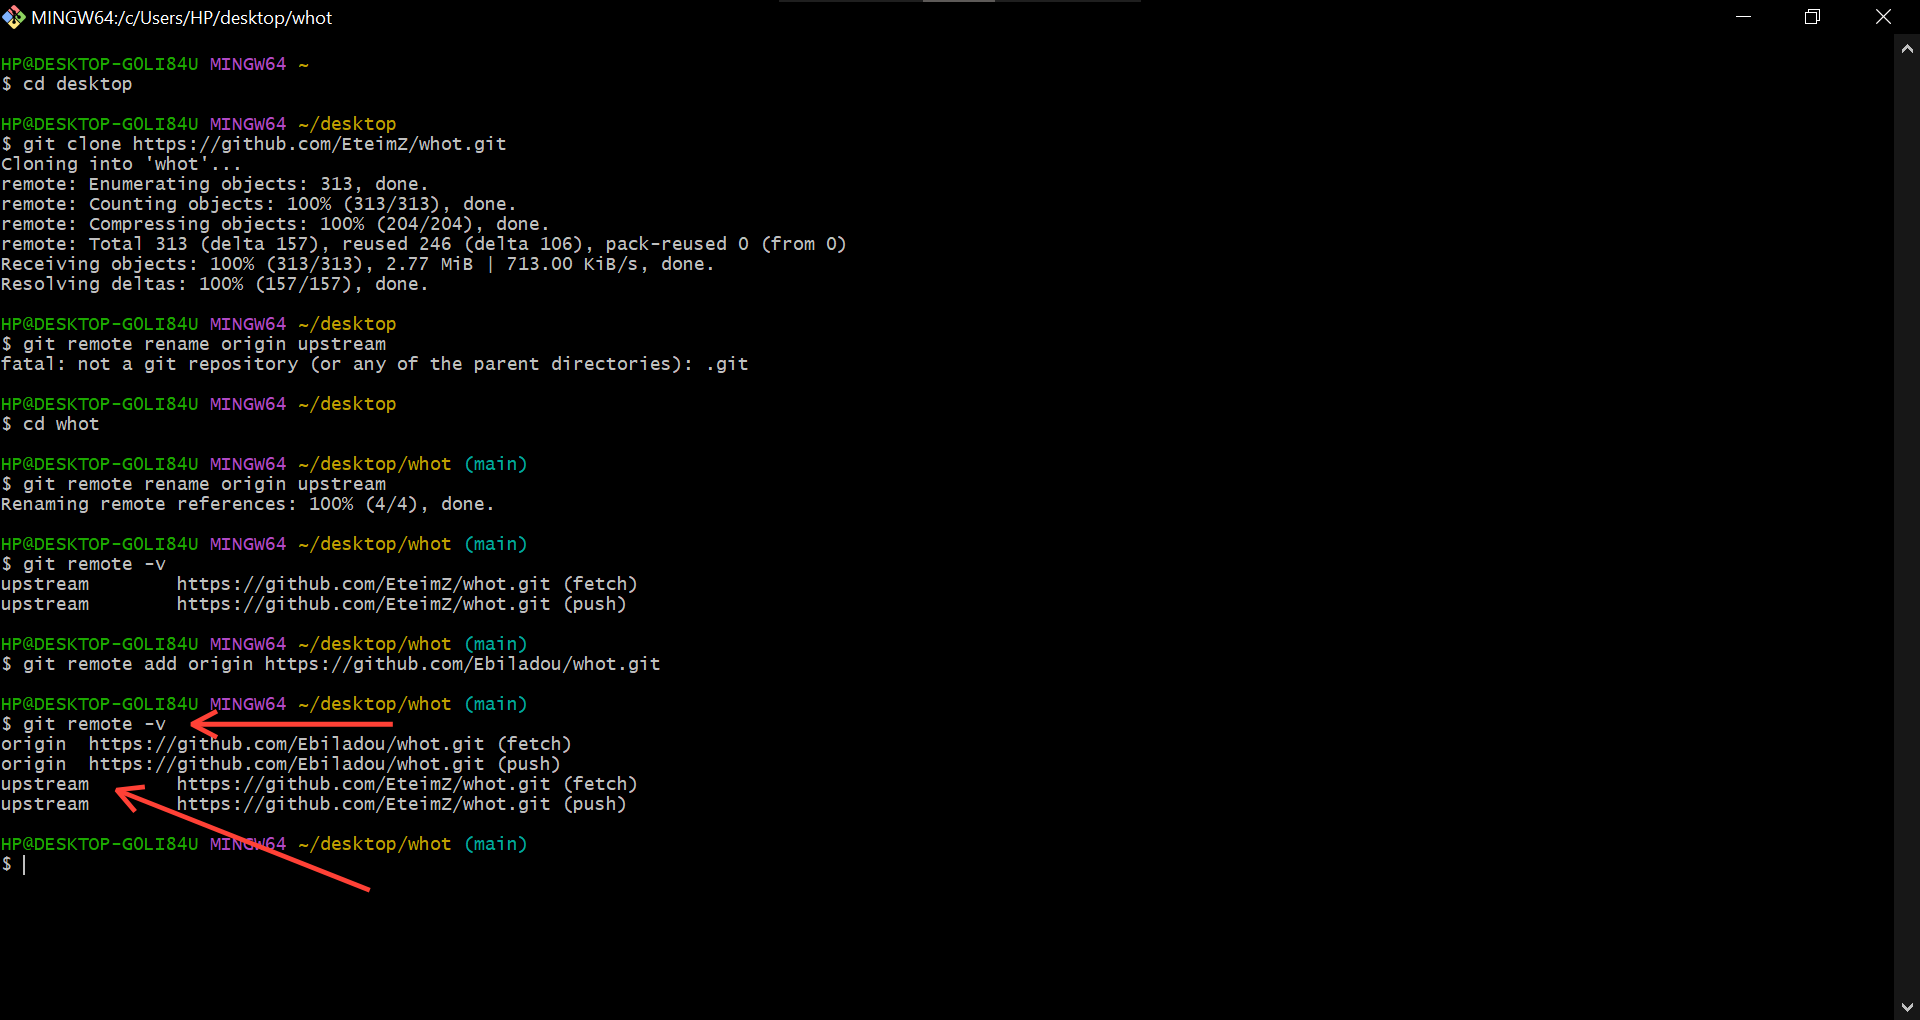
- To confirm the configured remotes, enter
git remote -von your terminal.
You should have both Repositories set to "Origin" and "Upstream" respectively. Now that the connection to the forked Repository is set to "origin" when you run git push the chanegs will be pushed to your forked repository with no push conflicts.
- Now, type in
code .in your terminal to open your IDE and start making your changes to the code. When you're done, push the changes to Git.
Step 3: Make a pull Request
After making changes to the code, you'll want the changes to be added to the original Repository. Since you cannot directly effect those changes, you'll have to make a pull request to the original Repository, stating the issue you found and fixed. The owner of the Repository can accept or reject your changes, bear that in mind.
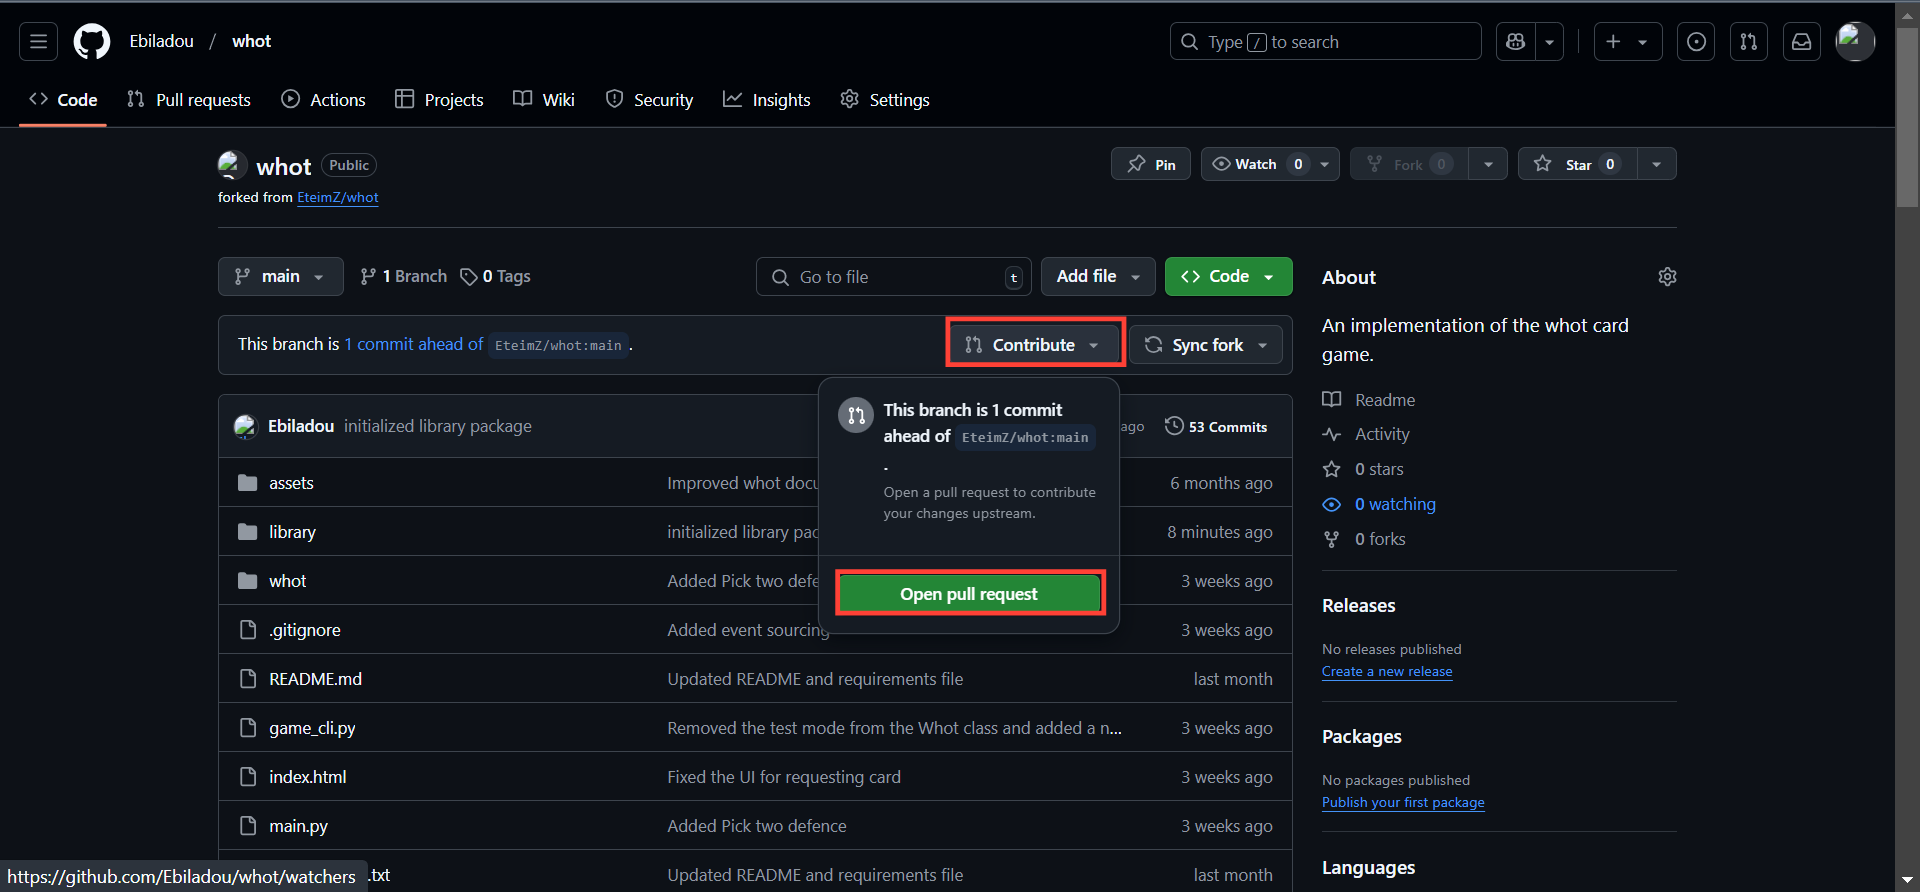
- Go to your repositories on Github and click the forked repository.
- At the top, you'll see you're ahead of the original repository, click the "Contribute" dropdown menu and click "Open pull request"
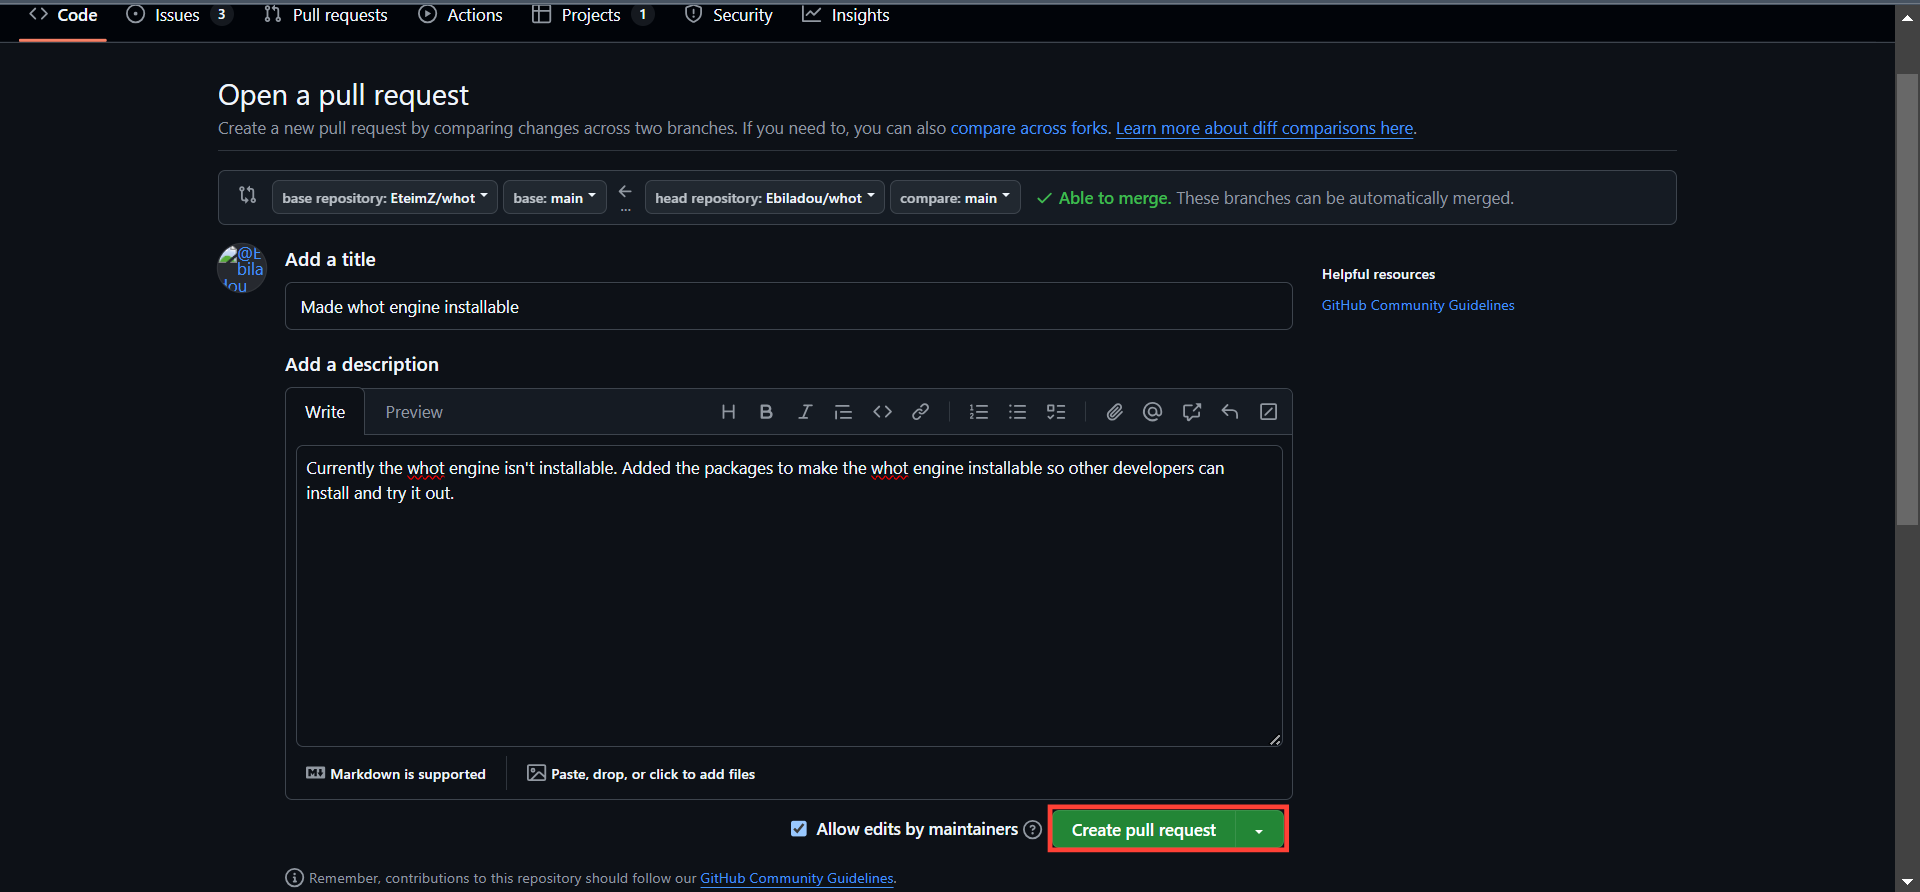
- Fill in the pull request title, description, and any other required information, and then click on the "Create pull request" button to submit the request. That is all, if approved, the changes will be merged with the original repository. If rejected, you can you can revise and resubmit your changes.
Conclusion
Contributing to a GitHub repository is an experience that not only enhances your skills as a developer but also builds your confidence in the long run.
By following the steps outlined in this guide, you've taken the first step towards becoming an active participant in open-source. As you continue to contribute to various projects, you'll find your network expanding, and your understanding of the development process growing.
Contributing to projects is not just about writing code, it's about collaboration and communication. You get to learn to work together with teams, share knowledge, and learn from the experience.
Image Credit: Oyinebiladou Omemu/techloy.com


