How to Enable SSH on Ubuntu
Whether you're a system administrator, developer, or simply a user, SSH is an essential tool that will simplify your workflow.


As a Ubuntu user, you're likely no stranger to the Linux and open-source software world. But have you ever needed to access your Ubuntu system from another device, perhaps to manage files, run commands, or troubleshoot issues?
That's where SSH (Secure Shell) comes in, a powerful tool that lets you access your system remotely and securely.
SSH (Secure Shell) is a protocol that allows you to access a computer or server remotely, using a secure and encrypted connection. Think of it like a secure tunnel between your local device and your Ubuntu system, allowing you to send and receive data securely.
Enabling SSH on your Ubuntu system opens you to a world of possibilities like accessing your Ubuntu system from anywhere, using any device with an internet connection. Transfer files between systems using SFTP (Secure File Transfer Protocol) or SCP (Secure Copy). Run commands on your Ubuntu system from a remote location, making it easy to manage and troubleshoot your system. And even manage multiple servers from a single location.
In this guide, learn how to install an SSH server and enable SSH on your Ubuntu system.
How to Enable and Access SSH on Ubuntu
Step 1: Open your Ubuntu terminal.
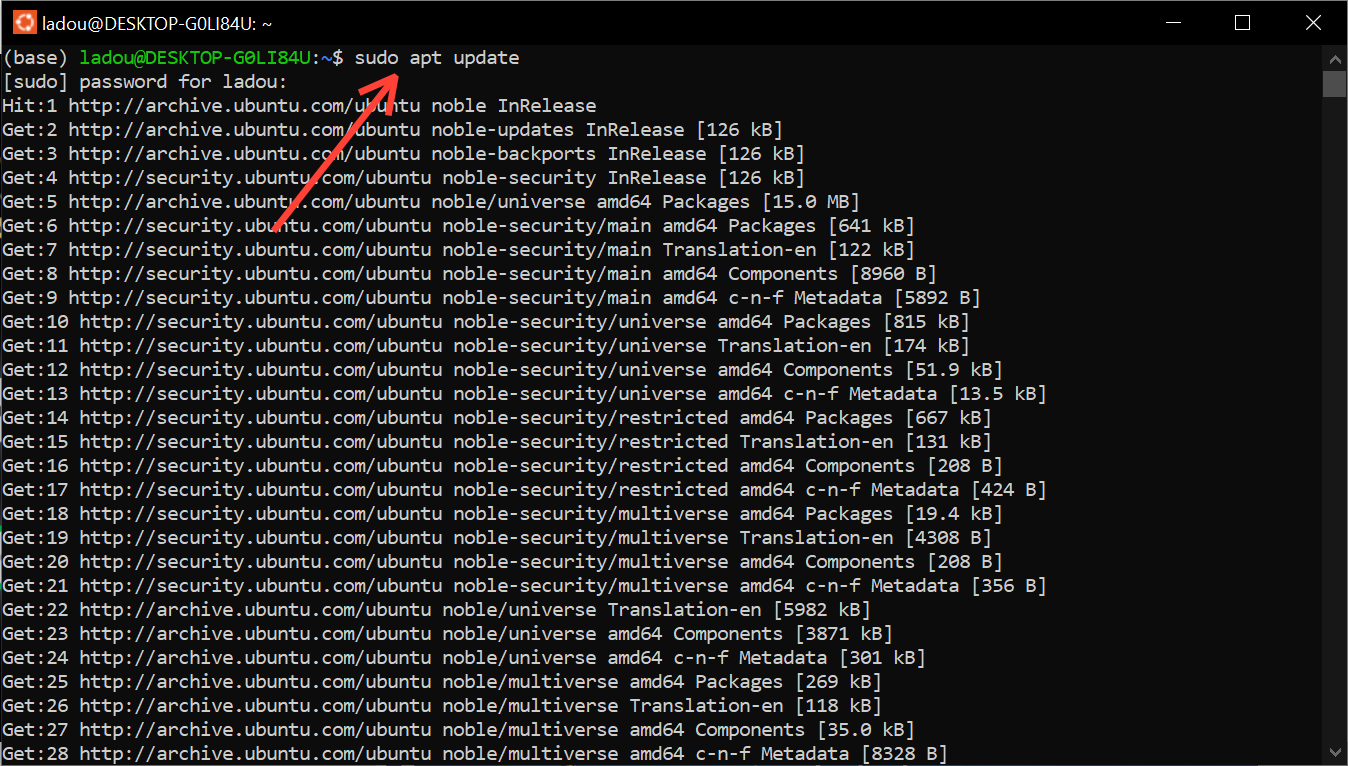
Step 2: Update your repository with this command "sudo apt update"
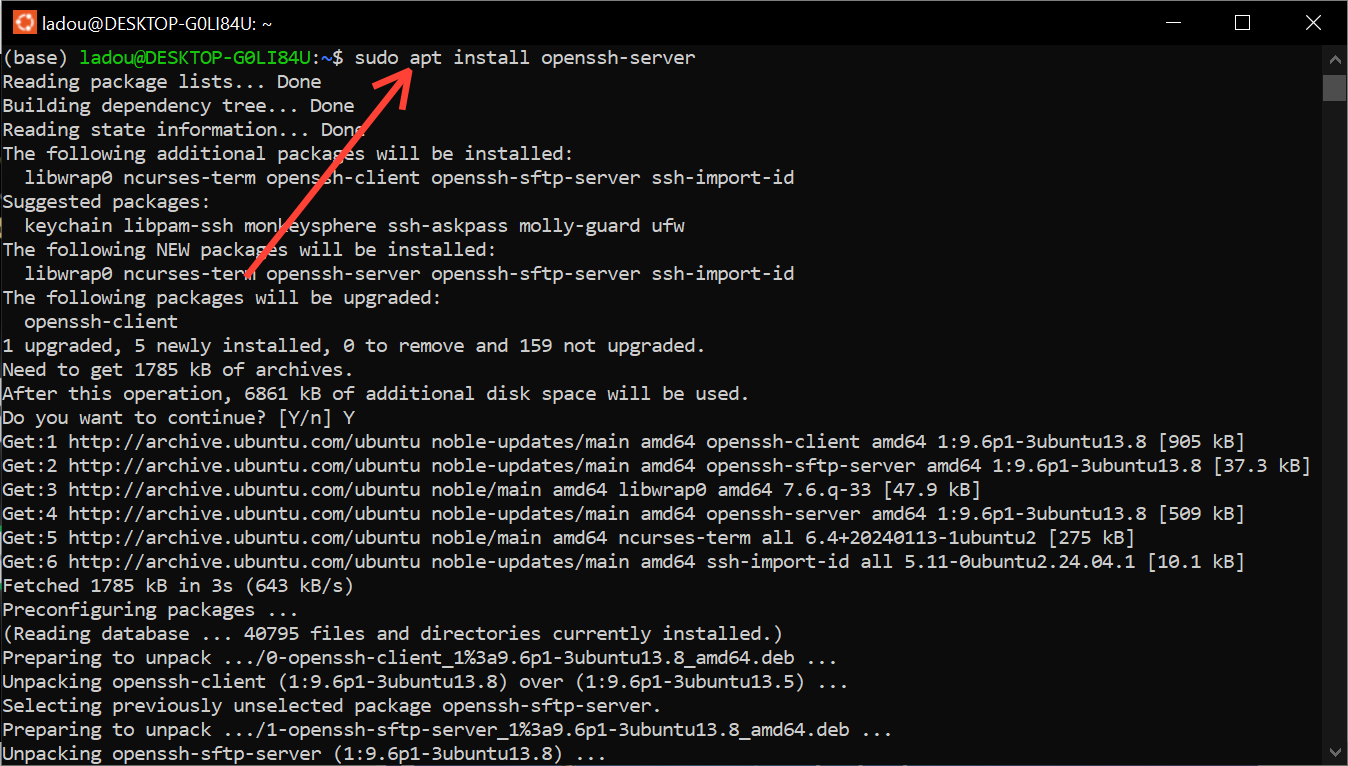
Step 3: Install the OpenSSH Server using this command "sudo apt install openssh-server"
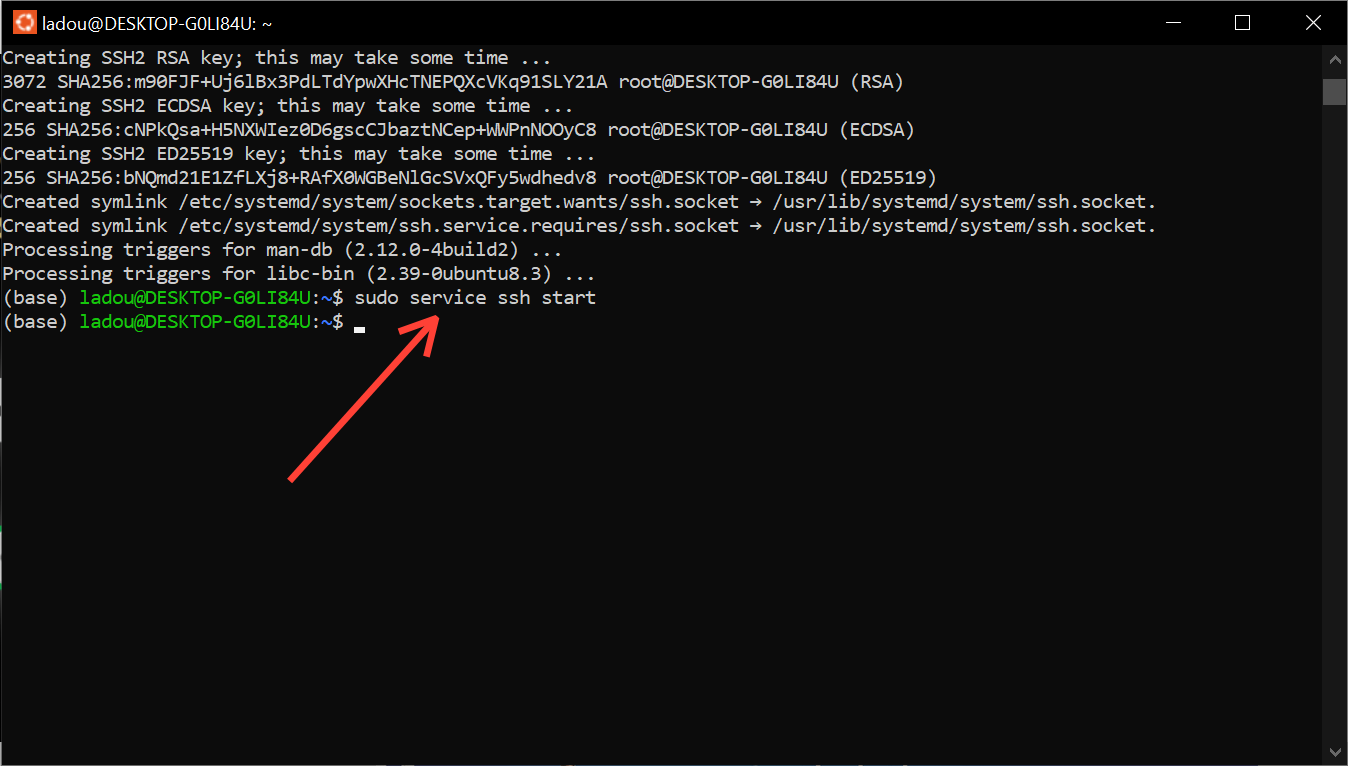
Once the installation process ends the SHH service will start automatically. If it does not automatically start, enter this command "sudo service ssh start"
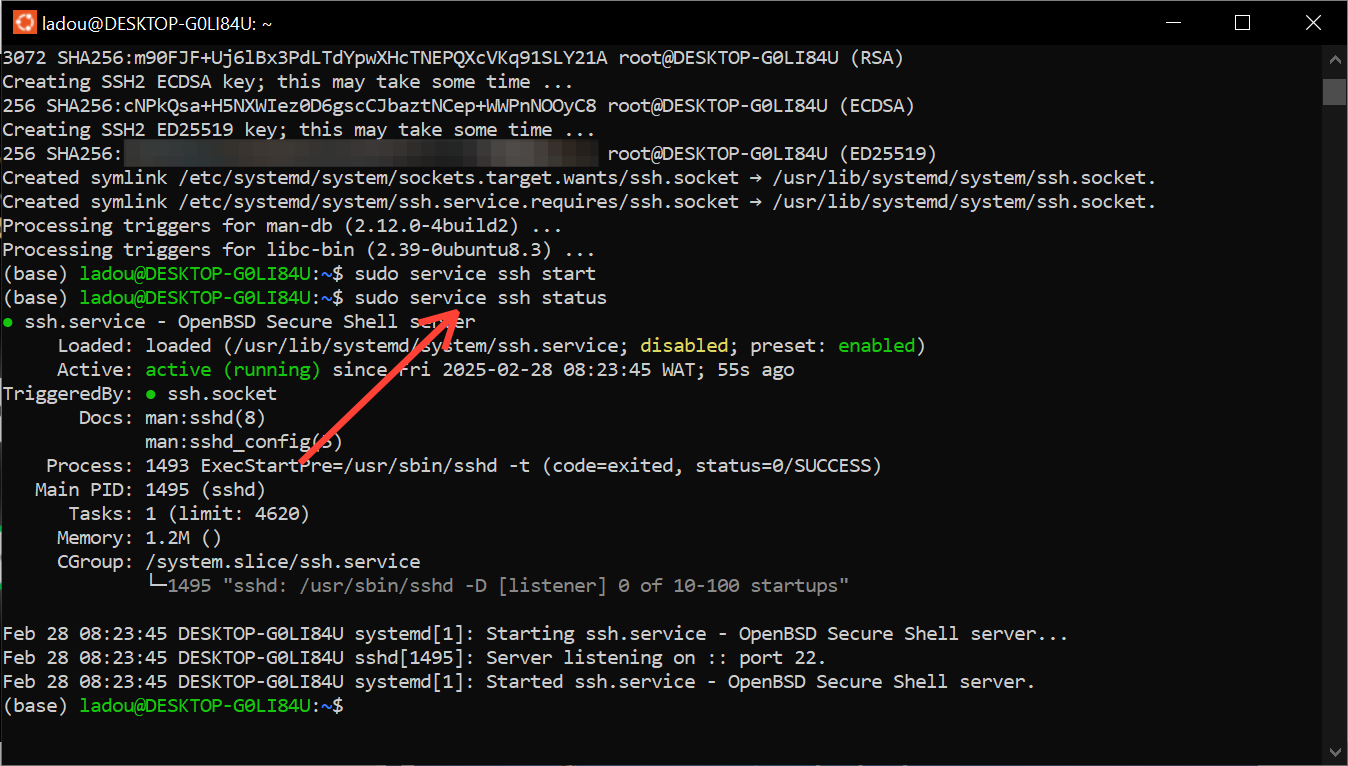
Step 4: To confirm the server is running, check the SSH Status by running this "sudo service ssh status" After confirming, press Q on your Keyboard to get back to the command line prompt.
Step 5: To access the SSH, enter your IP address or hostname in this format "ssh username@your_ubuntu_ip"
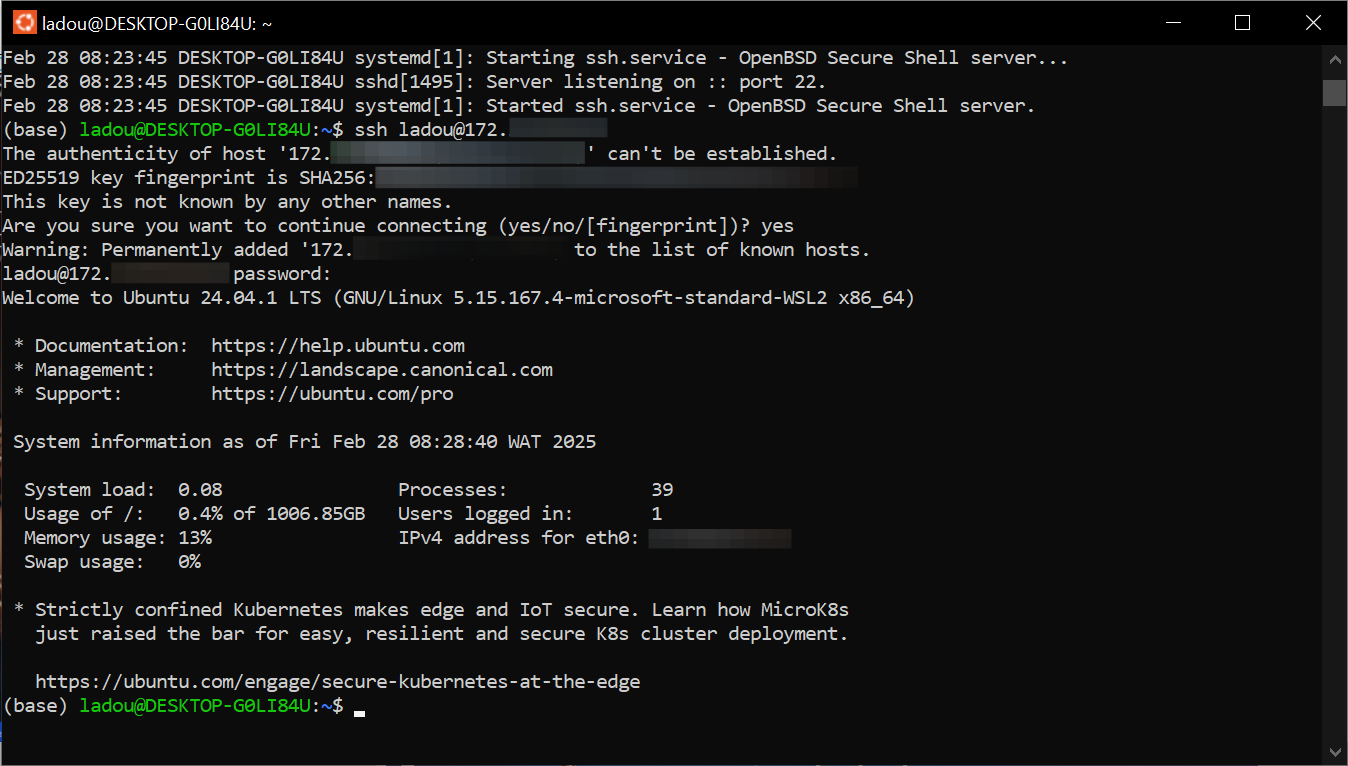
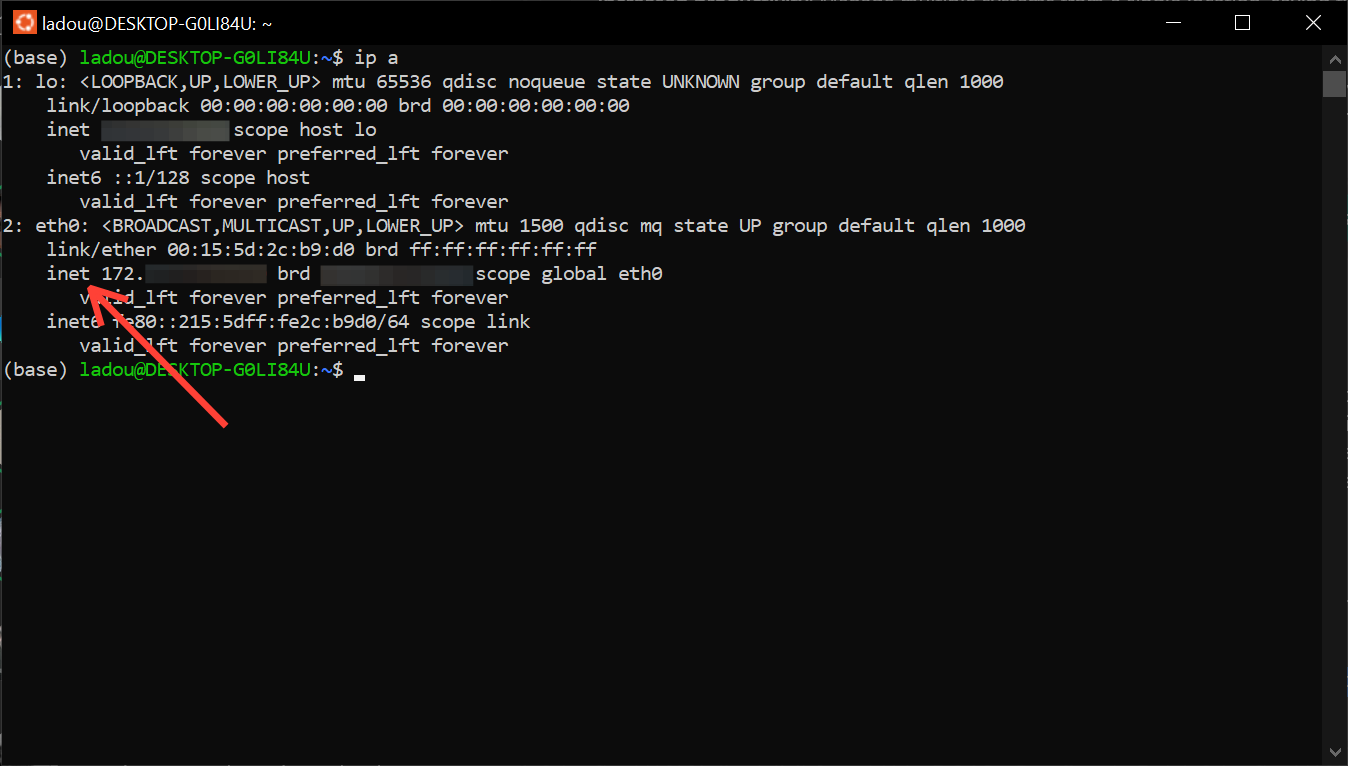
- If you're unsure of your IP address, load your network information by running the command "ip a" This will display information about your network including your IP address. The address is all the numeric numbers before the /(slash) next to "inet"
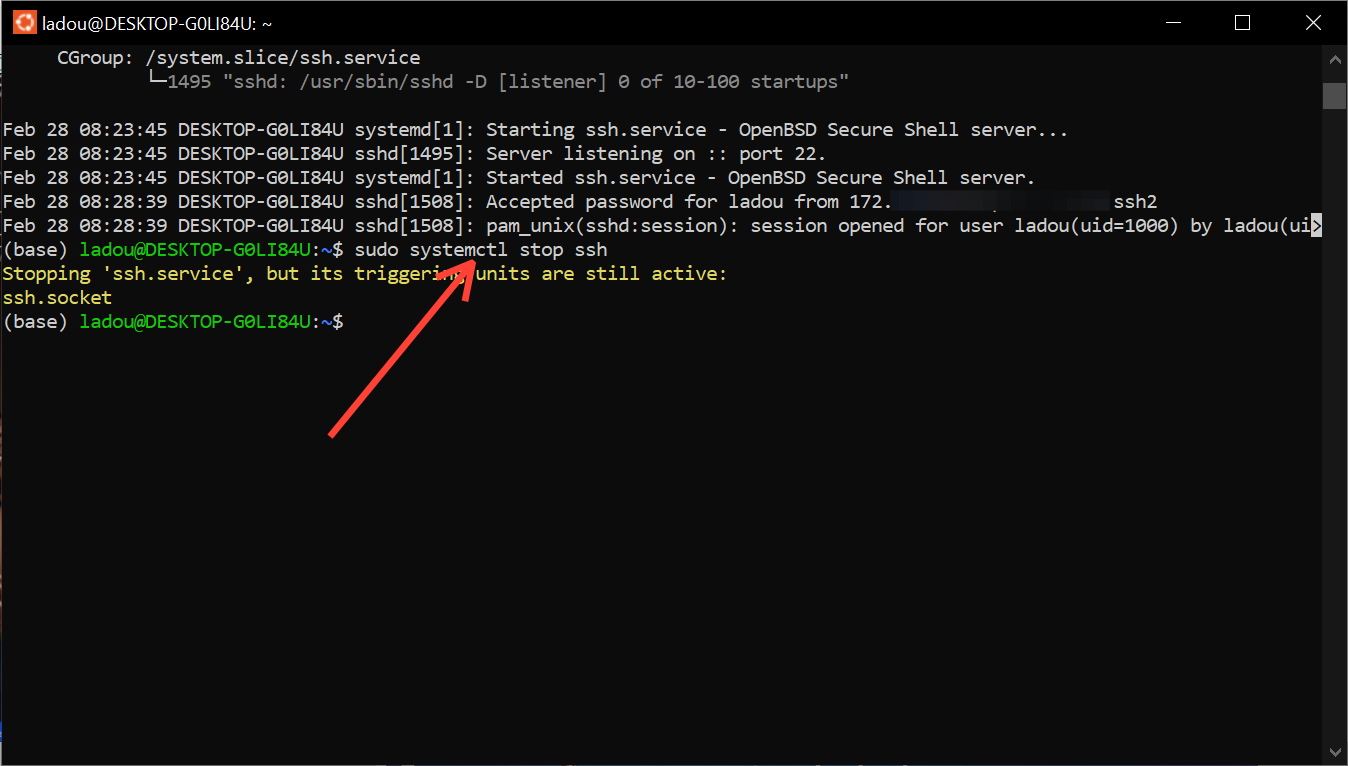
Step 6: To disable the SSH server, run "sudo systemctl stop ssh"
Conclusion
Enabling SSH on Ubuntu is a straightforward process that unlocks a world of remote access possibilities. By following the steps outlined in this guide, you've taken the first step toward managing your Ubuntu system with ease, flexibility, and security. Whether you're a system administrator, developer, or simply a user, SSH is an essential tool that will simplify your workflow.
As you explore the world of SSH, it is essential to have security in mind. Always use strong passwords, keep your system up-to-date, and be mindful of potential security risks.
Image credit: Oyinebiladou Omemu/techloy.com


