How to push changes to GitHub from VS code
Learn how to seamlessly push code changes to GitHub from Visual Studio Code.


Collaboration and version control are essential in software development, and by hosting your code on GitHub, you can take advantage of a range of benefits, including version control, collaboration tools, and a community of software developers who can review and contribute to your projects.
Whether you're working on a personal project or contributing to an open-source project, GitHub provides a platform for you to share your code, track changes, and show your skills to the world. But to take advantage of these benefits, you need to be able to push your code changes to GitHub. This is where Visual Studio Code (VS Code) comes in, the popular code editor that allows you to write, manage, and deploy your code to GitHub with ease.
In this tutorial, you'll learn how to push code changes to GitHub directly from VS Code, using both the intuitive graphical user interface (GUI) and the terminal. Whether you're a visual learner who loves the GUI or a command-line wizard, we've got you covered.
How to push changes to GitHub from VS code
Using the VS Code GUI
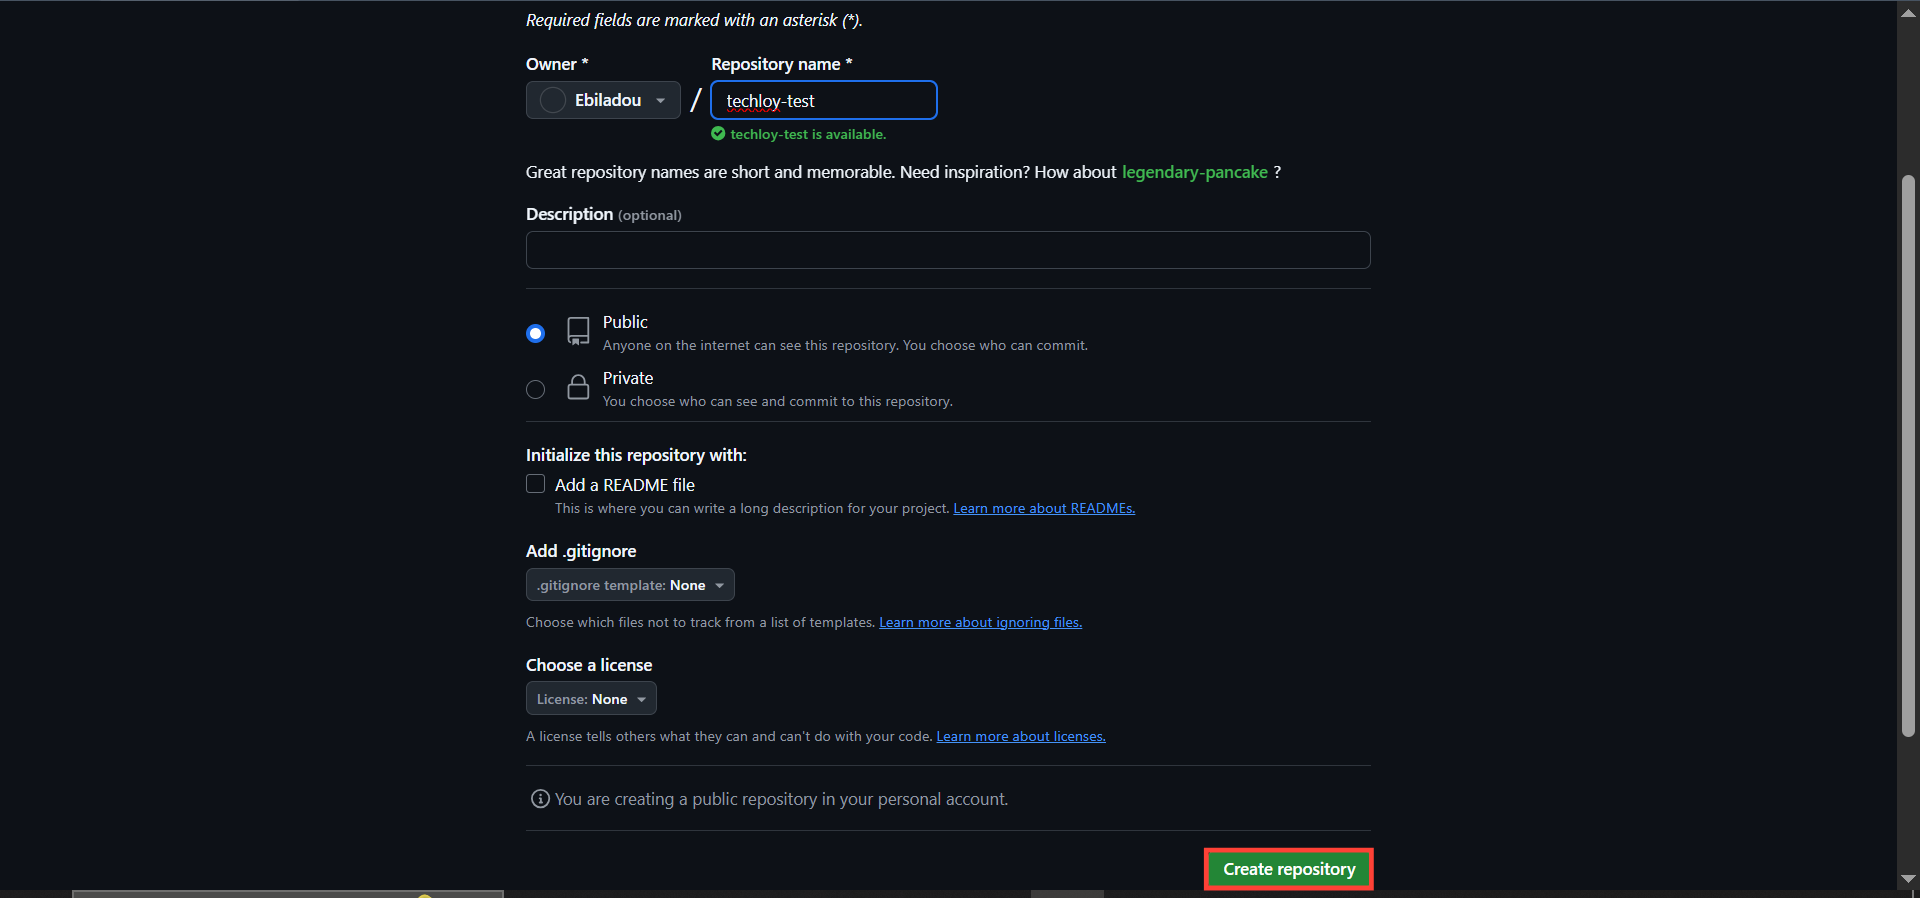
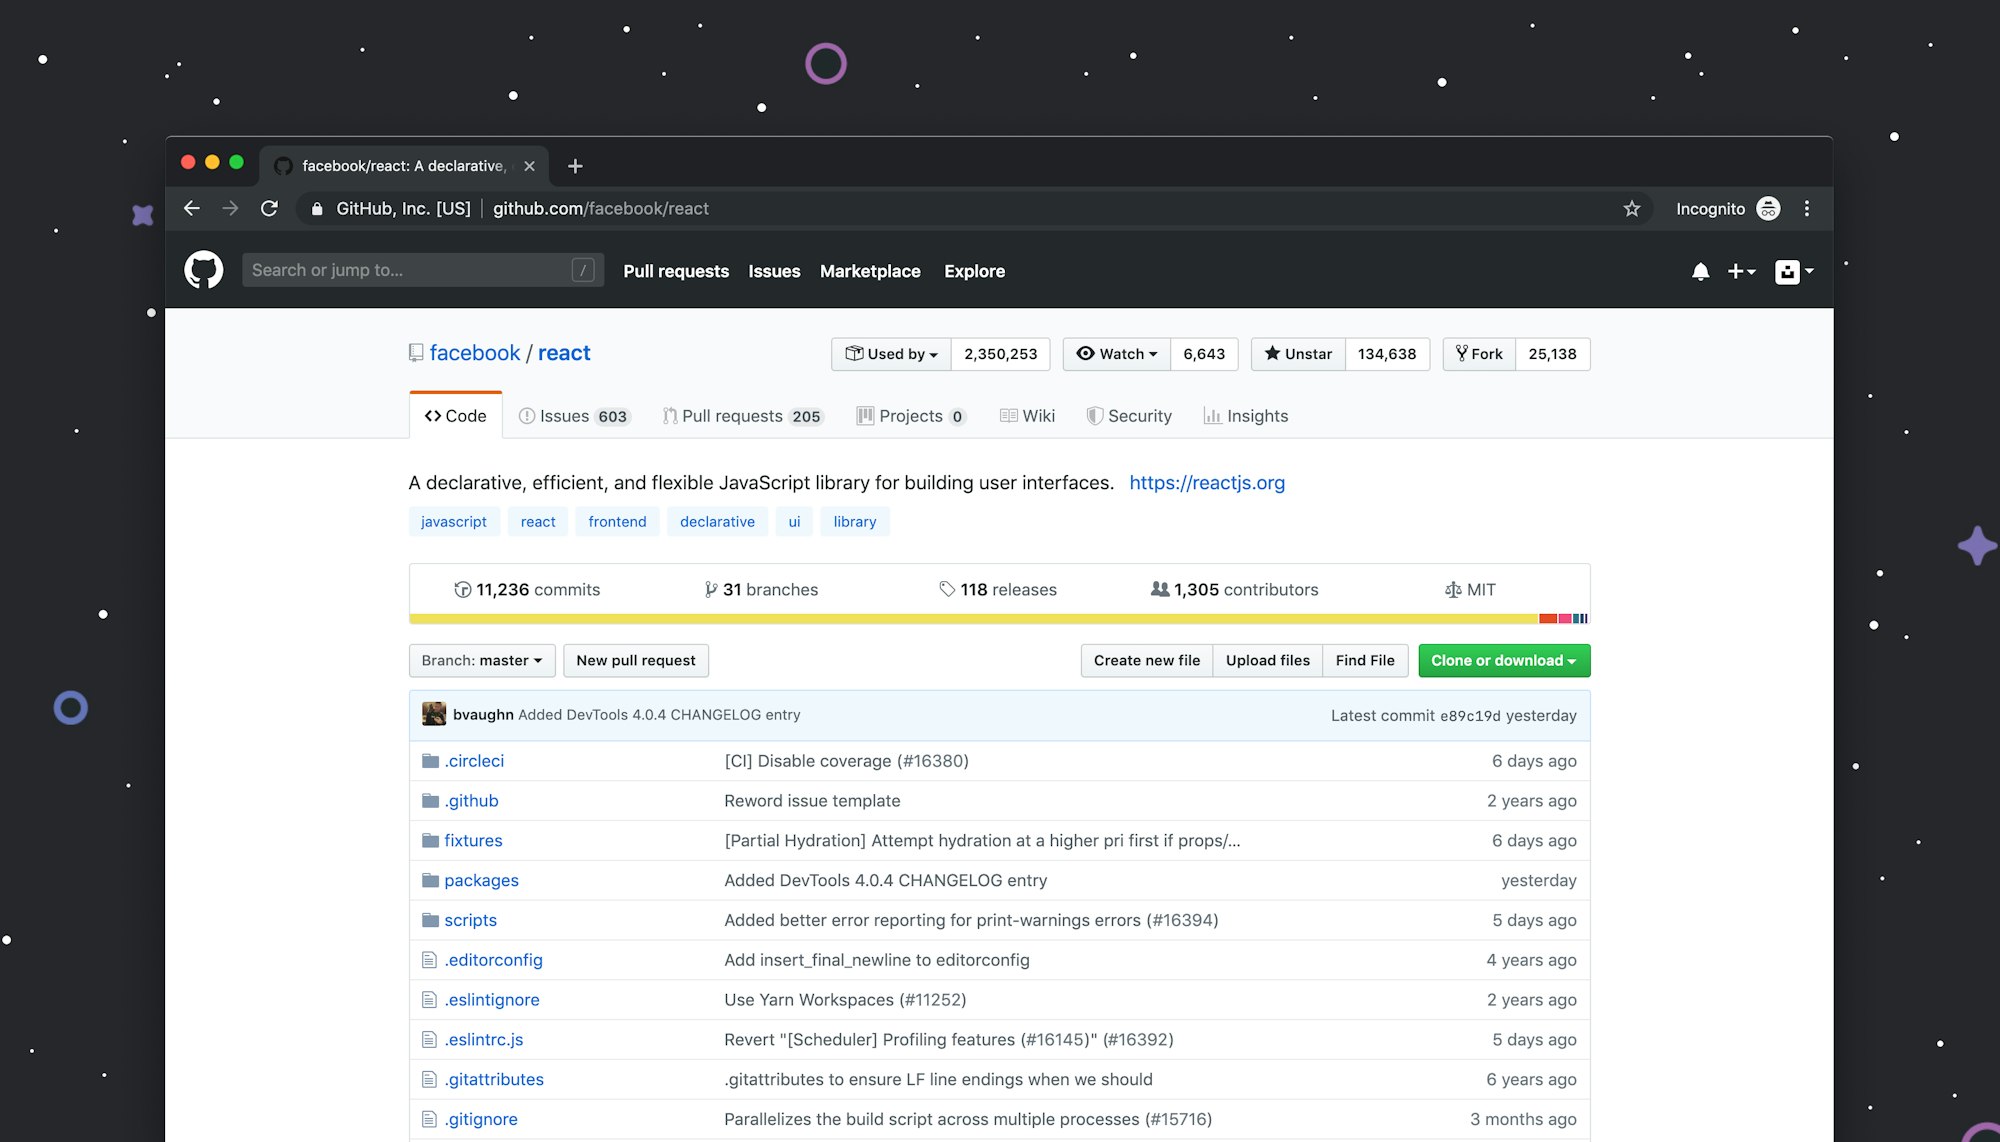
Step 1: Create a GitHub Repository for the project.
- Go to your GitHub account and on Repository, click New.
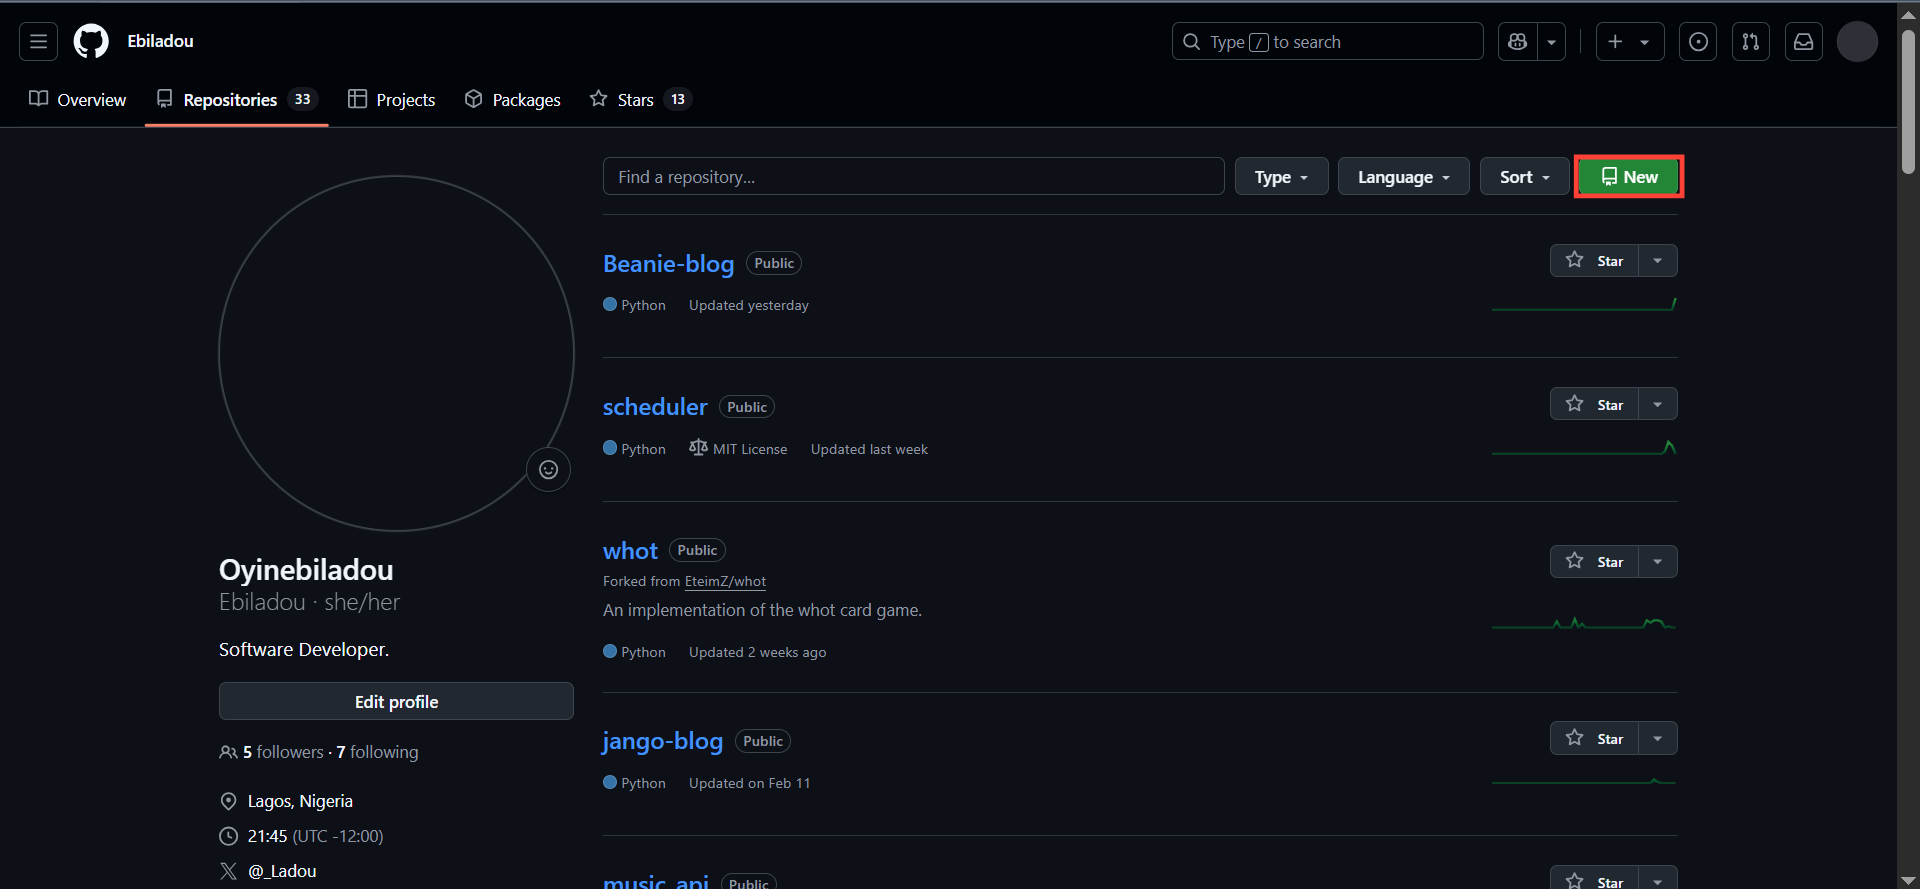
- Fill in the Repository details and click Create Repository.
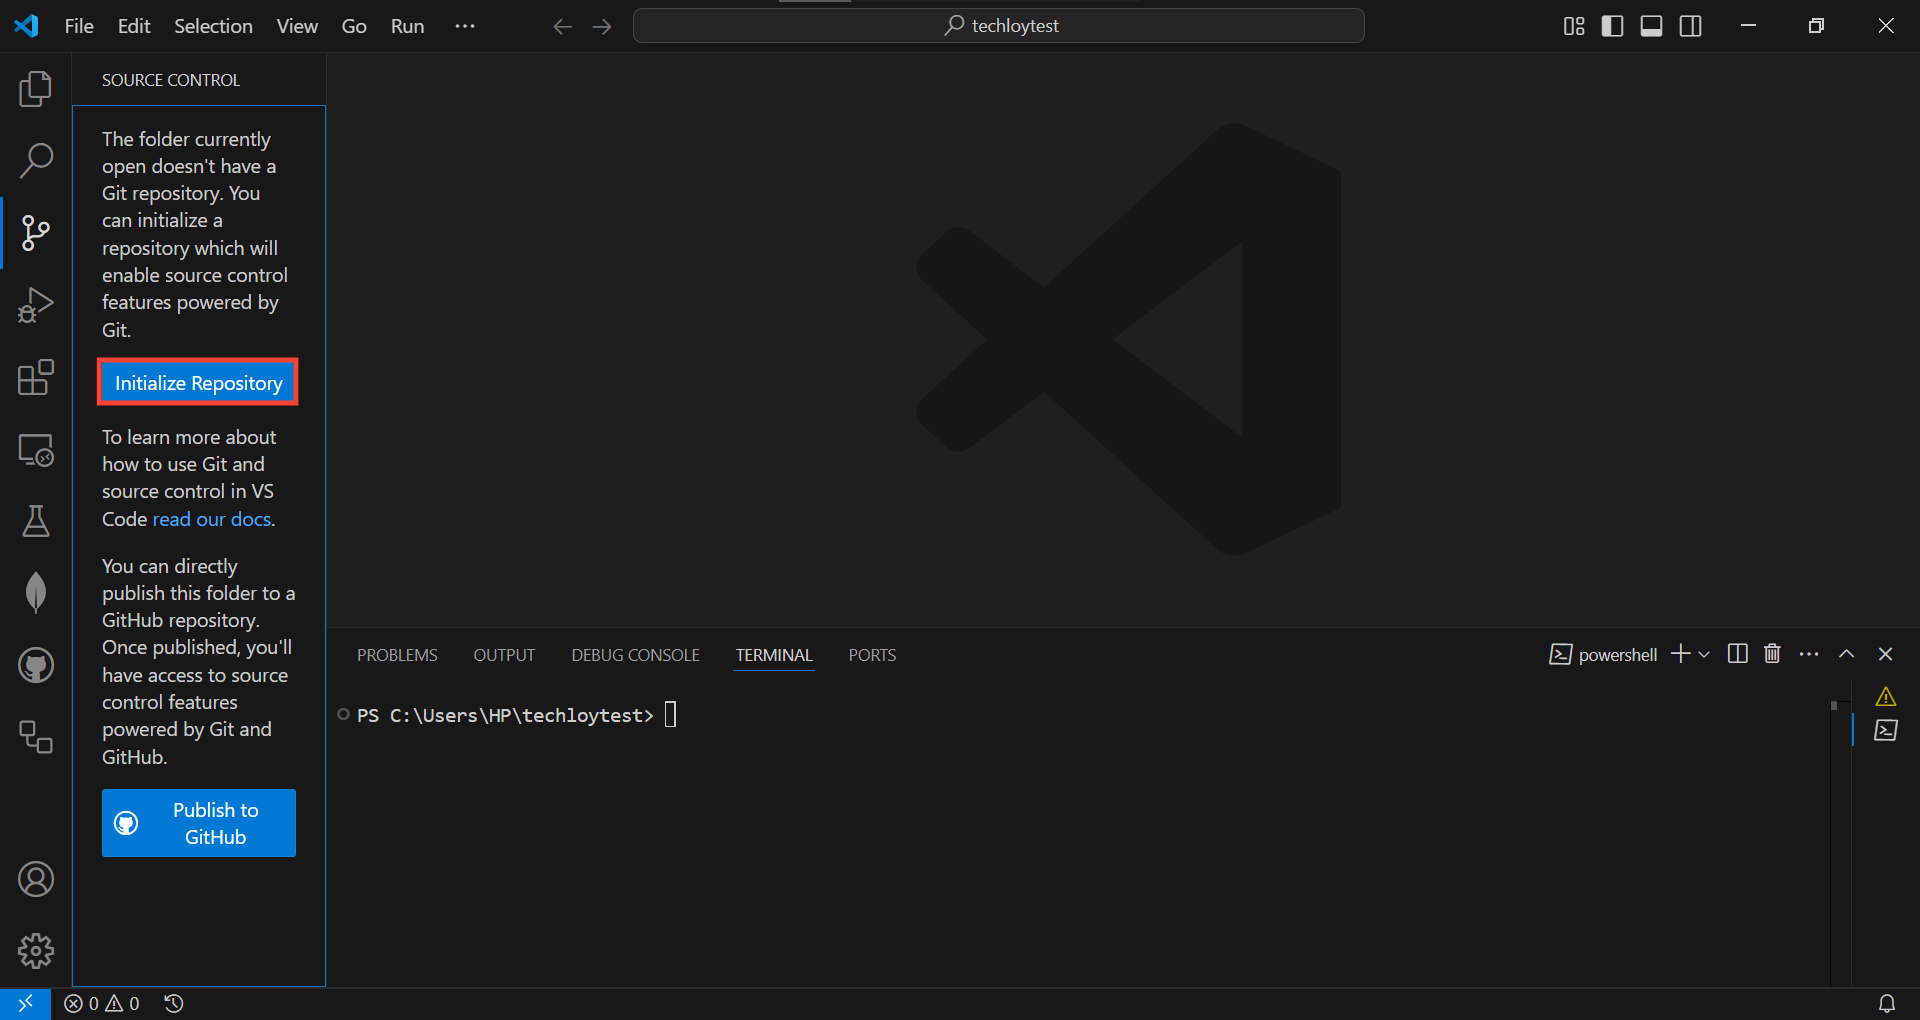
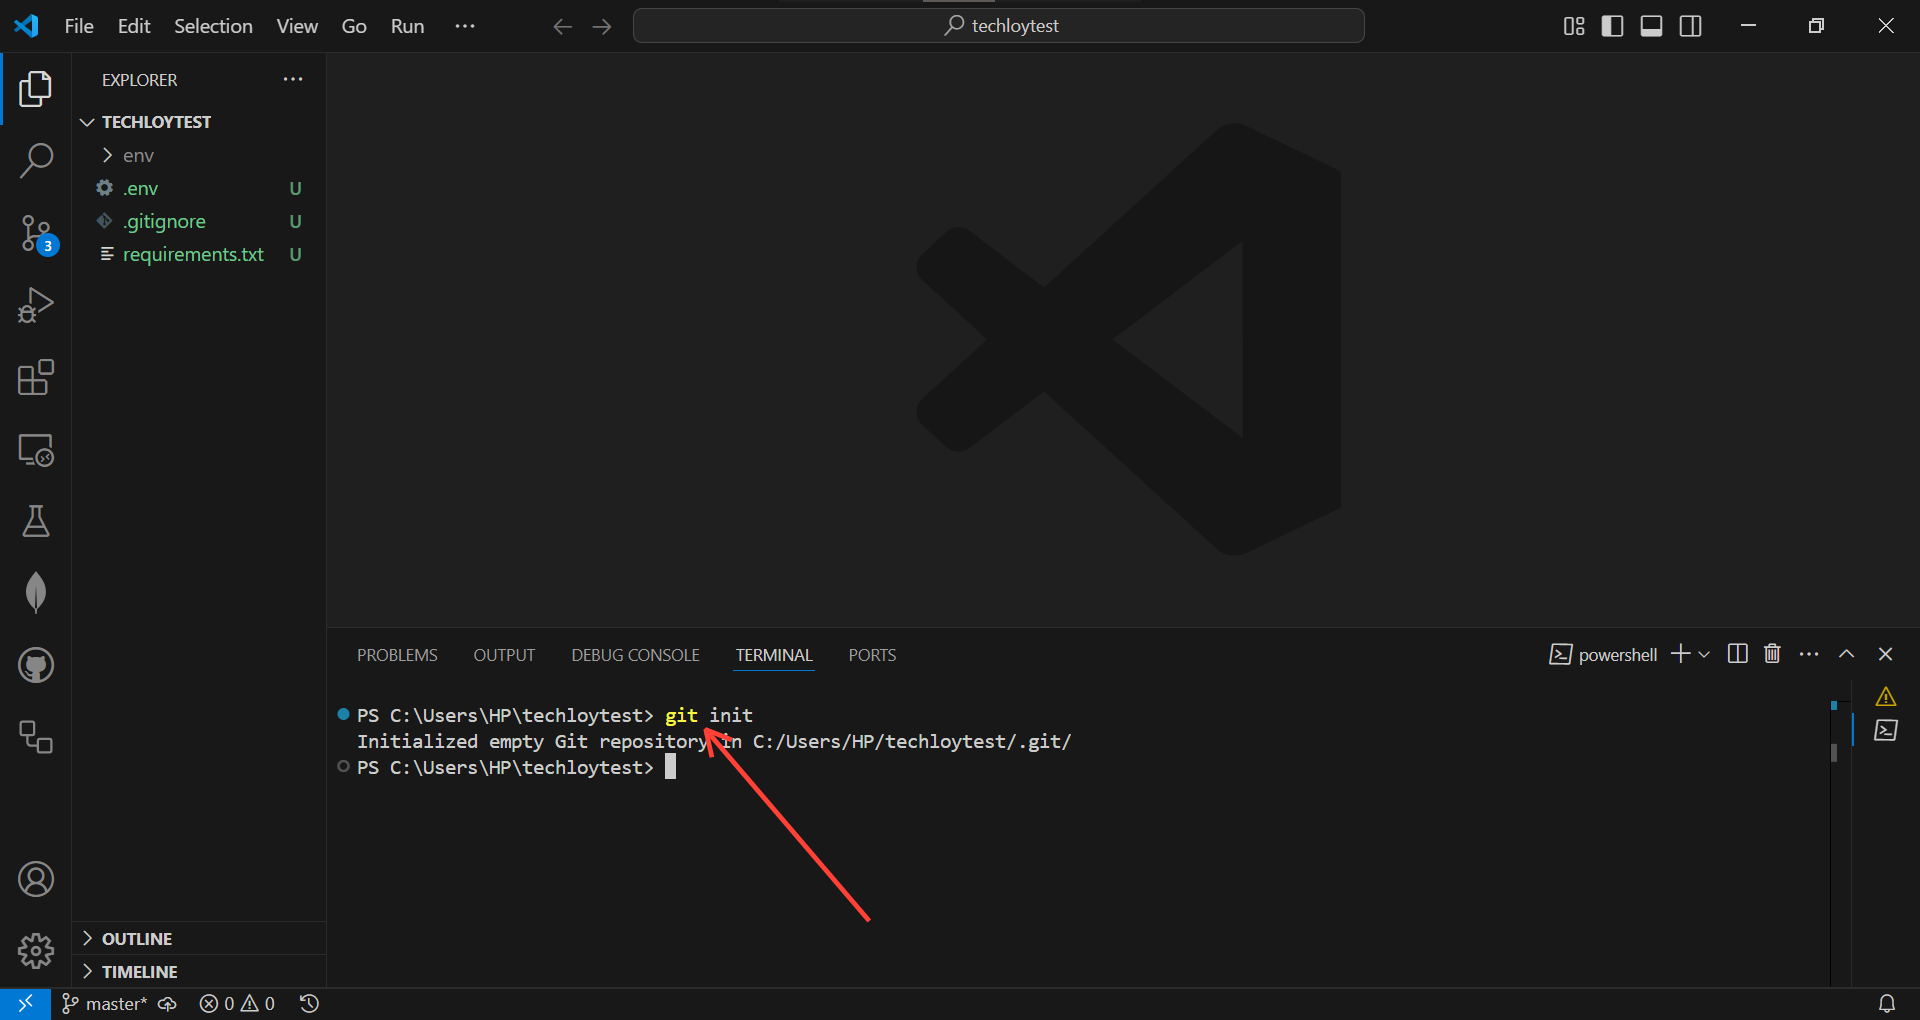
Step 2: Initialize your repository
- On your VS code Editor, Source control view icon and select Initialize Repository.
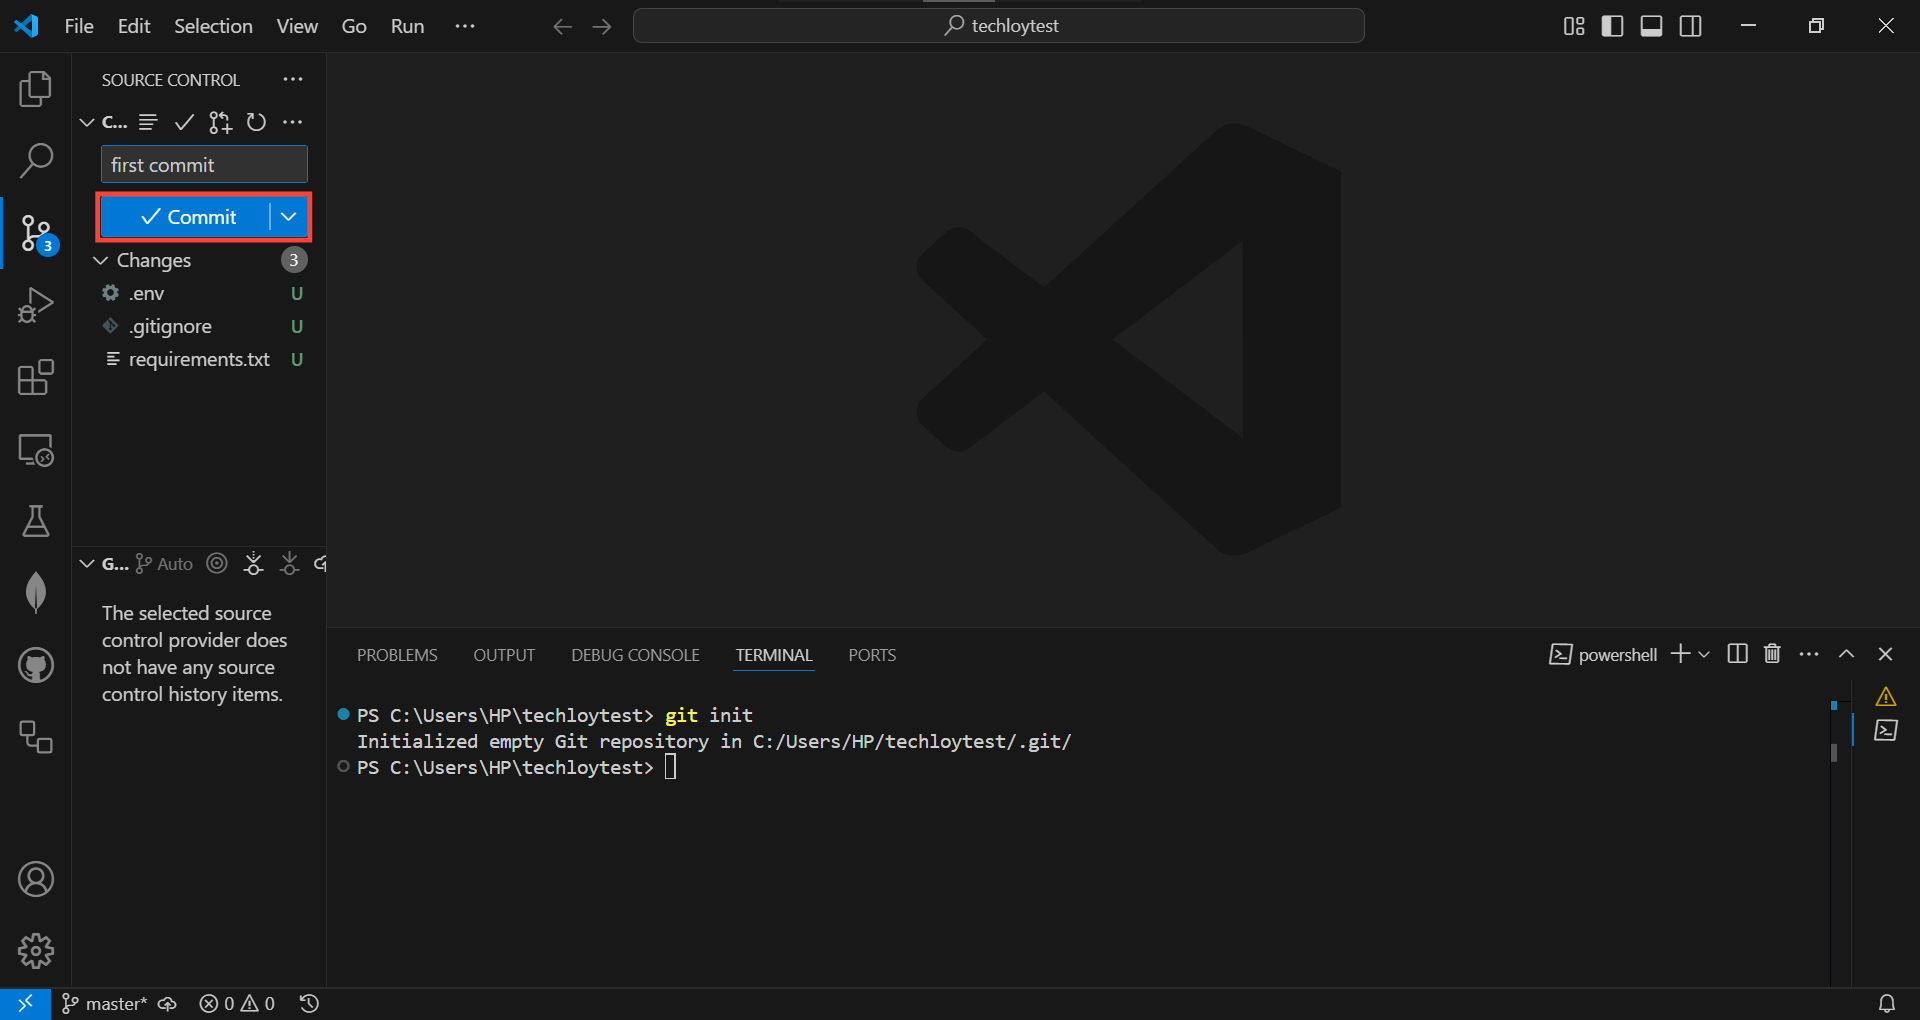
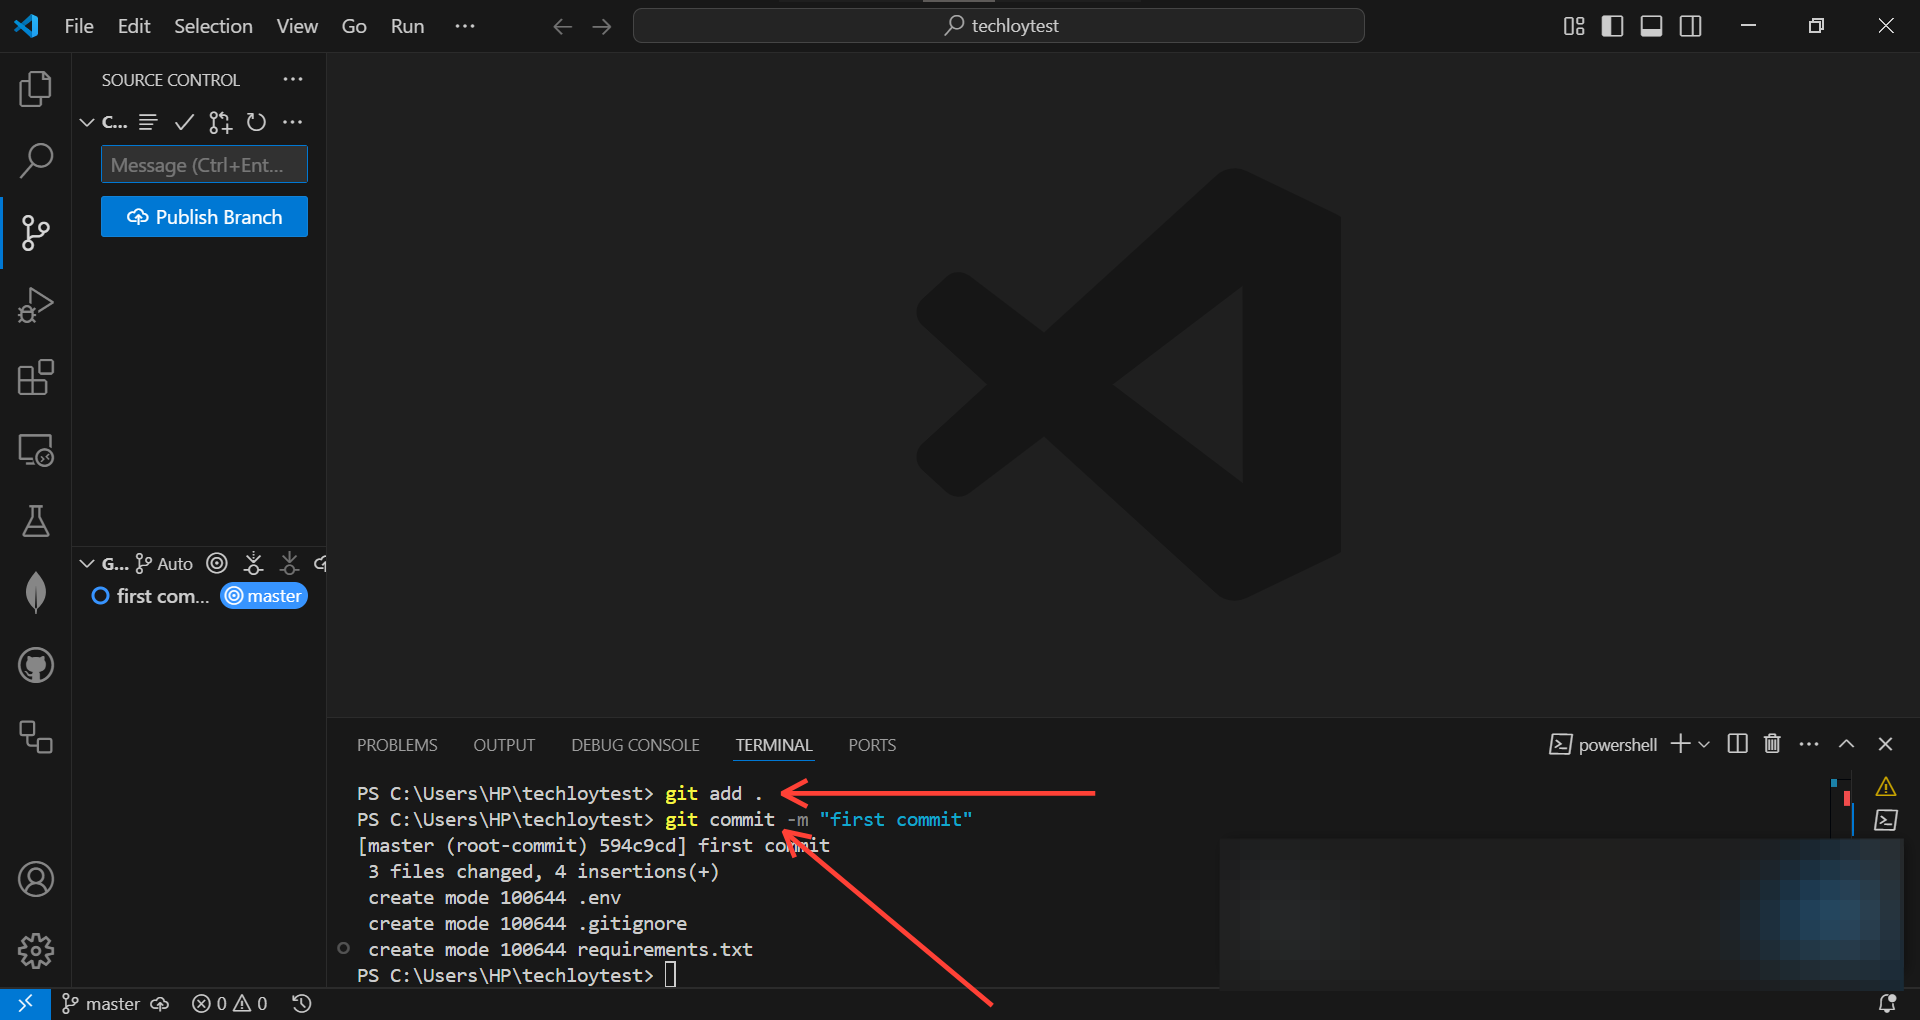
Step 3: Commit the changes to Git.
- To use the VS Code Editor GUI, enter your commit message, like "first commit" and Click on Commit.
Step 4: Push the changes to GitHub.
- First, go back to your GitHub account, open the repository, and copy the Repository URL.
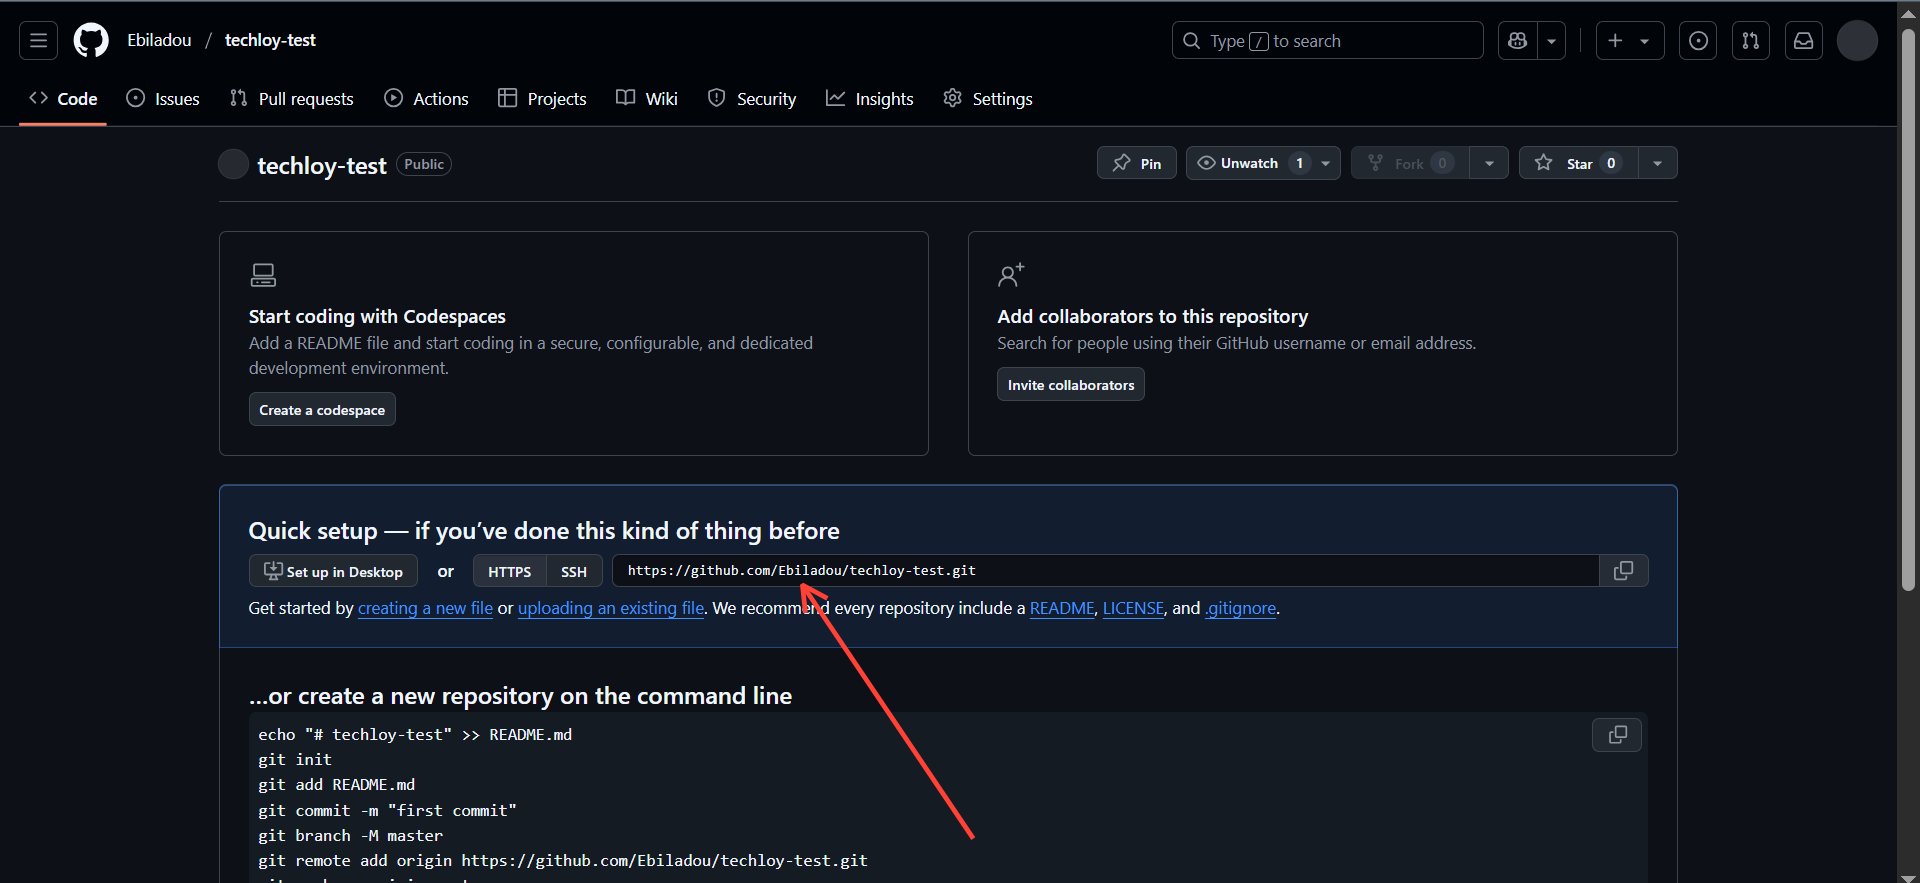
- On your VS Code Editor, Click on the ellipsis in the source control view, select Pull/Push from the drop-down menu, and choose Push to.
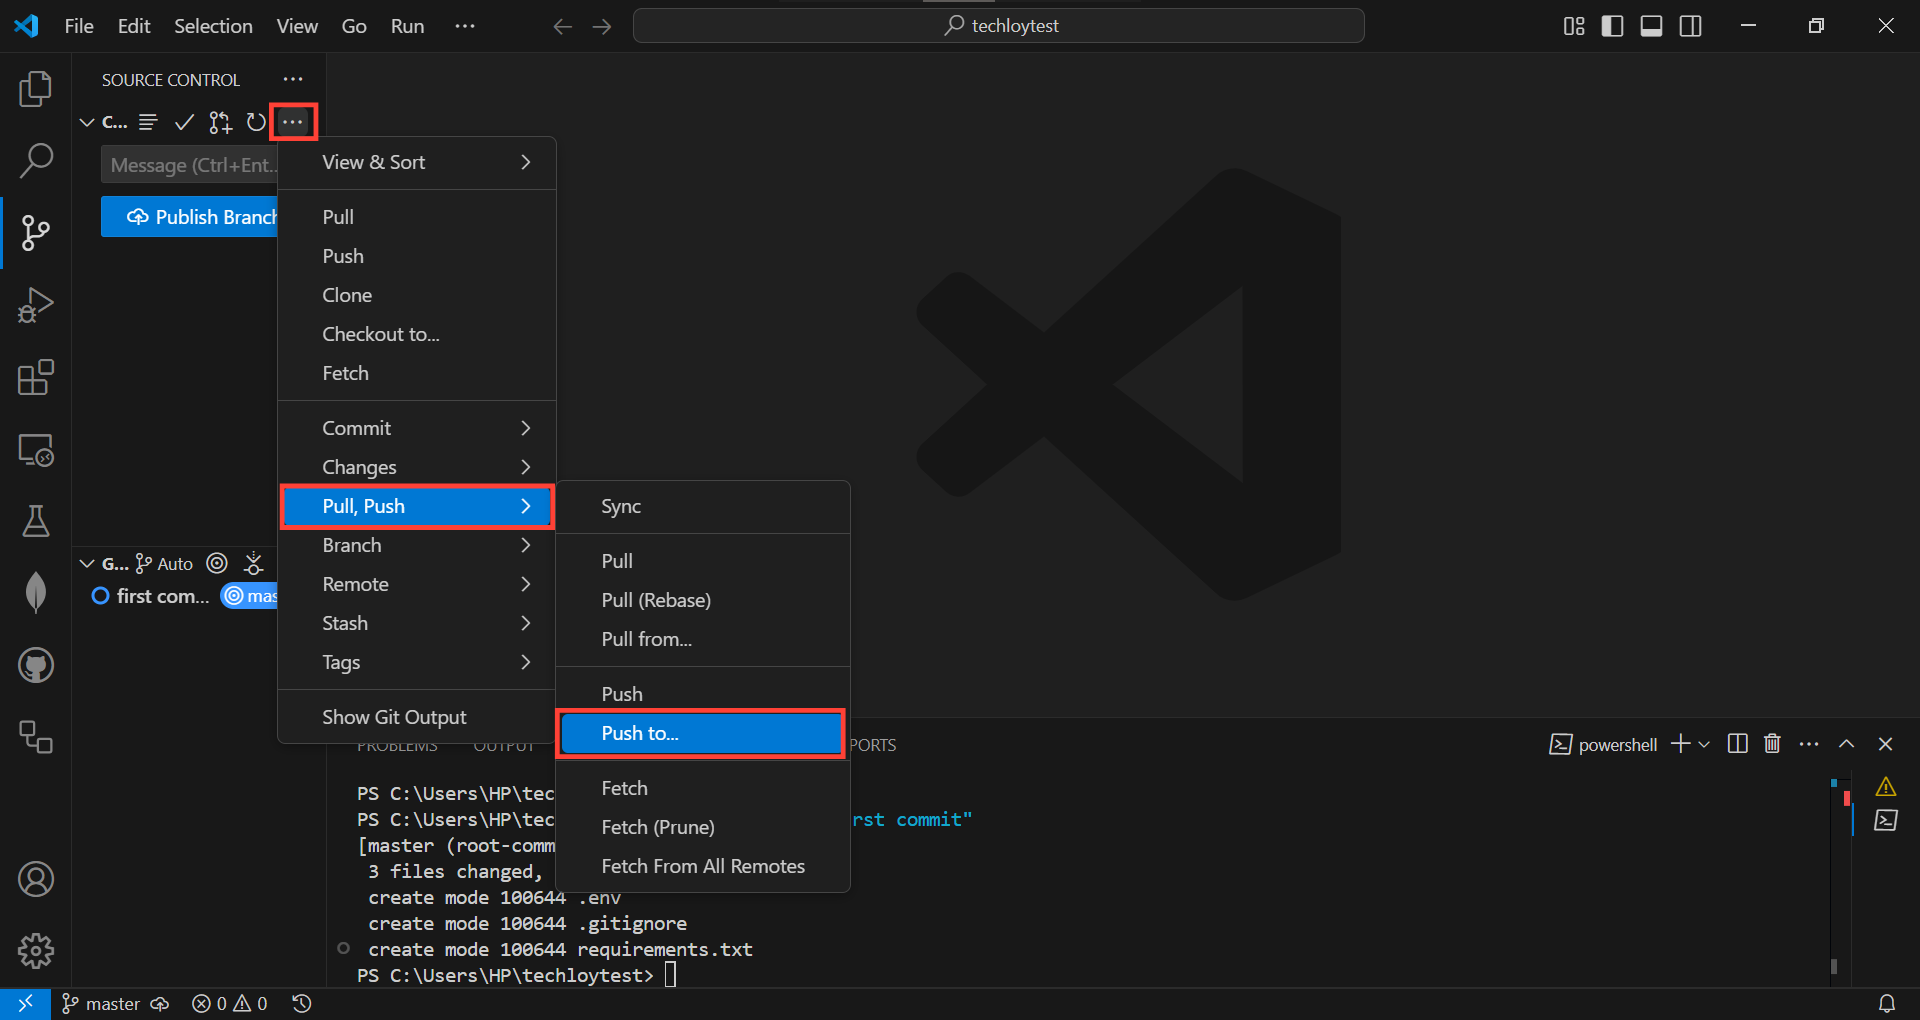
- Click on the "add remote" button.
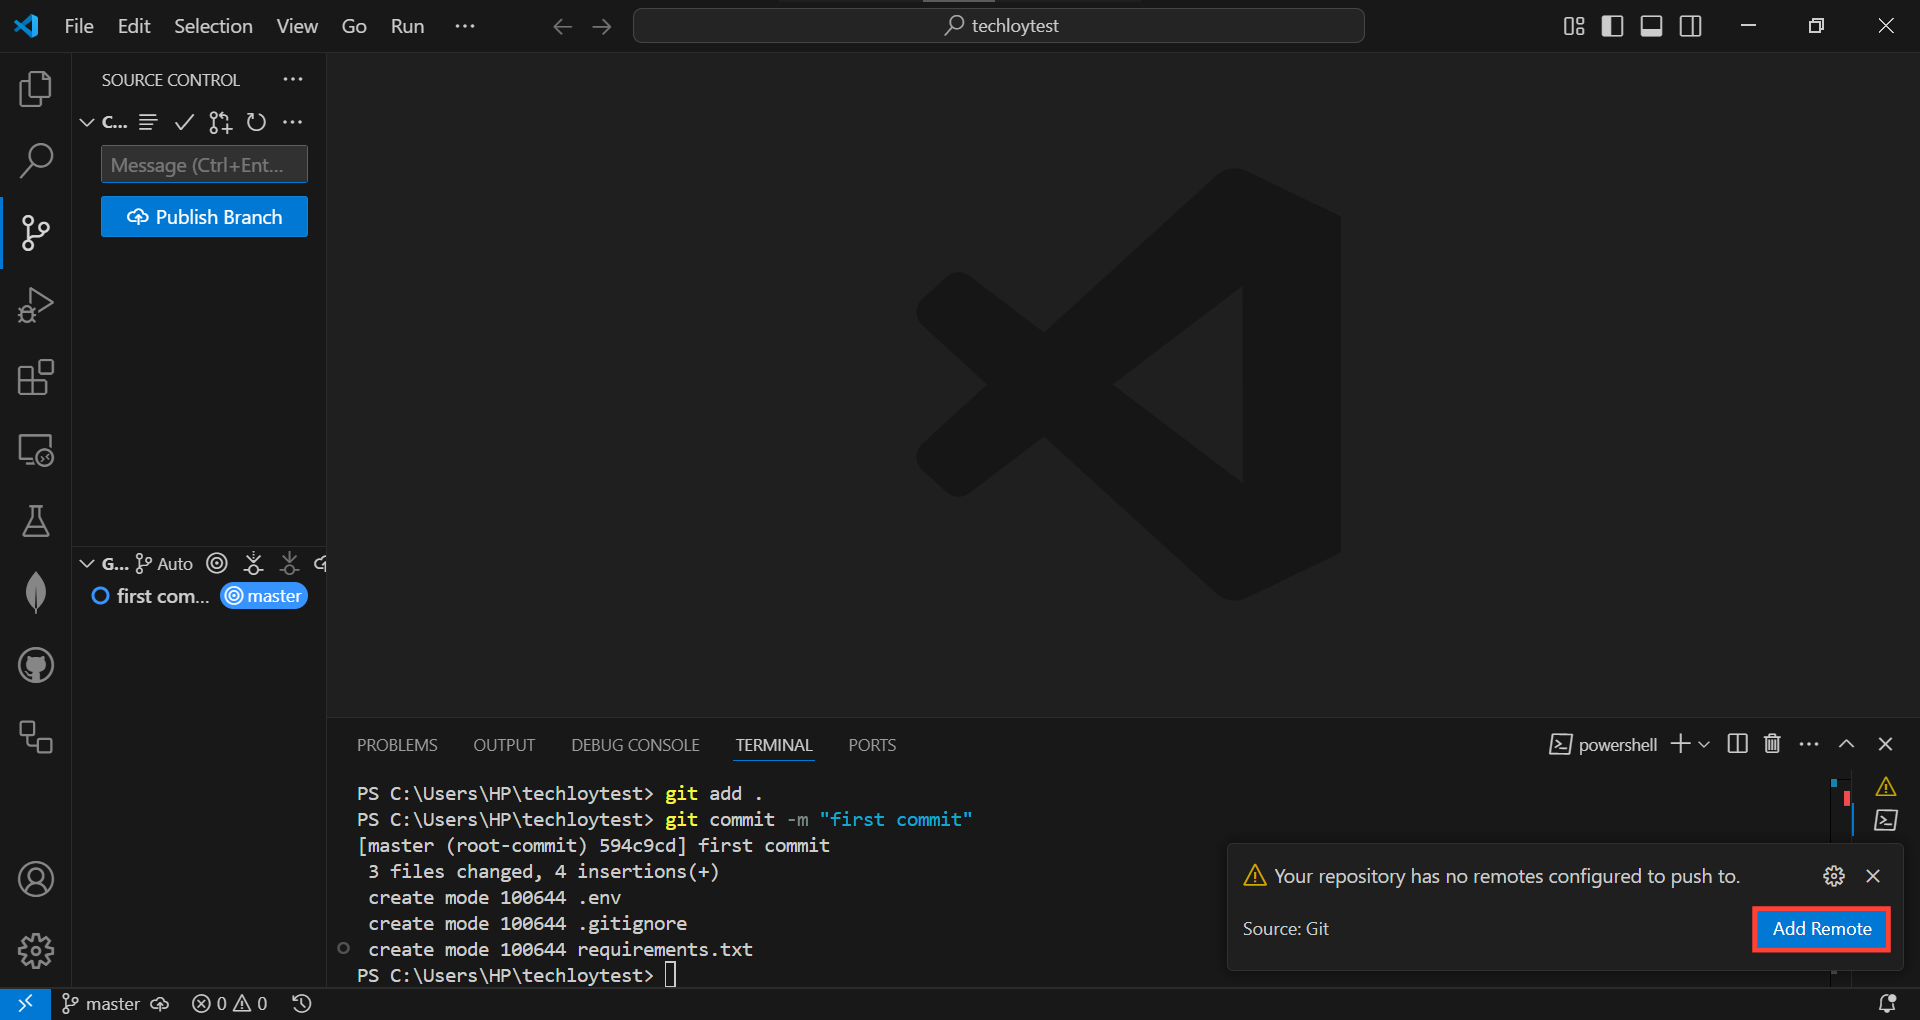
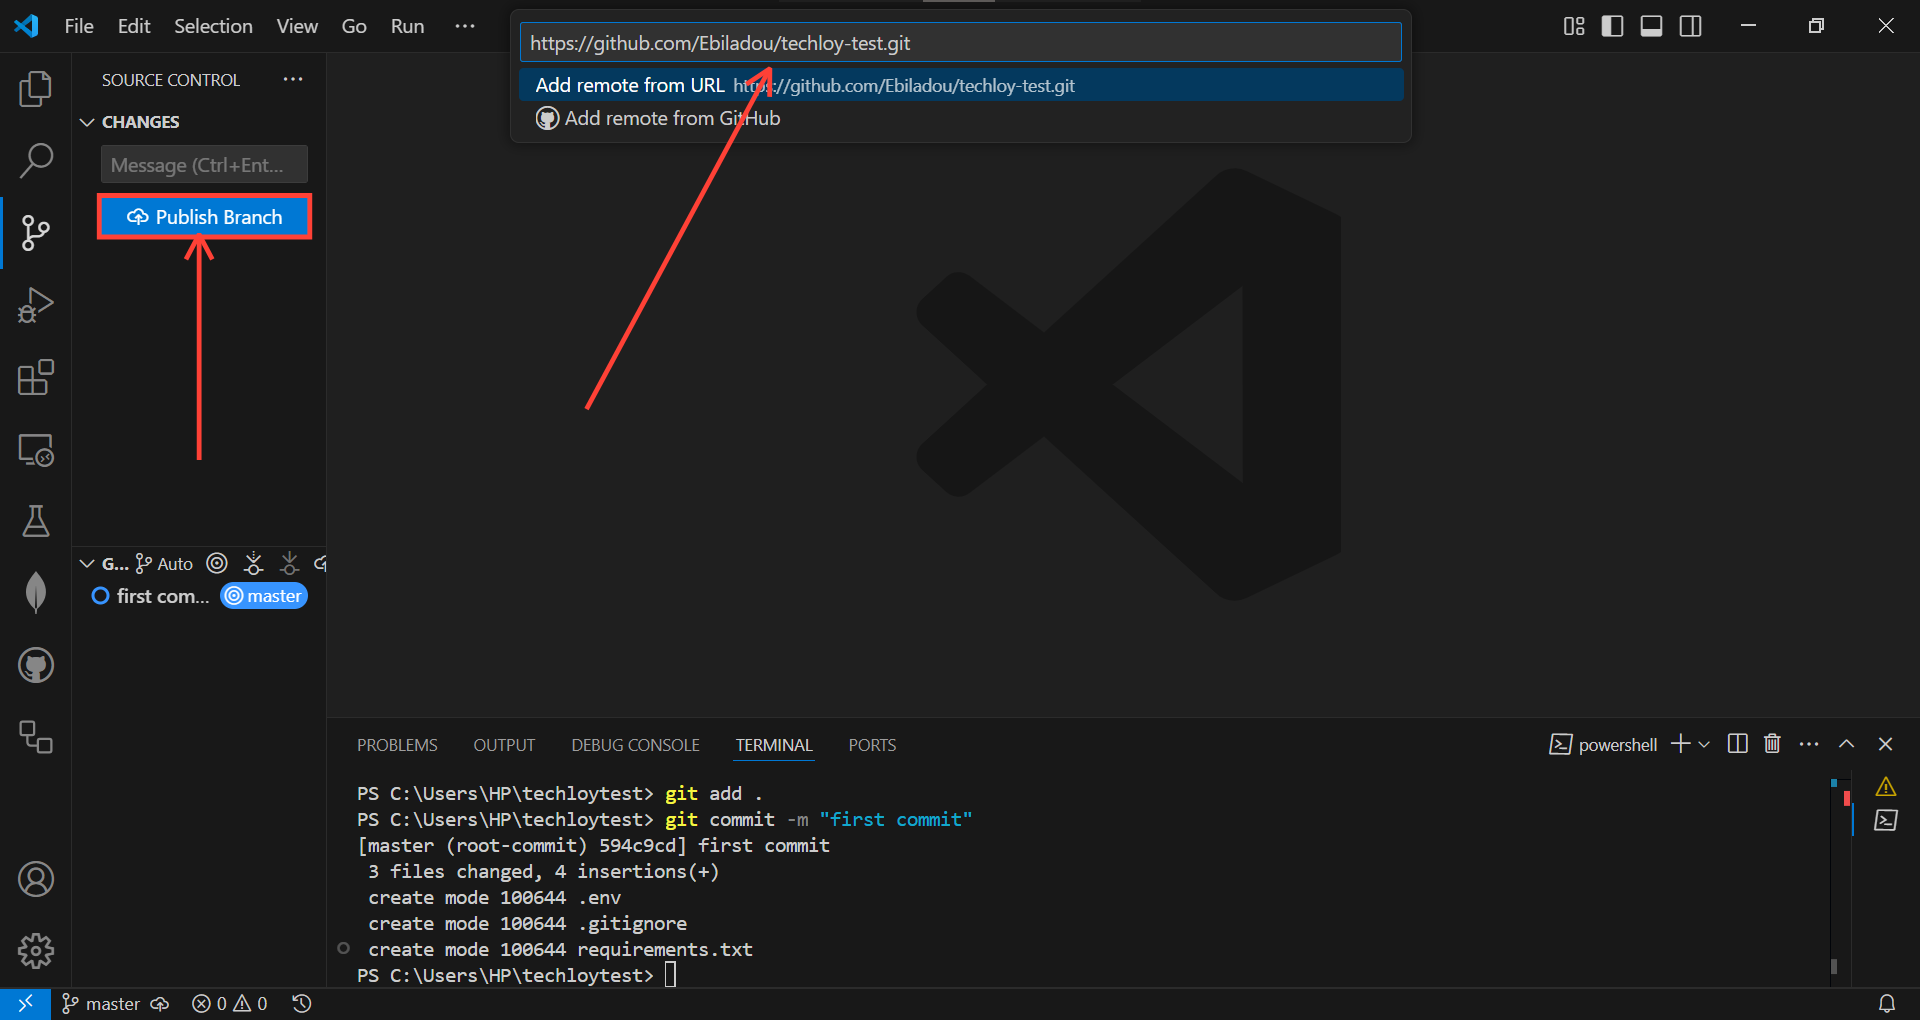
- Paste the URL you copied from GitHub, then click Publish Branch. That is all, your code is now initialized and pushed to GitHub.
Using the terminal
Step 1: Create a GitHub Repository for the project.
- Go to your GitHub account and on Repository, click New.

- Fill in the Repository details and click Create Repository.

Step 2: Initialize your repository
- To initialize the repository from the terminal, use the "git init" command on the terminal.
Step 3: Commit the changes to Git.
- To do this from the terminal, type in "git add ." then type "git commit -m <your_commit_message>"
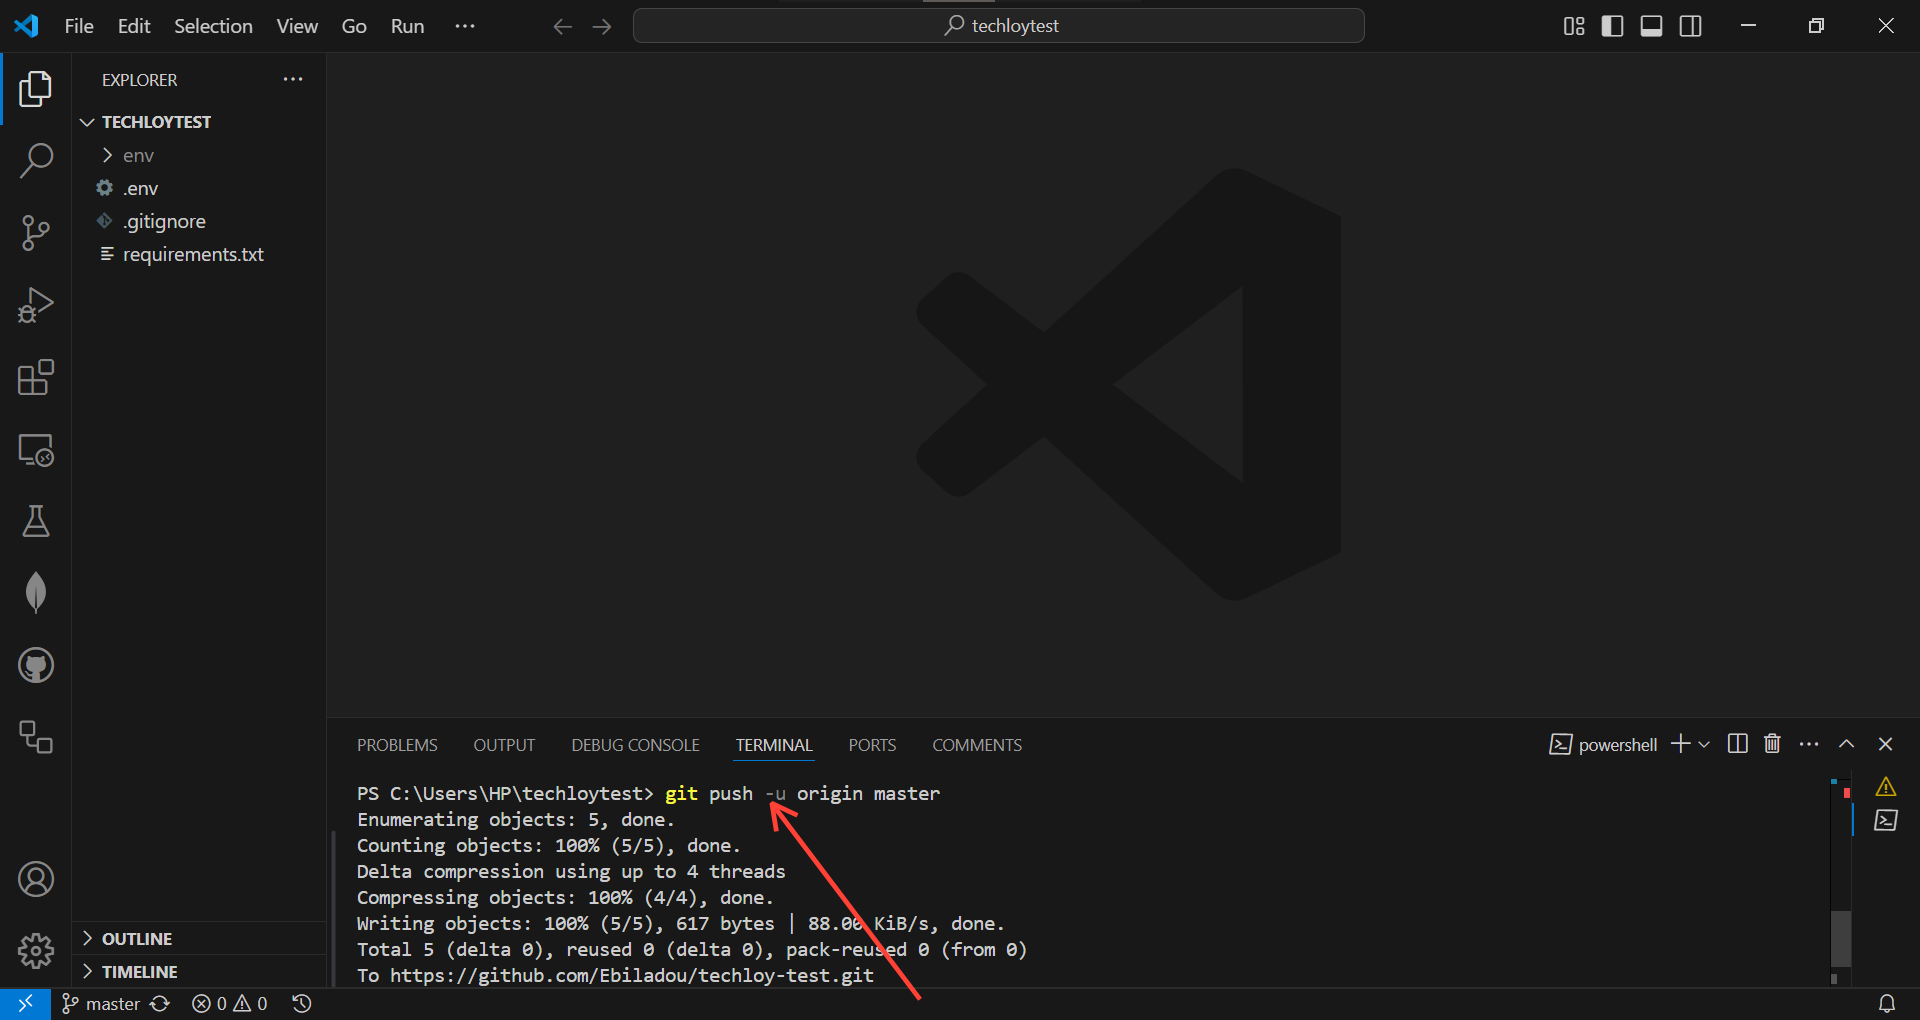
Step 4: Push the changes to Git.
- First, go back to your GitHub account, open the repository, and copy the Repository URL.

- Type "git remote add origin <repository_url>"
- Specify the branch you want to push to "git branch -M <branch_name"
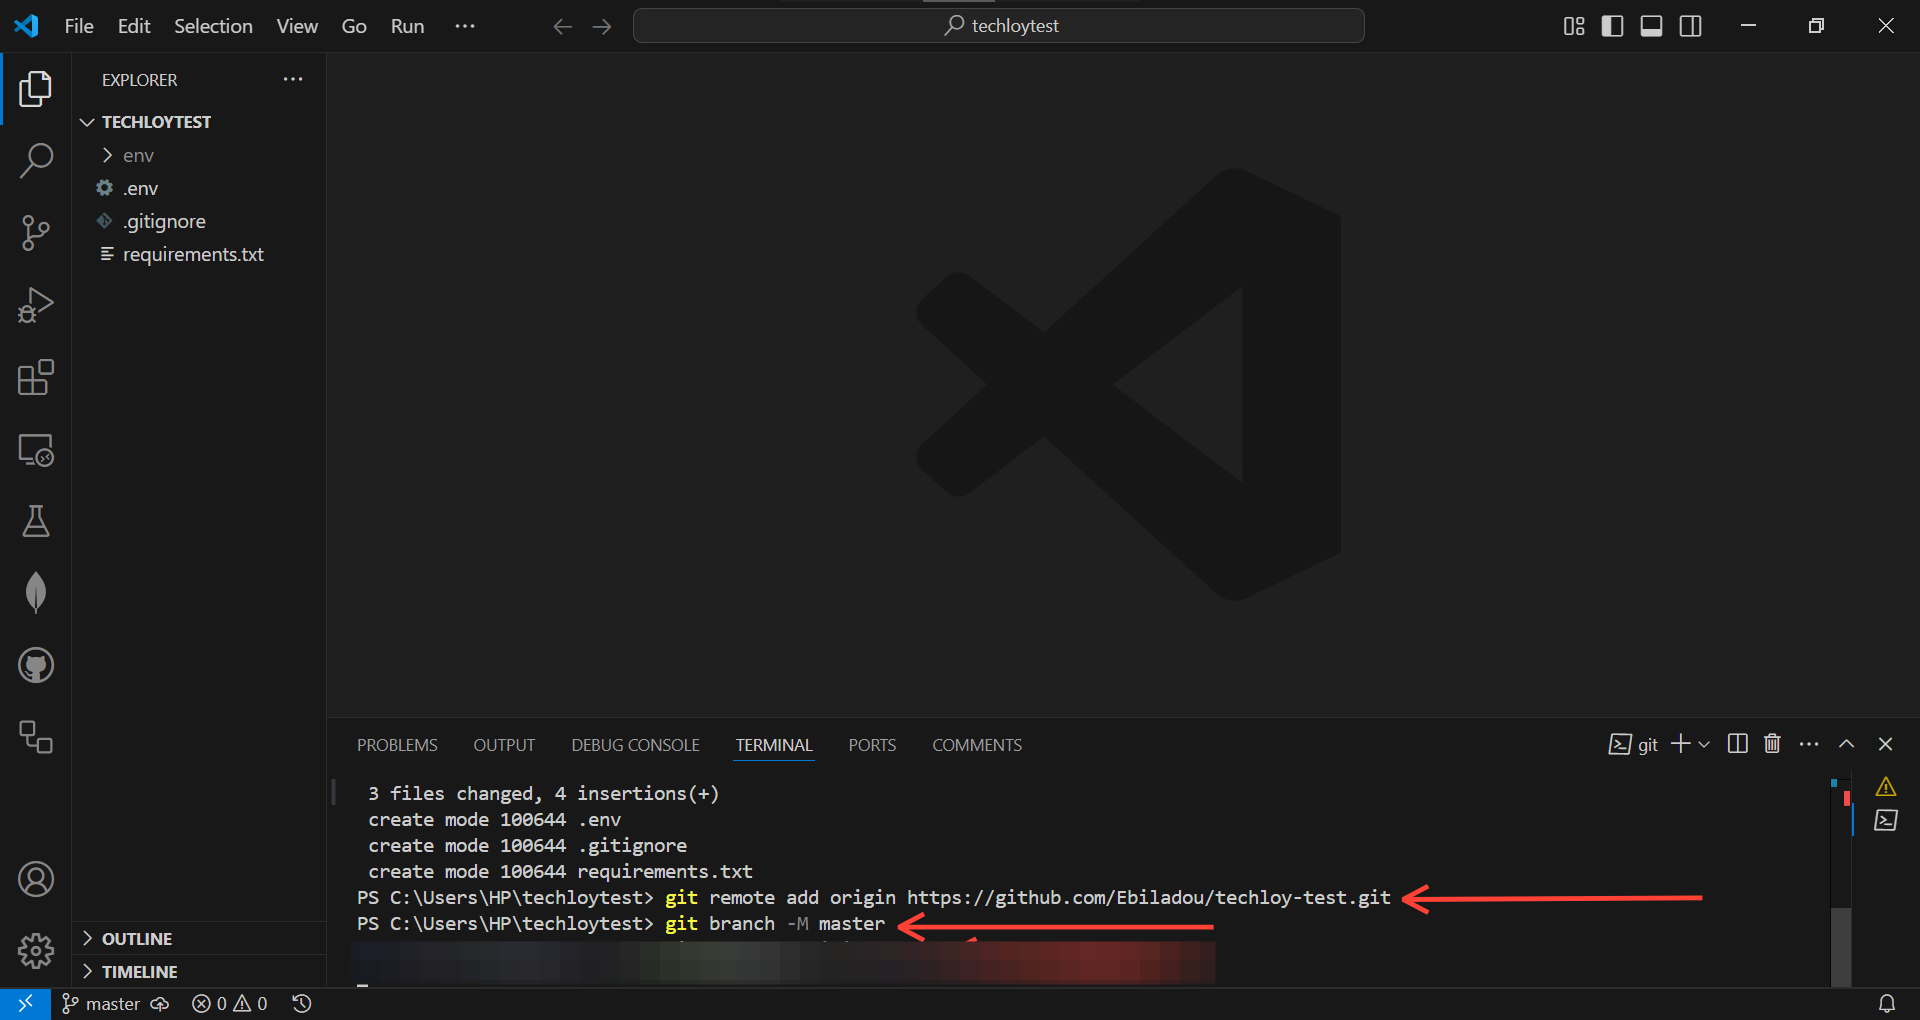
- Then run "git push -u origin <branch_name>"
How to Make Subsequent Changes to GitHub
Using the VS Code GUI
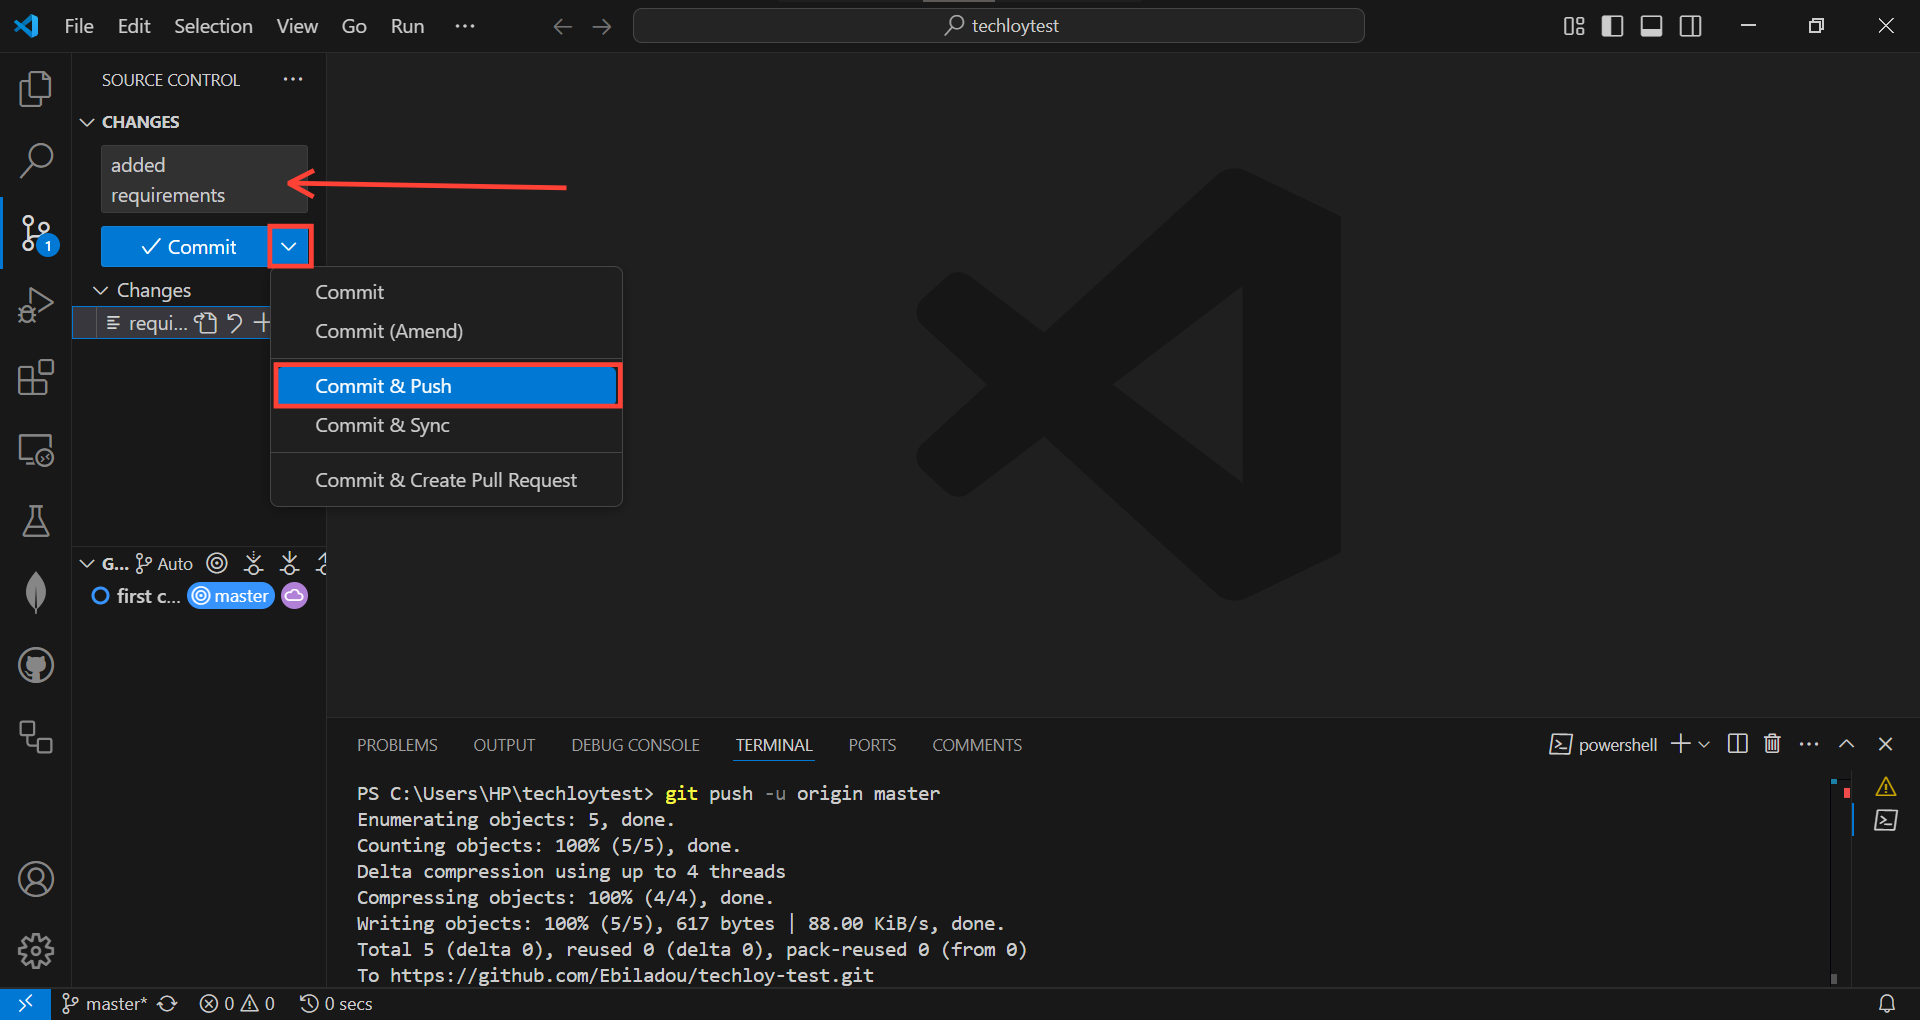
- Click the source control view menu, enter your commit message, click the drop-down menu in the Commit button, and then click Commit & Push.
Using the terminal
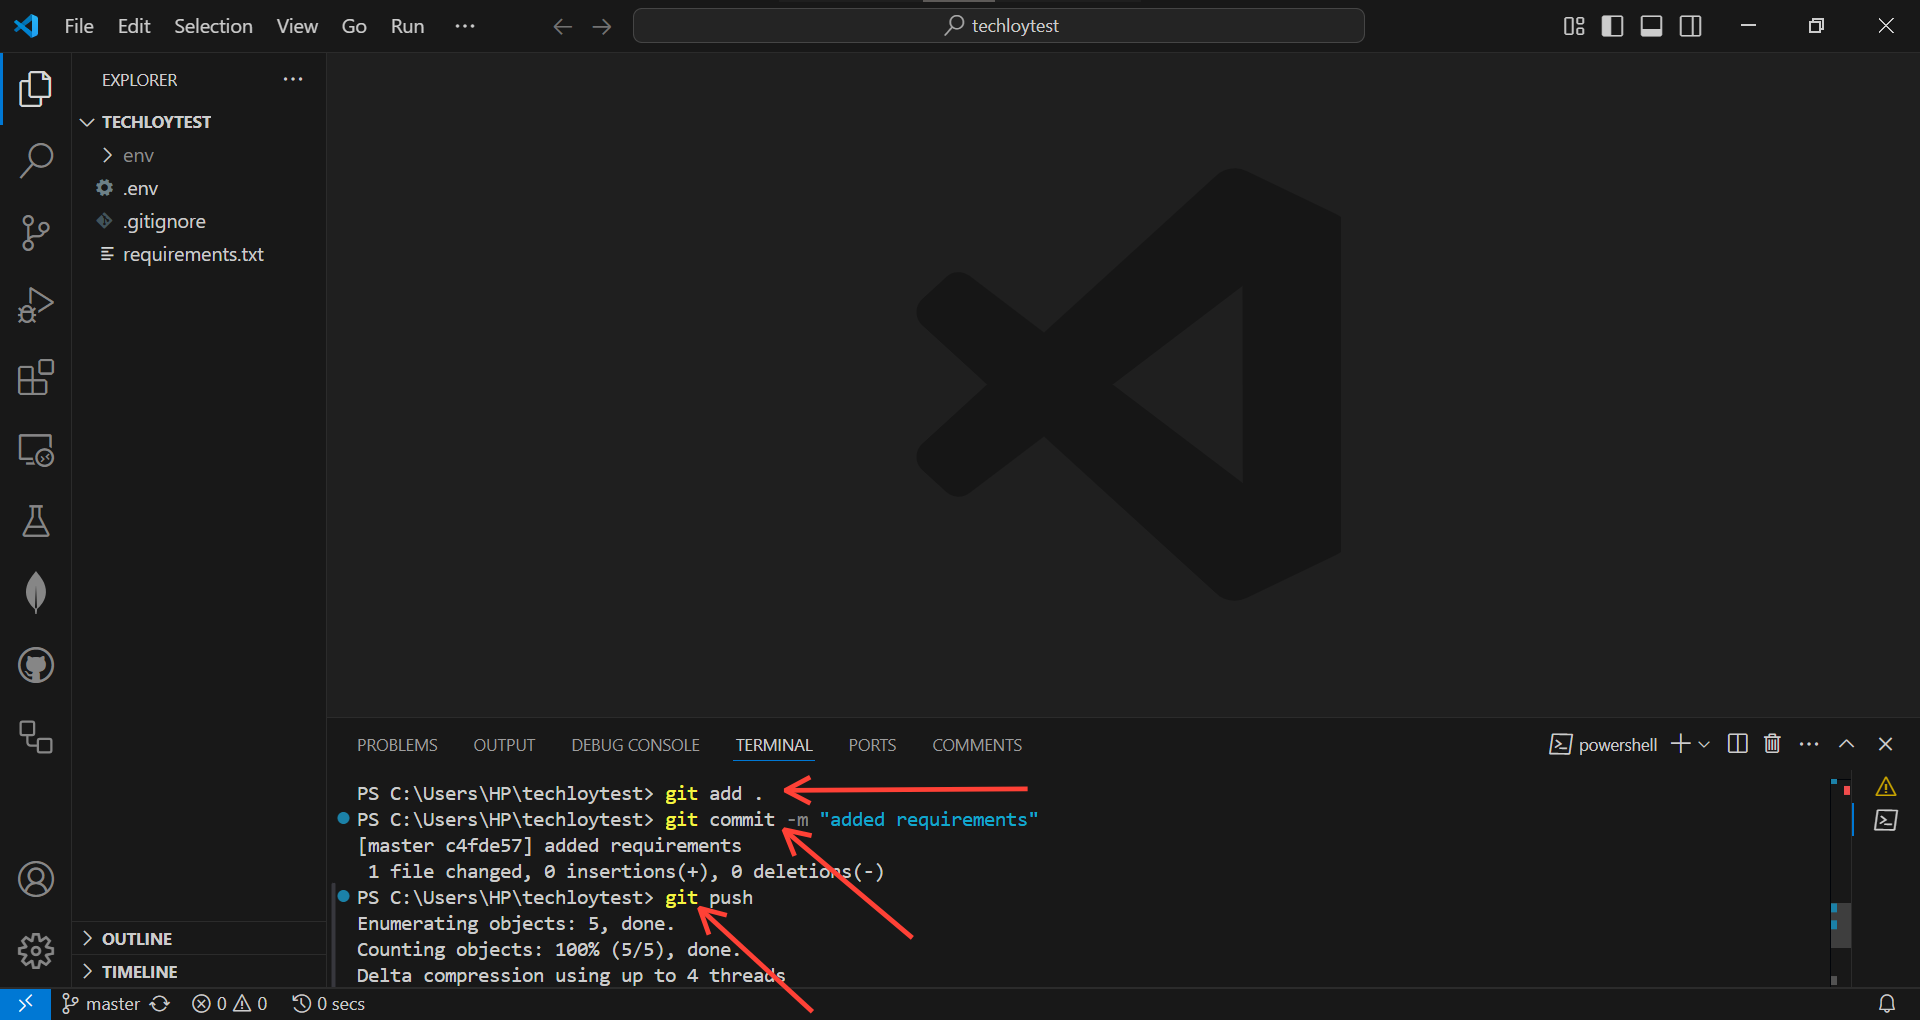
- Type "git add ."
- Then "git commit -m <commit_message>"
- Then type "git push" to push the changes.
Conclusion
Pushing code changes to GitHub from VS Code is a crucial skill for any developer. By following the steps outlined in this tutorial, you can ensure seamless collaboration, and showcase your projects to the world. Whether you're an intermediate developer or just starting, this skill will undoubtedly take your coding journey to the next level.
Image Credit: Oyinebiladou Omemu/techloy.com


