How to Recover Data from a Mac That Won’t Boot?
In this guide, learn the various methods for recovering data from a Mac that won’t boot.

Recovering data from a functional Mac is straightforward, mainly because of the integrated tools offered by macOS. However, if your Mac refuses to power on, data recovery becomes a steep challenge.
If your Mac is stuck on the loading bar, and displays a blank, blue, or grey screen, you’re not alone. This is a common hurdle faced by many Mac users. While it's a serious issue, there are measures you can take to resolve it.
In this guide, learn the various methods for recovering data from a Mac that won’t boot. Let’s get started!
5 Methods to Recover Data from Non-booting Mac
If your MacBook runs into trouble due to software glitches, hardware issues, or even physical damage, don't panic—your files aren't necessarily gone for good. However, note that the sooner you start the recovery process, the better your chances of getting back your data.
Next, we'll guide you through each step-by-step recovery technique to ensure a sound recovery.
Method 1: Use Target Disk Mode or Sharing Mode to Recover Data from a Mac that Won’t Boot
One of the easiest solutions to recover data from a non-booting Mac is via Target Disk Mode for Intel-based Macs and Sharing Mode for Apple Silicon Macs. This functionality allows you to connect two Macs via a cable, transforming one of them into an external hard drive that you can use for data transfer.
If the non-booting Mac is Apple Silicon-based, you’ll use Share Disk along with Thunderbolt 2 to Thunderbolt 3 cable. When dealing with an Intel-based Mac, you’ll use Target Disk Mode with a Thunderbolt cable.
Note: For devices running macOS Big Sur or later, Target Disk Mode is only compatible with a Thunderbolt cable.
Here’s the rundown:
Step 1: Connect the non-booting Mac with a functioning Mac using a Thunderbolt or Firewire cable.
Step 2: For non-booting Intel-based Macs, press the power button and hold the (T) key to open Target Disk Mode, then move directly to step 6. If your non-booting Mac uses an Apple Silicon chip, hold the power button until Loading Startup Options appears on the them screen.
Step 3: Next, choose Options and click Continue.
Step 4: From the Apple menu bar, click on Utilities > Share Disk.
Step 5: Next, select system disk and hit Start Sharing.
Step 6: For Apple Silicon-based Macs, you can now access your system drive via the desktop of another connected Mac and should be able to copy any files across the shared drive.
Step 7: For an Intel-based Mac, go to Finder > Location > Network.
Step 8: Next, double-click the drive on a non-booting Mac and select Connect > Guest > Connect.
Step 9: Lastly, transfer the files you want and eject them safely.
Method 2: Use Professional Software to Recover Data from a Mac that Won’t Boot
If you don’t want to navigate complex manual recovery methods, use a professional Mac data recovery software—Stellar Data Recovery for Mac. Its simple UI and advanced features make it an ideal DIY tool for recovering documents, photos, audio, and video files from non-booting Macs.
Note: Ensure your Mac is connected to the internet and keep the license key ready.
Here’s how to configure the software on a non-booting Mac using Apple Silicon Chip:
Step 1: Press and hold the power button to boot into Recovery Mode.
Step 2: Select Options on the start screen and click Continue.
Step 3: The macOS Recovery window appears, click Next to go to the login option.
Step 4: Type in your Admin Password and click Continue to proceed.
Step 5: On the Recovery Mode screen, click Utilities > Terminal.
Step 6: Enter the following command in the Terminal window and hit Return: sh <(curl http://www.stellardatarecovery.co.in/StellarDataRecovery.xml)
Step 7: Accept the License Agreement and launch the software.
Here’s how to configure the software for Mac on a non-booting Mac using a T2 chip:
Step 1: Power on your Mac and press Command + R to boot it into Recovery Mode.
Step 2: Connect your Mac to an active Wi-Fi network and click Utilities > Terminal.
Step 3: Enter the following command into the Terminal window and hit Return: sh <(curl http://www.stellardatarecovery.co.in/StellarDataRecovery.xml)
Step 4: Accept the License Agreement and launch the software.
Once you have configured the software on your Mac, follow the steps below to recover your data:
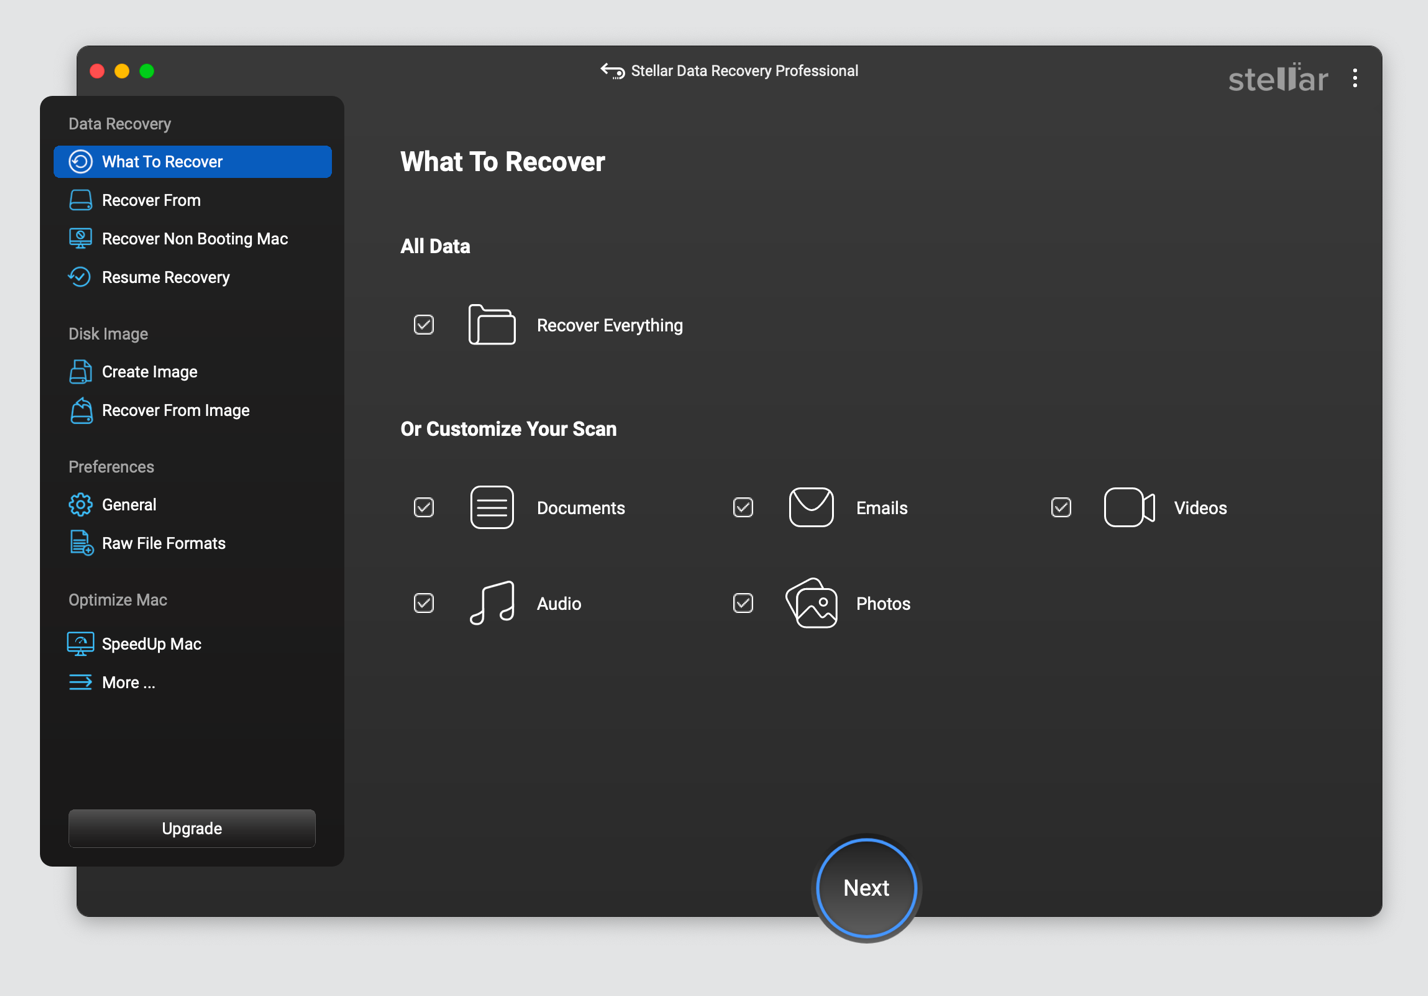
Step 1: Select the type of files you want to recover and click Next.

Step 2: Select the storage volume you want to recover from and hit Scan.
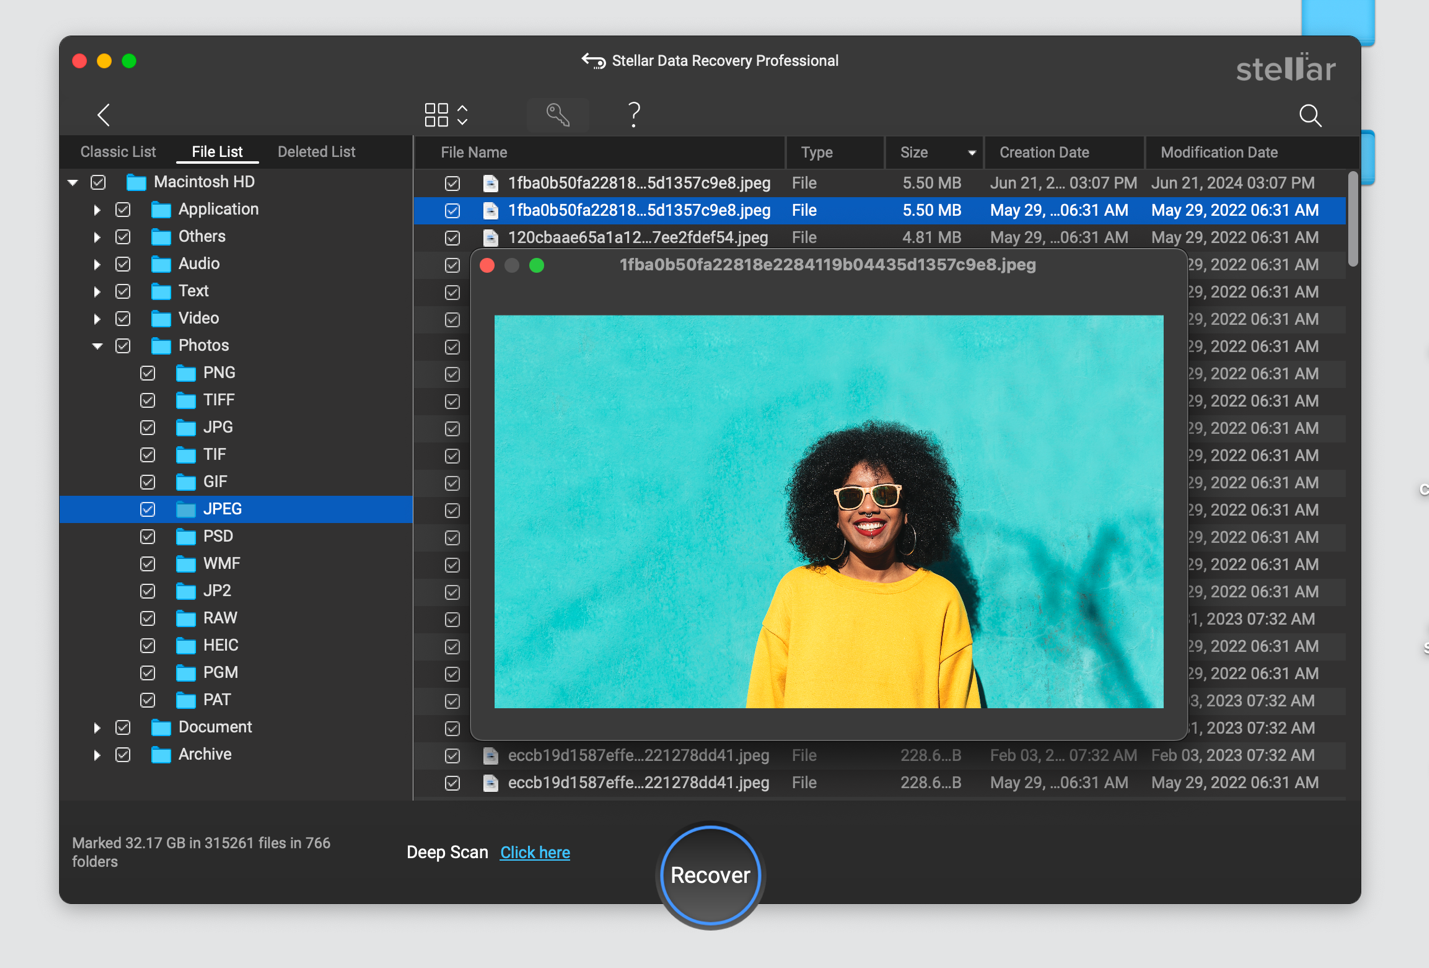
Step 3: Once the scan is complete, preview and select the files you want to restore.

Step 4: Click Recover to move the recovered files to the desired location.
Method 3: Use Time Machine Backup to Recover Data from a Mac that Won’t Boot
Time Machine, a built-in backup tool, helps you backup and restore data on your Mac devices. If you have already backed up your Mac’s data using Time Machine, you can easily restore it using macOS Recovery Mode.
For Macs with Apple Silicon chip, press and hold the power button as your Mac boots up and release the button when the Startup Options Screen appears. From here, you can boot your Mac in safe mode, use macOS Recovery, and more.
For Macs with Intel chips, boot your system and the Command + R keys. Release the keys when the Apple logo appears on the screen.
Note: This can only be done if you have a Time Machine backup.
Follow the steps below to restore your data from Time Machine:
Step 1: Plug the Time Machine backup drive into the non-booting Mac and boot into Recovery Mode.
Step 2: From the macOS Utilities window, select Restore from Time Machine Backup.
Step 3: From the list of available backups, select the ones you want to restore and click Continue.
Step 4: Next, select the destination drive where you want to save the restored data and click Continue.
Step 5: Finally, erase the disk and click Restore.
Method 4: Use APFS Snapshots to Recover Data from a Mac that Won’t Boot
The APFS snapshot feature creates periodic updates of a drive’s state on Mac and enables data restoration under critical circumstances, like crashes or when the device fails to boot.
If you’re running macOS High Sierra or later, and your Mac’s startup disk is formatted with APFS, use APFS snapshots to recover your lost data.
Here’s the rundown:
Step 1: Boot your Mac into Recovery Mode.
Step 2: On the macOS Utilities window, select Restore From APFS Snapshot and click Continue.
Step 3: Select the startup drive with the snapshot you want to restore from and click Continue.
Step 4: Once the process is complete, your Mac will automatically reboot.
Method 5: Use Disk Utility to Create a Disk Image of the Non-booting Mac
If you do not have a Time Machine backup, you can install macOS on an external hard drive, boot from it and transfer your data. To do this, use Disk Utility in recovery Mode to create a disk image for backup. Later, plug this disk to another Mac and transfer files from it.
Note: The external drive should be of a higher capacity than your non-booting Mac’s internal hard drive. Additionally, it’s important to check for any disk errors before proceeding, and in case you find one, it’s recommended to use a data recovery tool to retrieve your stored data.
Here’s how to do it:
Step 1: Connect your non-booting Mac to the external drive and boot into Recovery Mode.
Step 2: Launch Disk Utility from the macOS Utilities window.
Step 3: Select the external storage drive and hit Erase to format it.
Step 4: Name your drive, select either APFS or Mac OS Extended (Journaled) as the Format, select GUID Partition Map as the Scheme and click Erase to confirm.
Step 5: Close Disk Utility.
Step 6: Next, select Reinstall macOS from the macOS Utilities window.
Step 7: Select your external drive as the destination and follow the prompts to install macOS on the external drive.
Step 8: After the installation is completed, you can proceed with the setup and copy files from your Mac to the new external OS.
Note: If the internal drive fails to show up in Finder, you’ll need to mount and unlock it via Disk Utility.
Wrapping Up
A non-booting Mac often means you will not be able to access your stored data and this requires an immediate fix. You can use the methods listed in this guide, such as APFS snapshots, Target Mode, or recovering from Time Machine backup, to perform a successful recovery.
However, if the manual methods fail, and you’re looking to save much time and effort, it’s recommended to use Stellar Data Recovery for Mac. It is compatible with all kinds of Mac systems powered by M1, M2, and M3 chips, as well as earlier Macs running on T2 chips.


