How to Schedule Emails on Gmail
Have you ever been in a situation where you need to send an important email, but you're not sure if the recipient is available to read it? Or maybe you want to send a message at a specific time, but you know you'll be busy when you need to send it. That's where scheduling an email on Gmail comes in handy!
Gmail's scheduling feature allows you to prepare your email in advance and schedule it to be sent at a specific time and date. This means you can take care of all your email communications at once and have them delivered when they'll have the most impact.
One of the great things about Gmail is that it's free and easy to use. So whether you're sending an email to a coworker or a client, Gmail's scheduling feature can help ensure that your message is delivered at the right time and with the most impact.
How to Schedule Your Emails on Gmail
- Go to Gmail
- Click on the Compose button
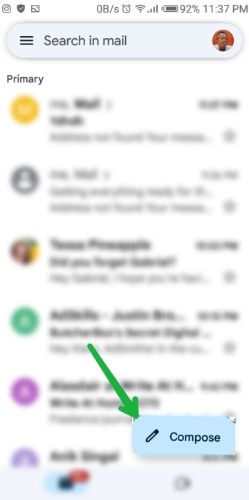
3. Compose your Email, Once done, click on the three-dot button at the top right corner of your screen.

4. Select Schedule Send from the drop-down

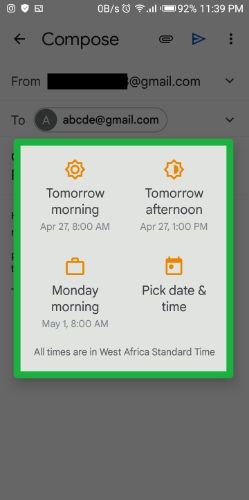
5. On clicking the Schedule Send, you would get a Pop-up asking when you want the email to be sent. If the time you want the email to be sent isn't on the options, Select Pick date & time.
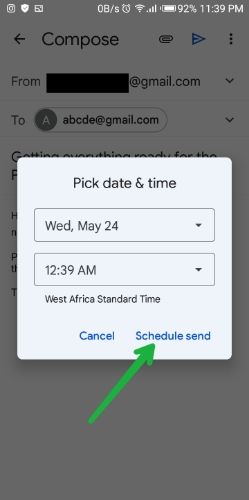
6. Upon Selecting the Pick date & time, you would be given the option of setting the day and time you want the mail to be sent. After setting that up, Click Schedule Send to activate it.
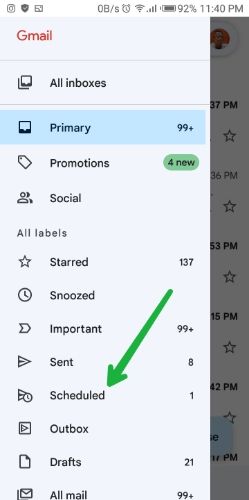
7. Once done, your message would be scheduled for the day you've selected for it. To view the scheduled mail, go back to your inbox > Click the Button at the top left corner of your screen then select Scheduled.
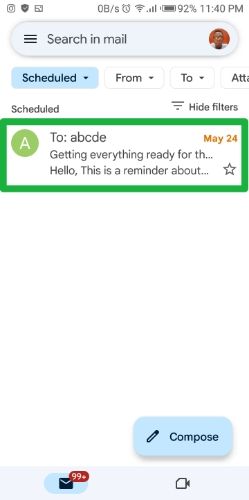
8. On getting to the scheduled email section, you would get to see the mail you've Scheduled.
Scheduling an email can help you manage your time more efficiently by allowing you to prepare and send messages in advance. You can schedule an email to be sent at a specific time and date, which can be helpful if you are busy or need to send a message during non-business hours.
Image Credit: Gabriel Ojeh / Techloy.com


