How to Screen Record in Windows 11


If you want to show someone how to do something on their computer or explain a website's features, recording your screen and sending them the video can be very helpful.
However, screen recording was a complicated process in the past, as Windows lacked any built-in tools. Luckily, Microsoft has made it much easier for Windows 11 users with a new screen recorder function added to Snipping Tool, which was previously only used to take screenshots.
This article teaches how to make a Screen Record in Windows 11.
How to Screen Record in Windows 11 Using the Snipping Tool
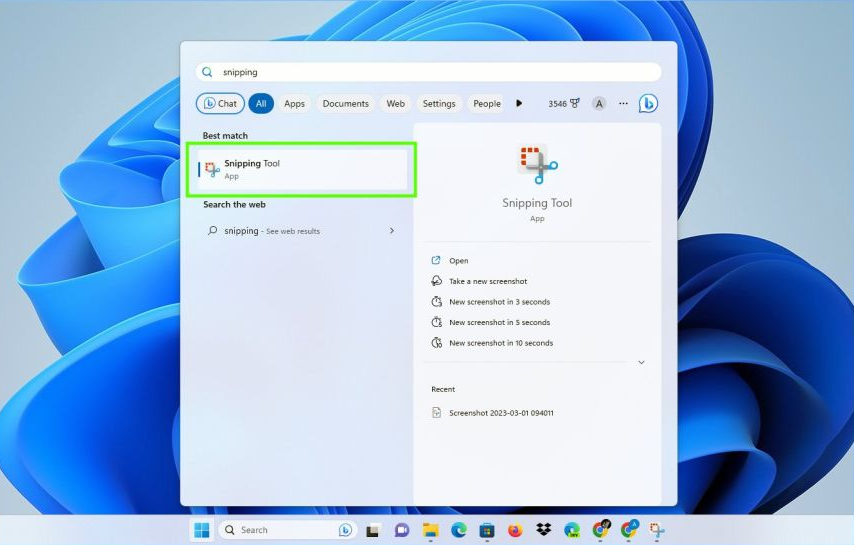
- Open the Start menu by Clicking on the Start button located at the bottom-left corner of your screen. After that, just type Snipping Tool in the search bar and press Enter when it shows up in the search results.
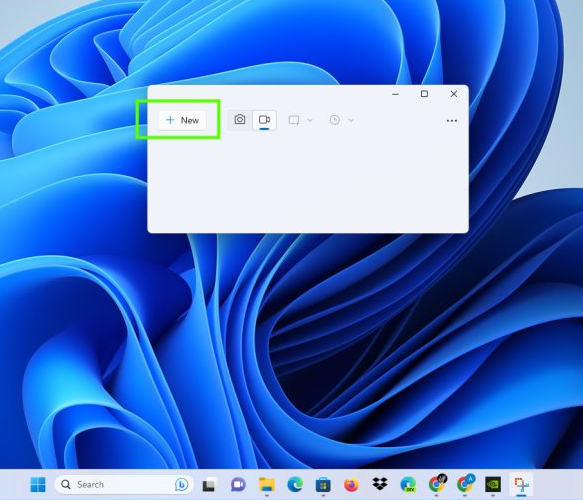
2. Now, Switch over to video capture mode.

3. Click + New to start a new screen record.
4. Click + drag to highlight the area of your desktop you wish to record.
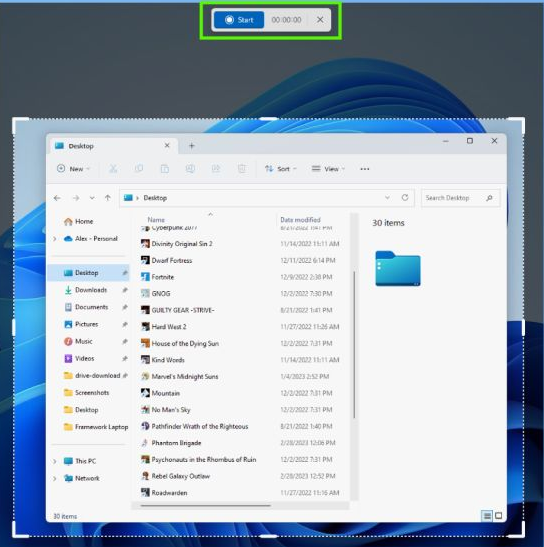
5. Once you're done with your screen recording, you can click on the Stop button located at the top of the screen.
Conclusion
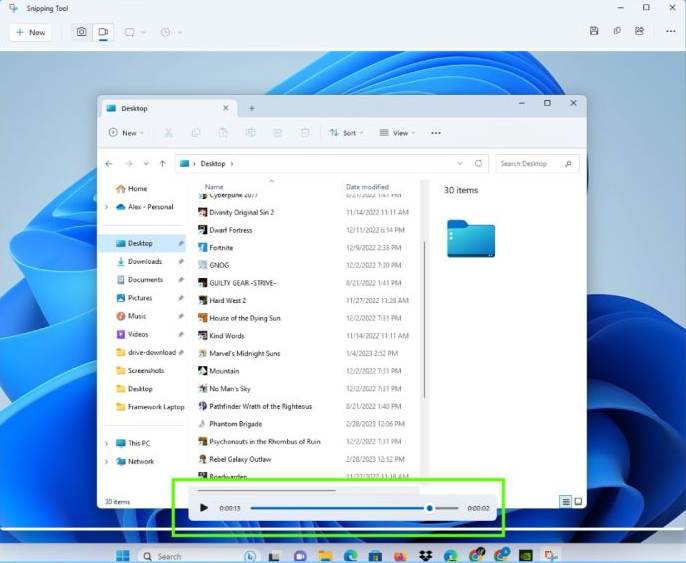
Snipping Tool is a useful tool for capturing screenshots and recording your screen in Windows 11. With its built-in editing tools and screen recording function, it provides a simple and efficient way to communicate with coworkers or friends and family. Its user-friendly interface makes it accessible to all levels of computer users, whether you need to capture a screenshot or record a video tutorial.
Image Credit: Future


