How to Set Up Google Authenticator
Passwords alone aren’t enough as a secure way to keep your accounts safe.


Passwords are a common way for us to be authenticated and signed in to our very accounts, be it work, social, you name it. While this works, passwords do not offer an advanced layer of protection. They are notoriously flawed. Weak, reused, or guessed passwords can unlock Pandora's box of security breaches and identity theft. Now, this is where authenticator apps come in.
Google Authenticator is one of the most popular and widely used authenticator apps out there. Even without a Google account, you can use it. Most importantly, it can store codes from various applications, keeping them safe and secure in one convenient place. But if you do happen to have a Google account, your codes are synced across all your devices.
If you are new to the world of two-factor authentication, setting up and using Google authenticator can be intimidating. But it is an easy process. In this guide, we will show you how to set up and use Google Authenticator, and also delete authentication codes generated.
How to Set up and Use Google Authenticator
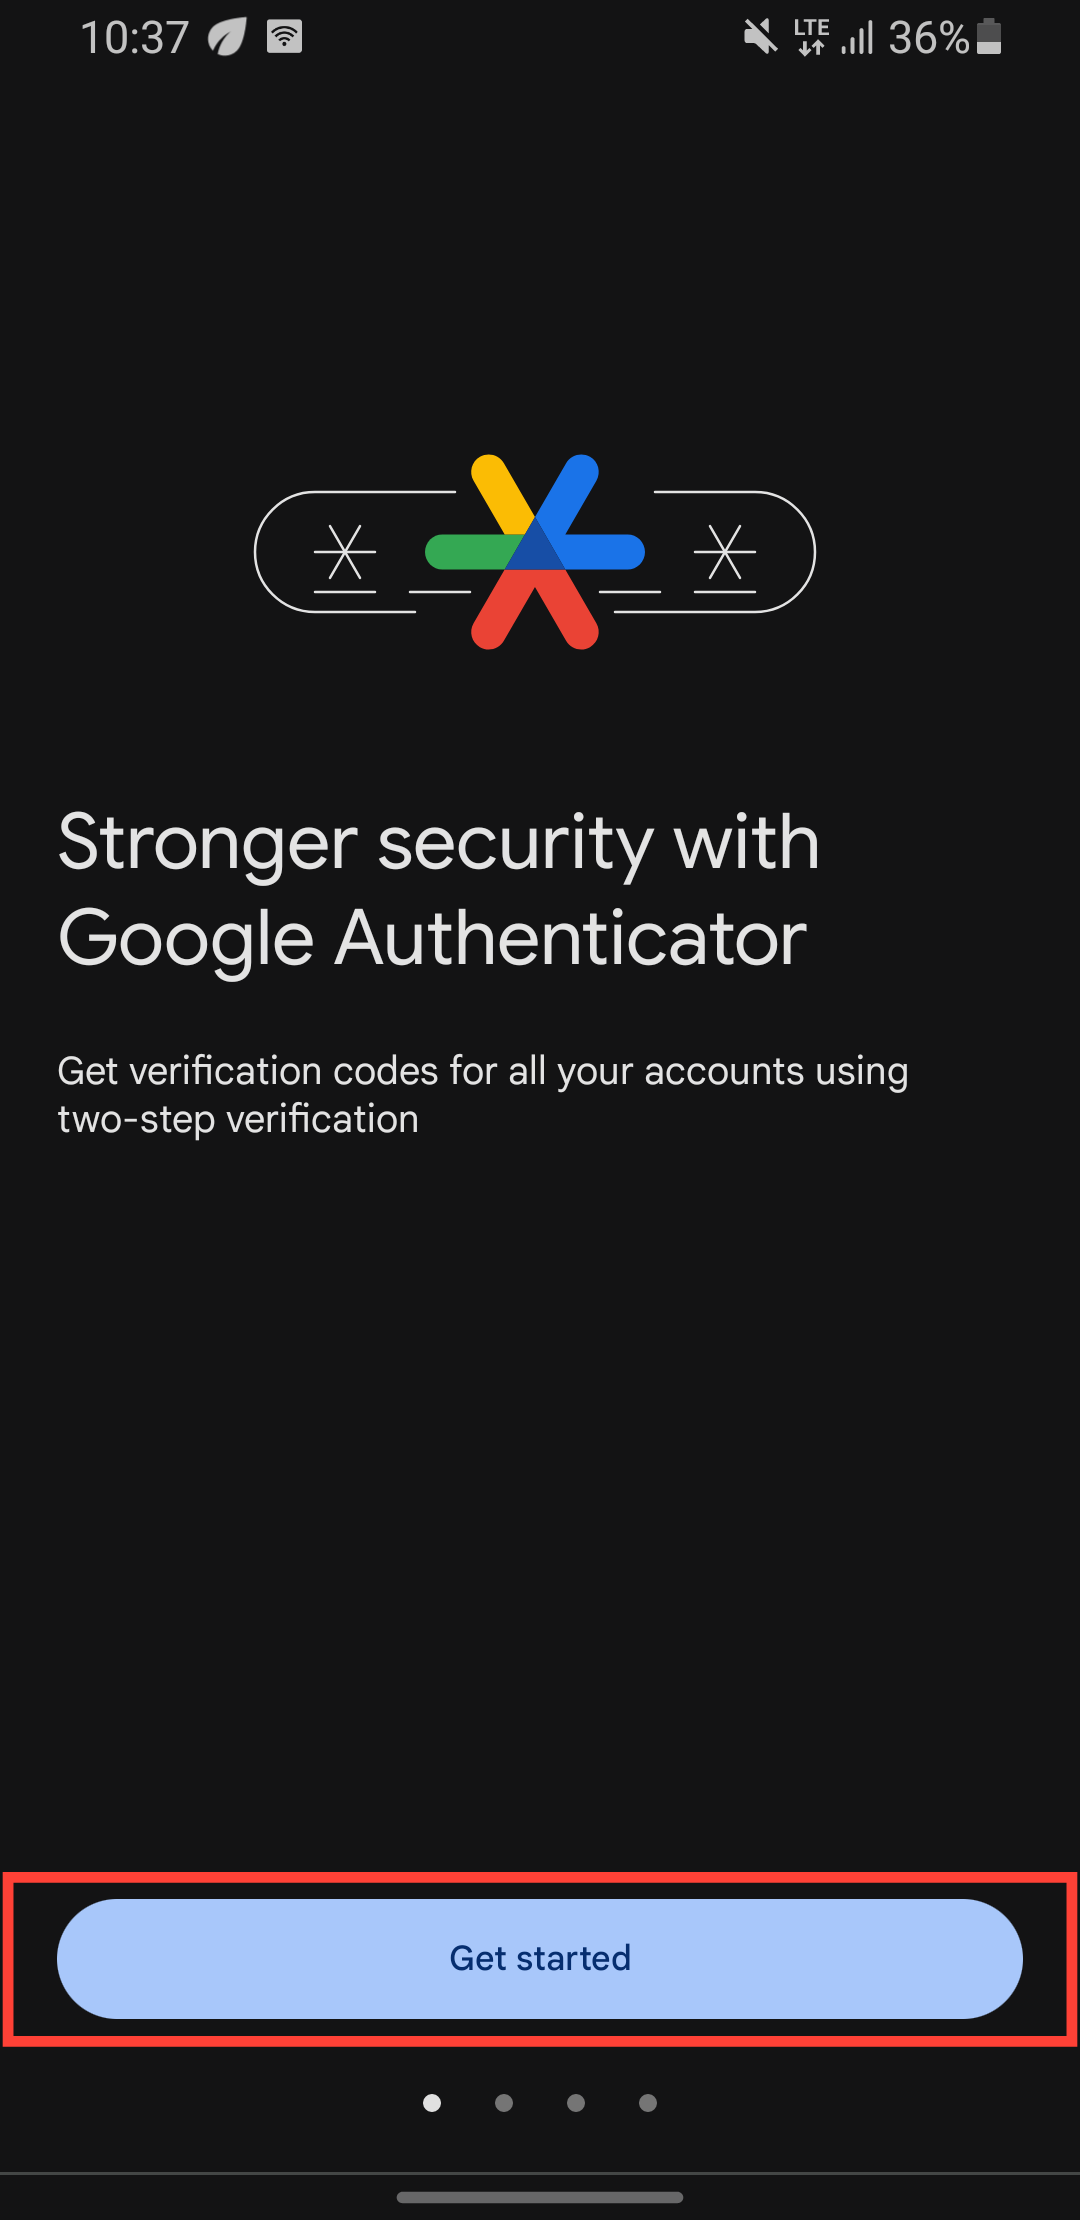
Step 1: Install the Google Authenticator App from the Google Play Store and open the app and select "Get Started"
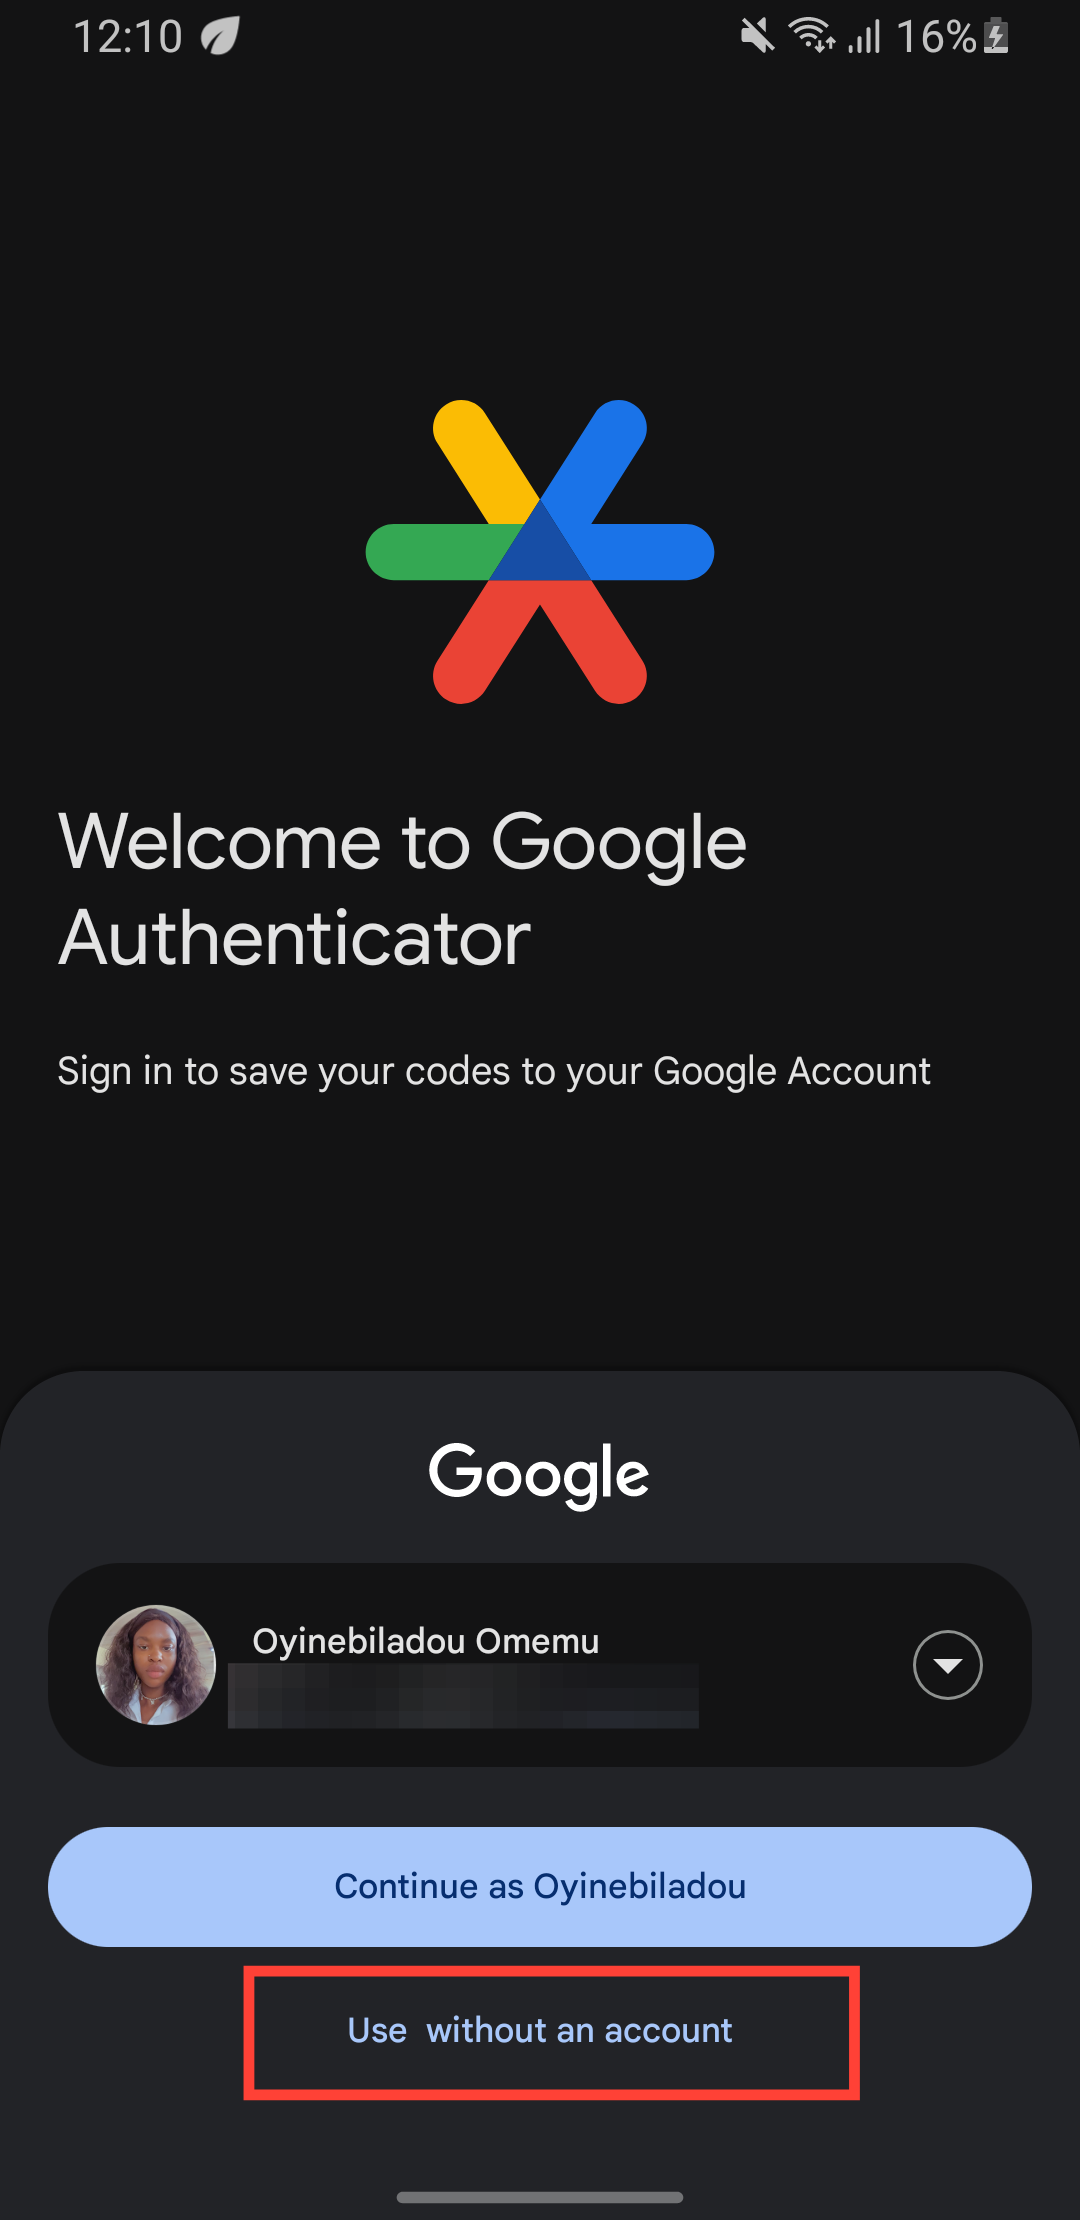
Step 2: If you have a Google account, select your account from the drop-down menu and select "Continue as <name of account>"
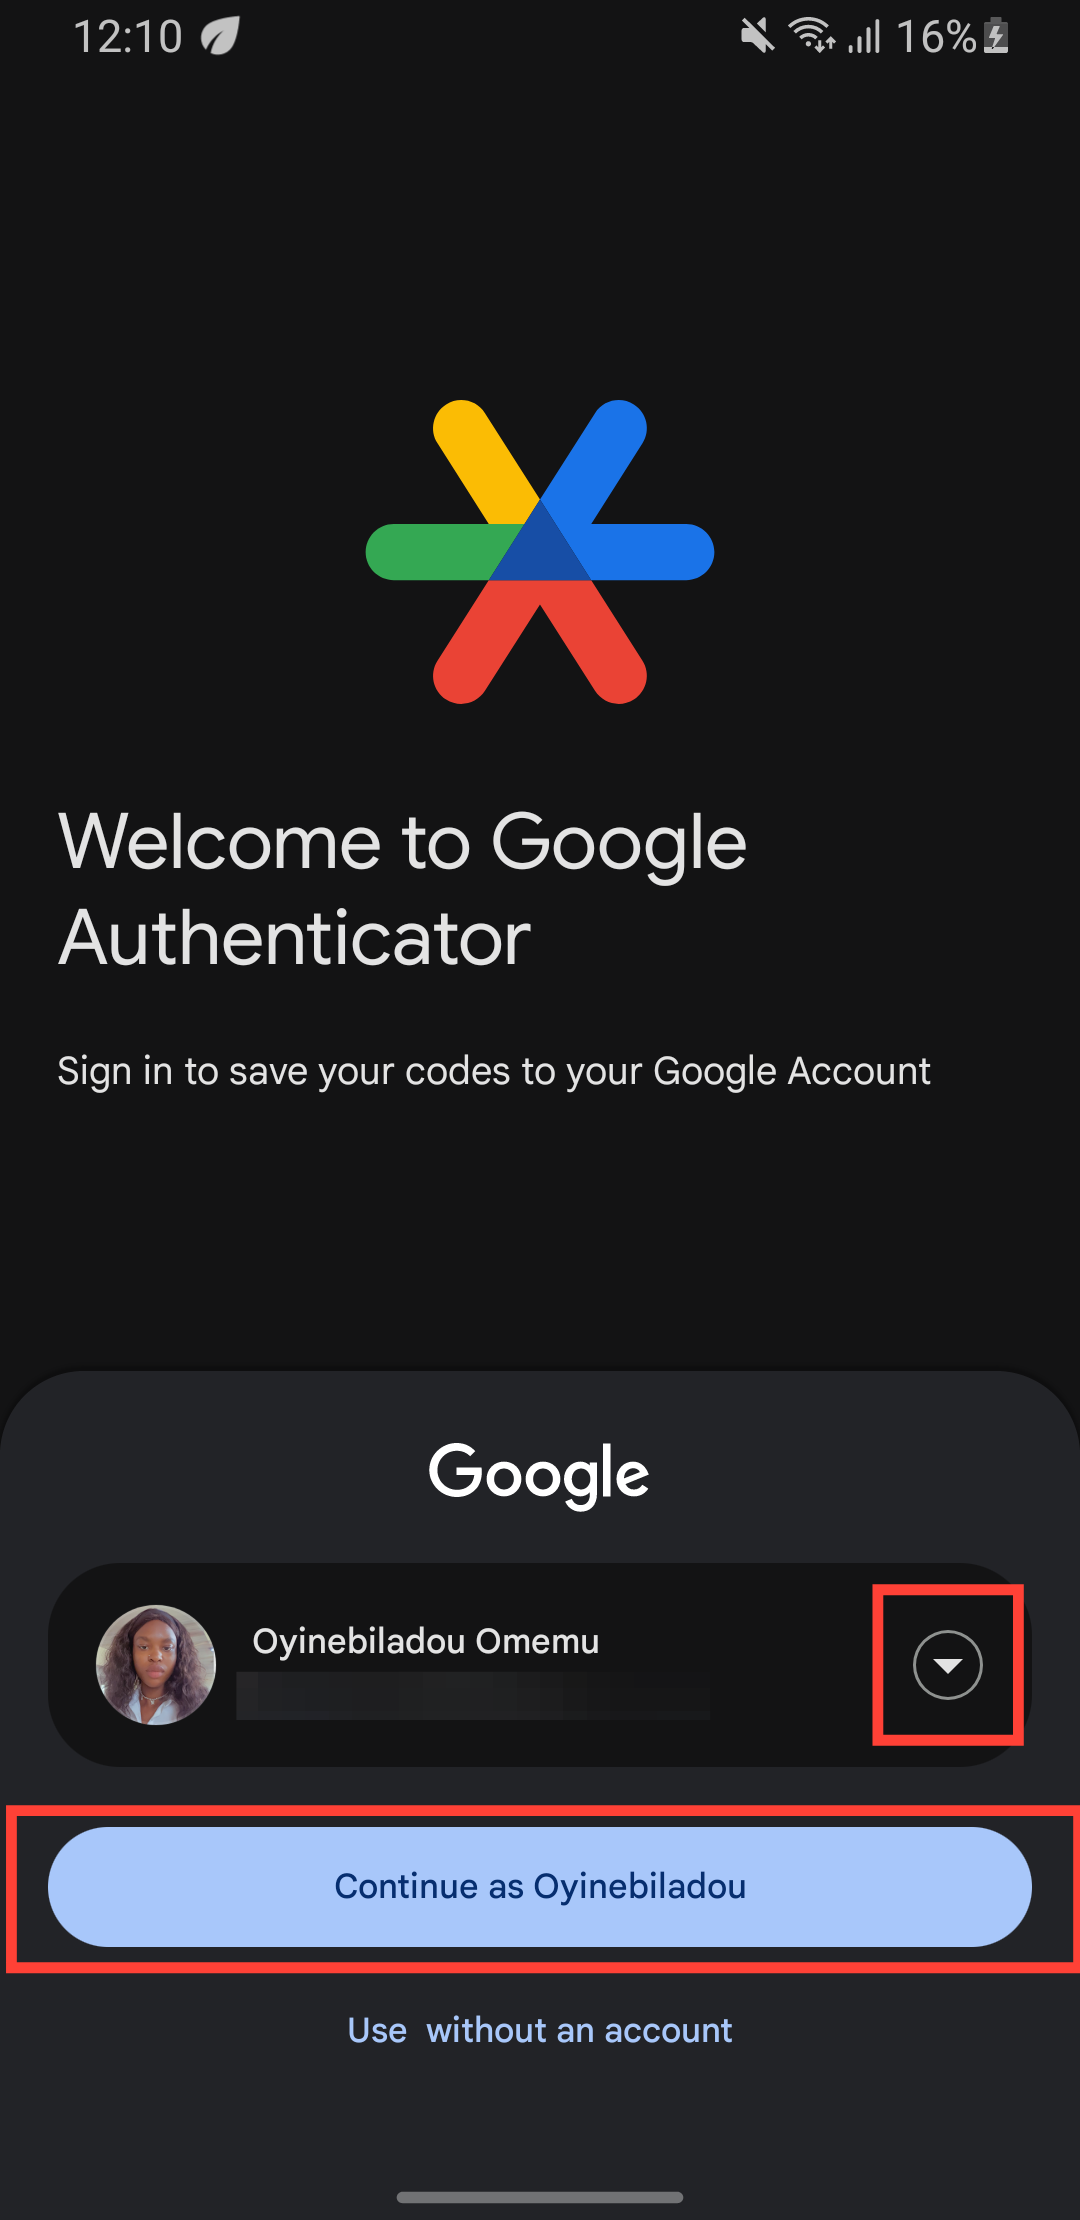
- If you do not have a Google account, select "Use without an account"
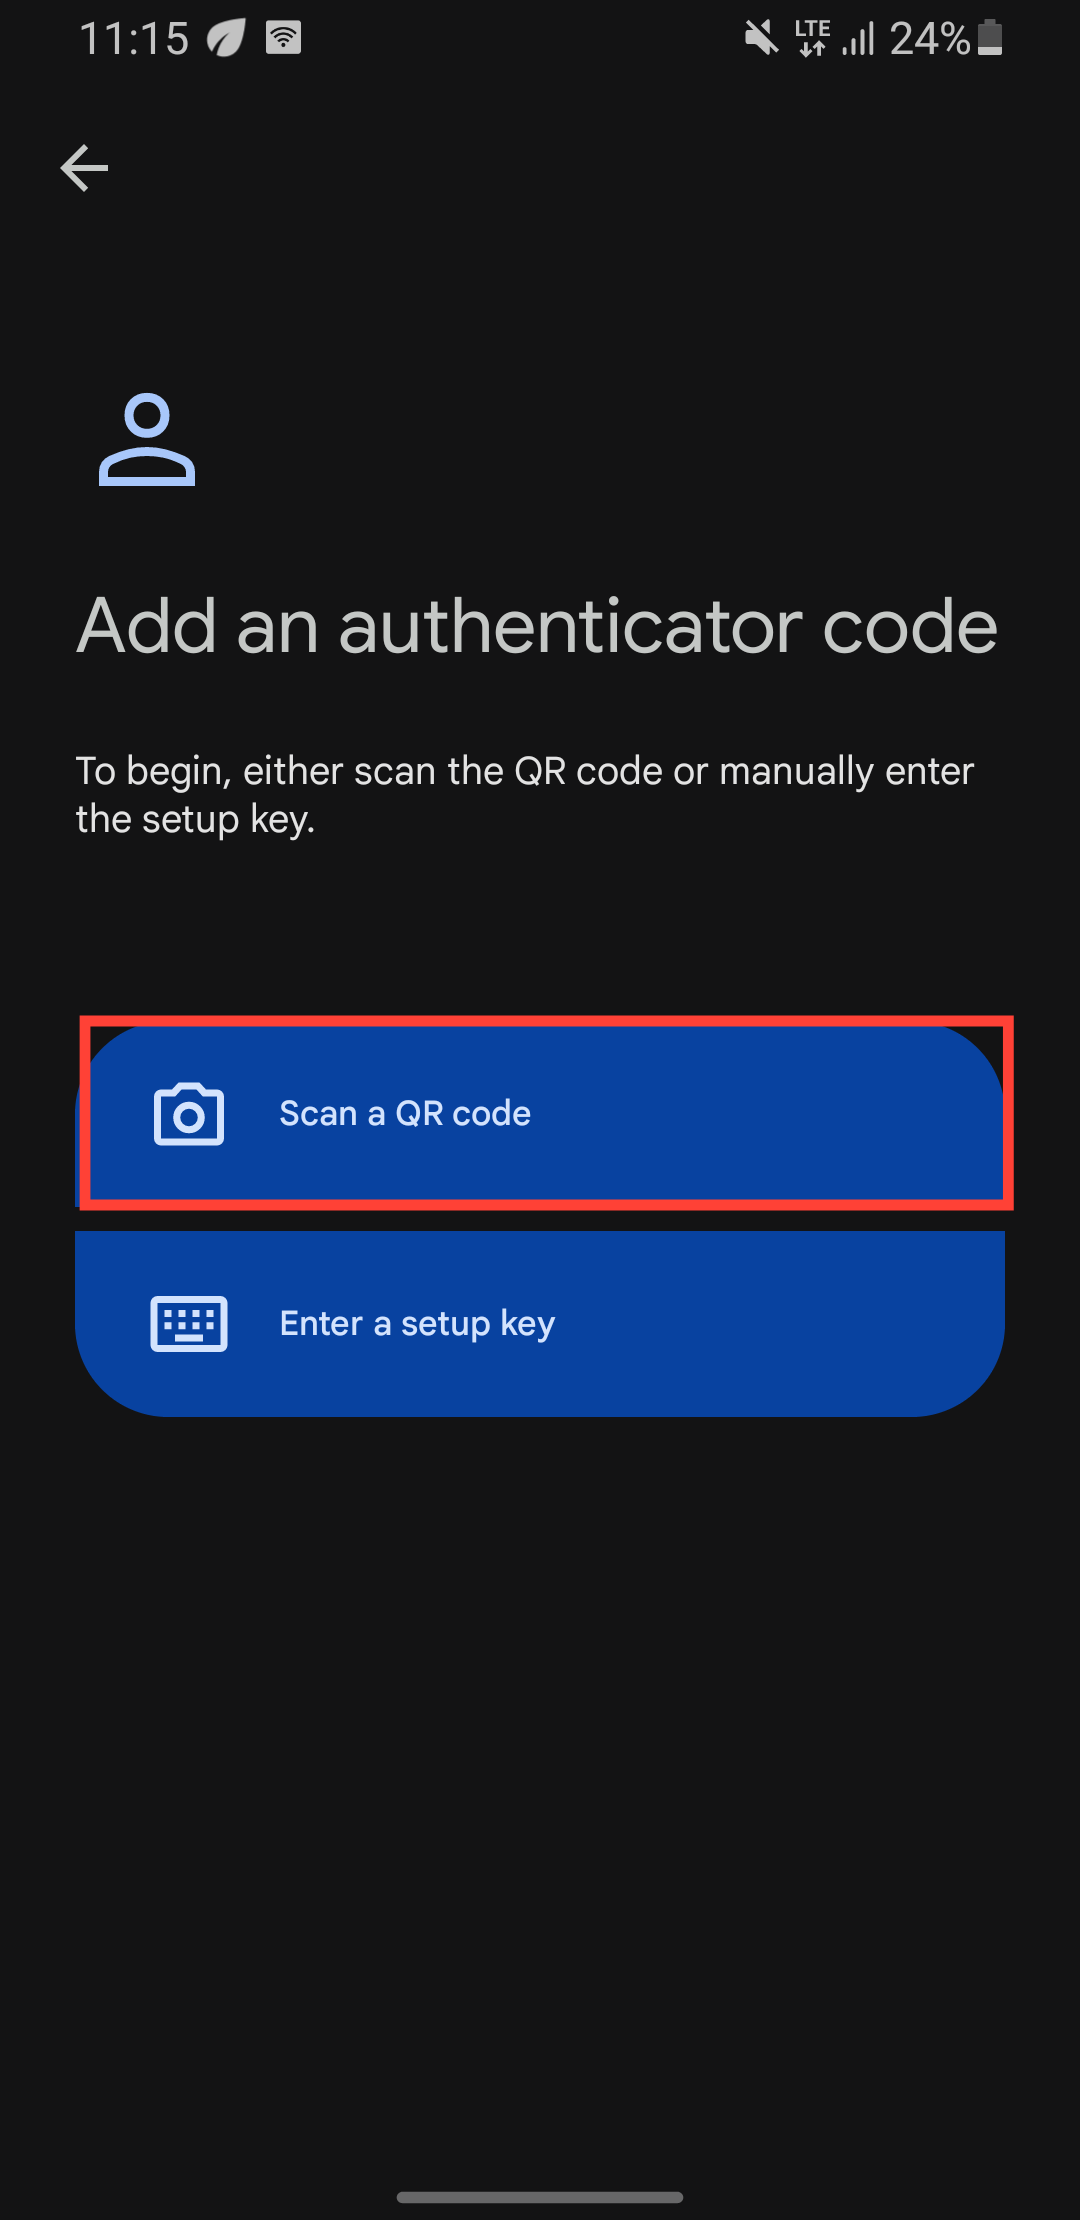
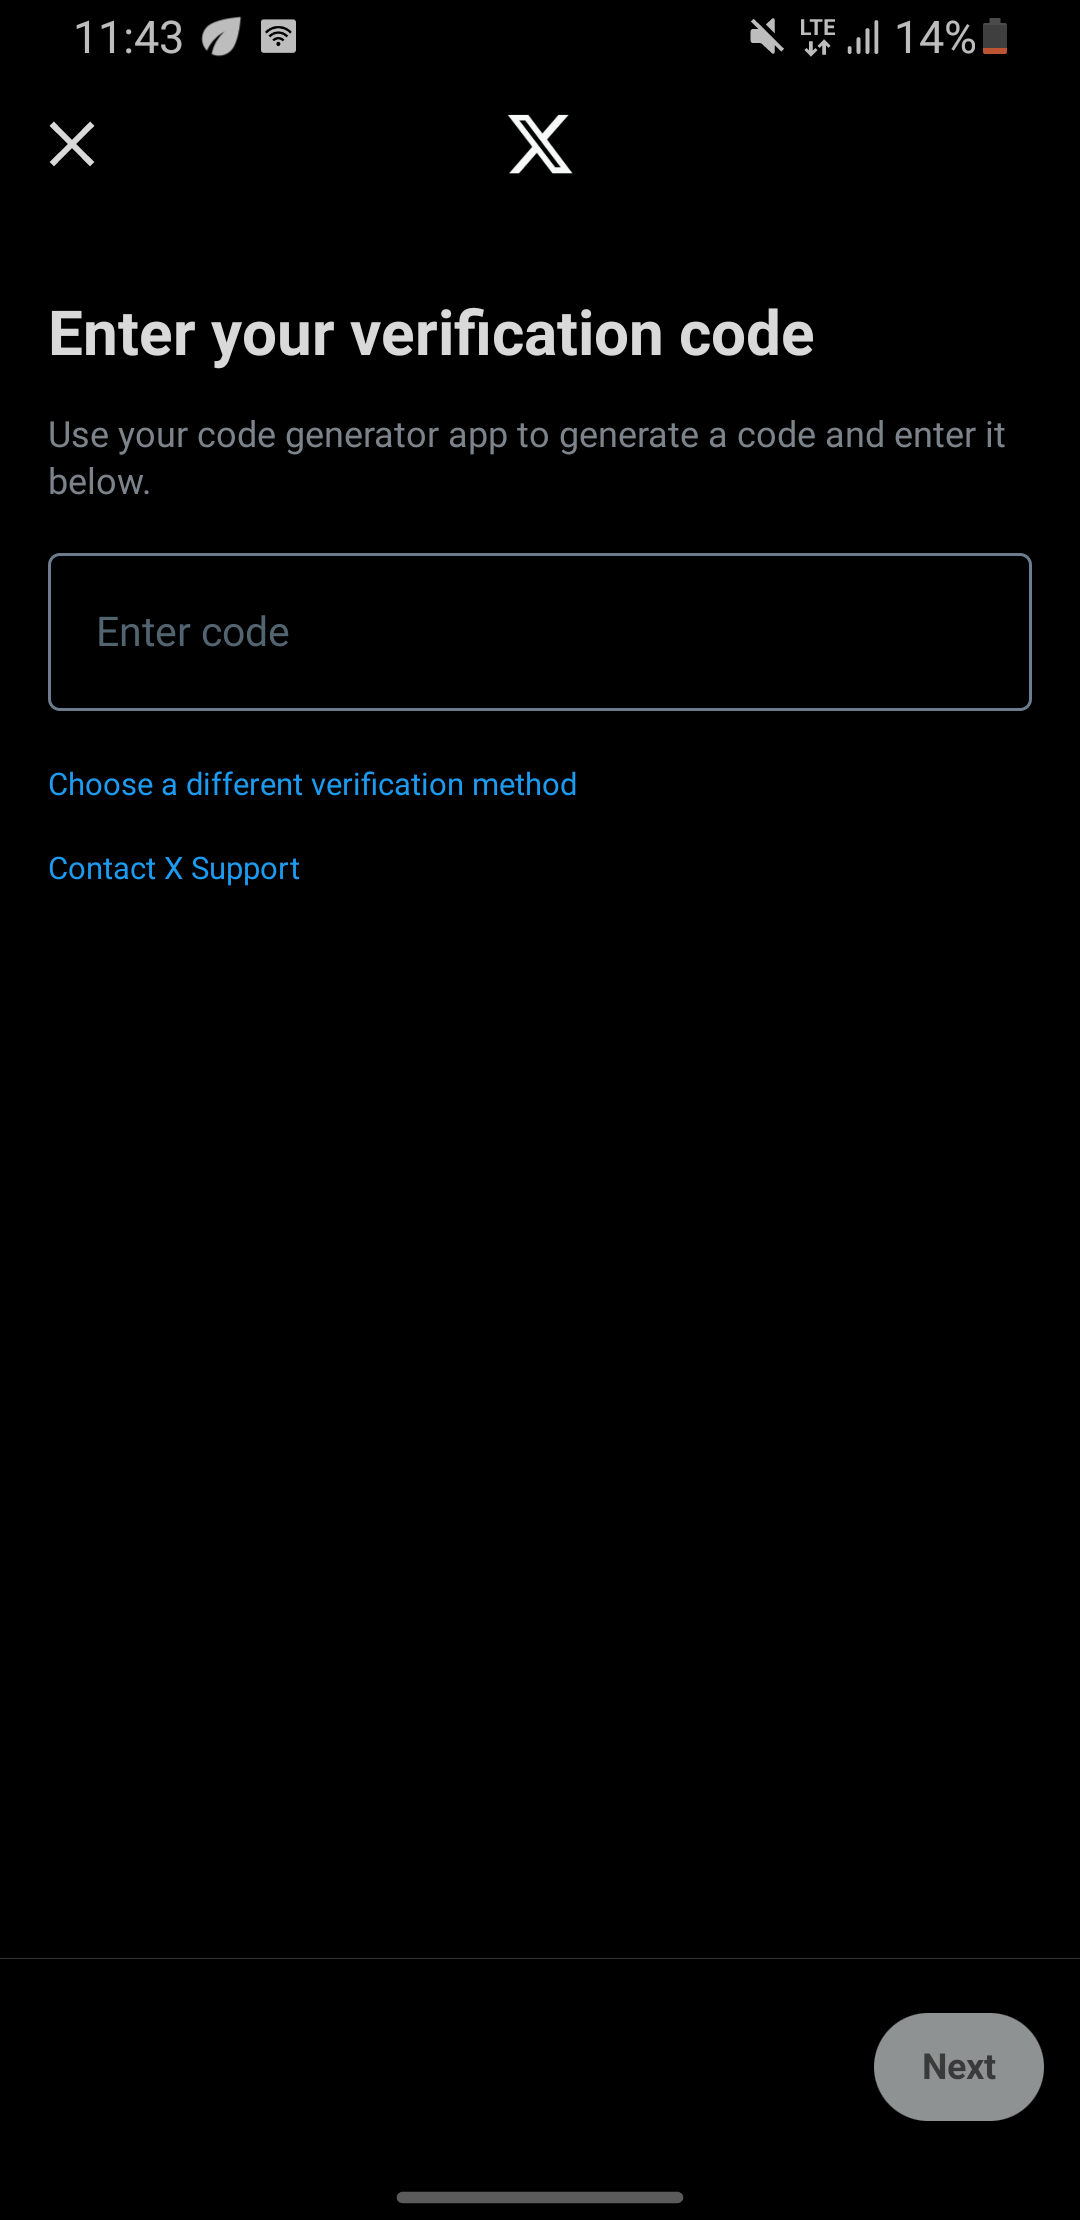
Step 3: Click on the “+” button on the home screen to add a new account to use the two-factor authentication. Select "Scan a QR code" or "Enter a setup key" to add the account.
Step 4: Open the application you want to add. Within the security settings of the application, find the option for 2-factor authentication (2FA). Use another device for this, preferably a laptop/desktop. (We'll use Twitter in this Example)
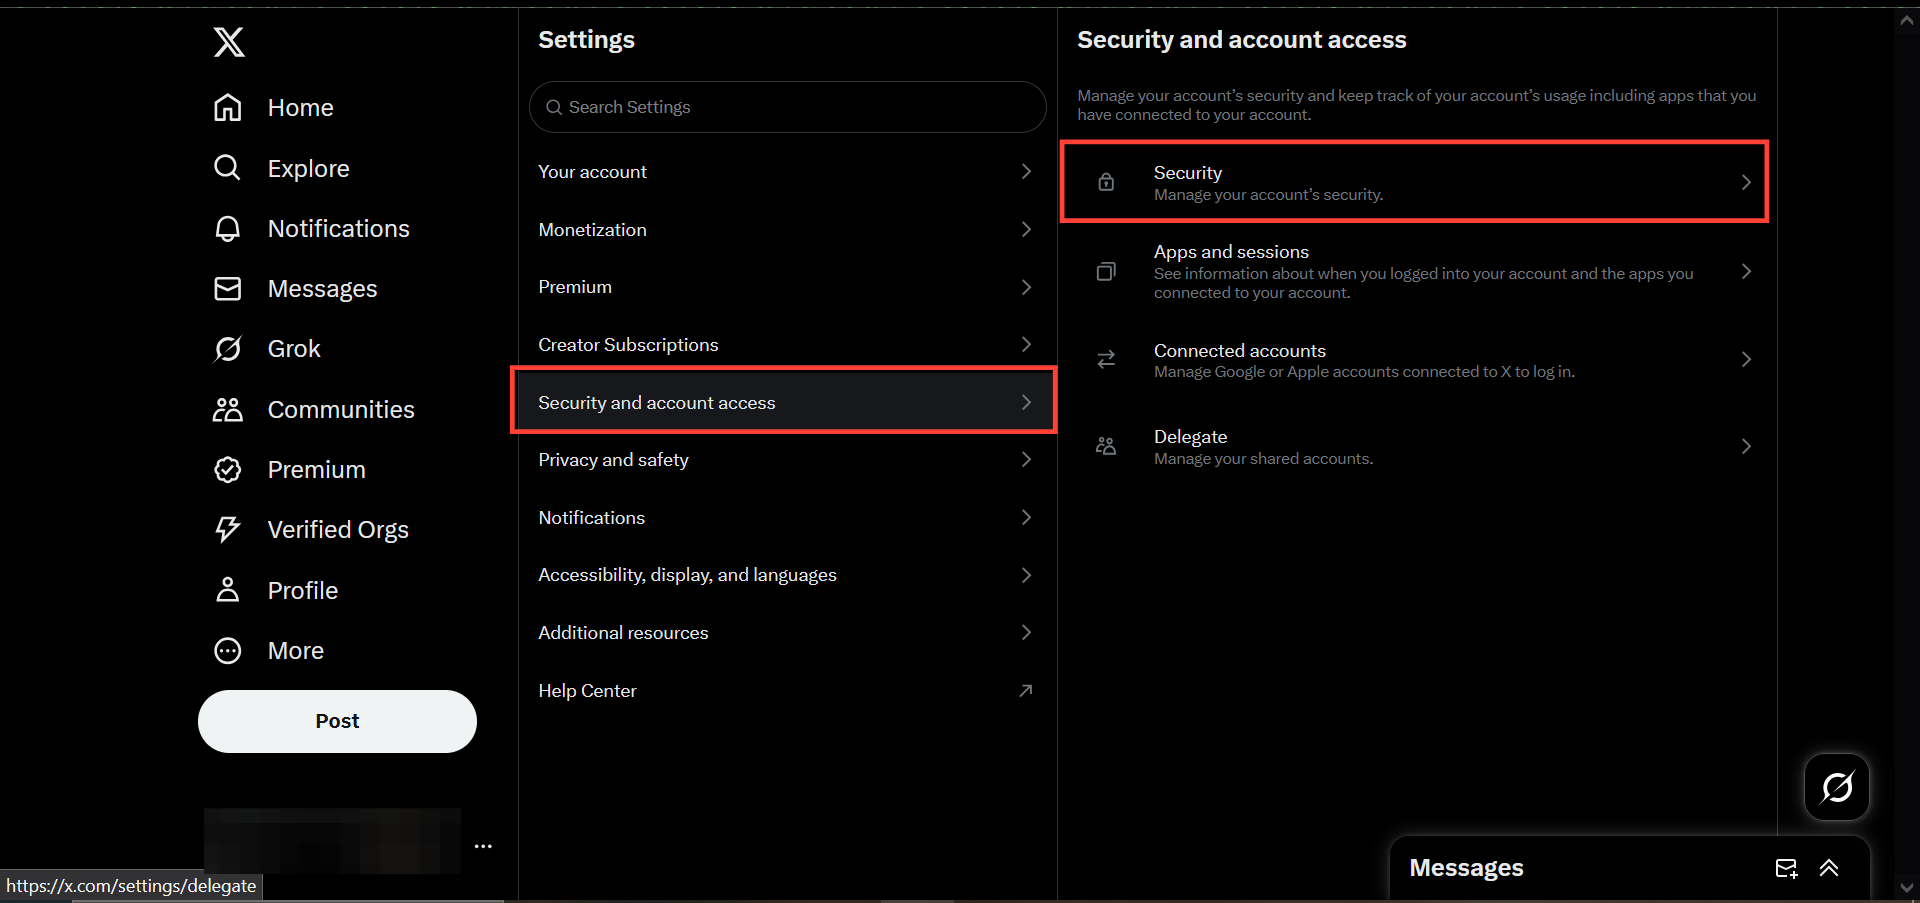
- For Twitter, open the webpage and sign into your account, then go to settings
- Select "Security and Account Access" then click on "Security"
- Click on "Two-factor Authentication"
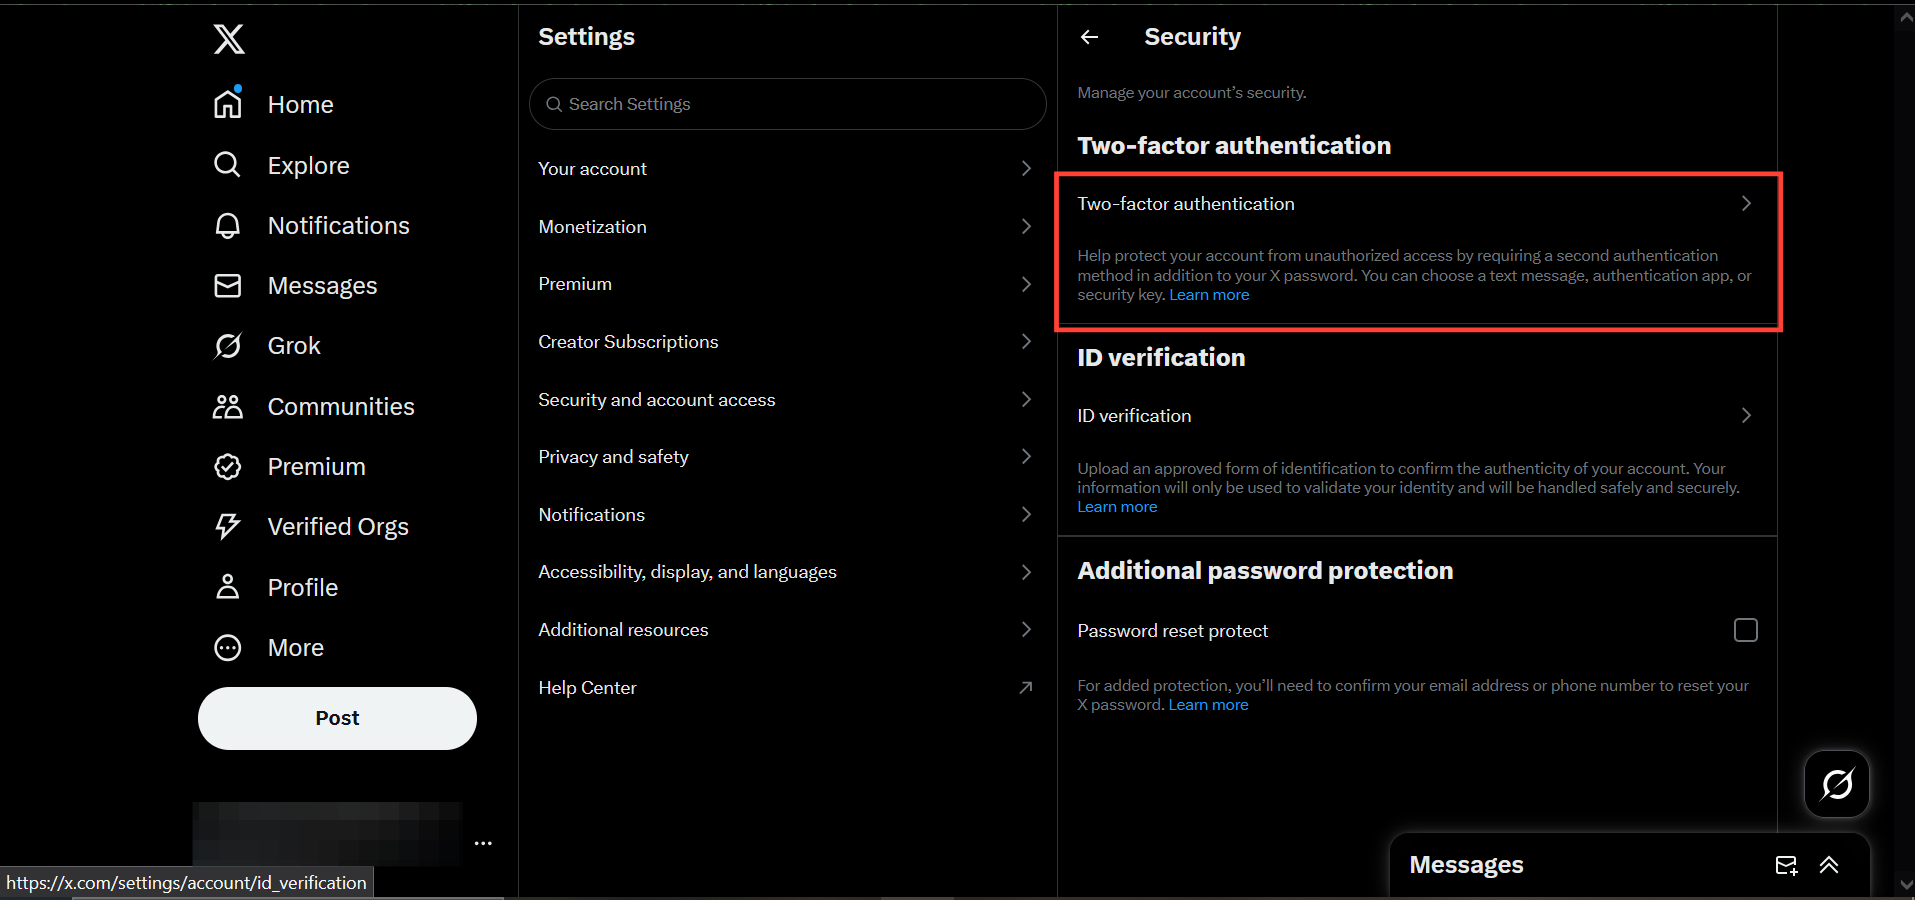
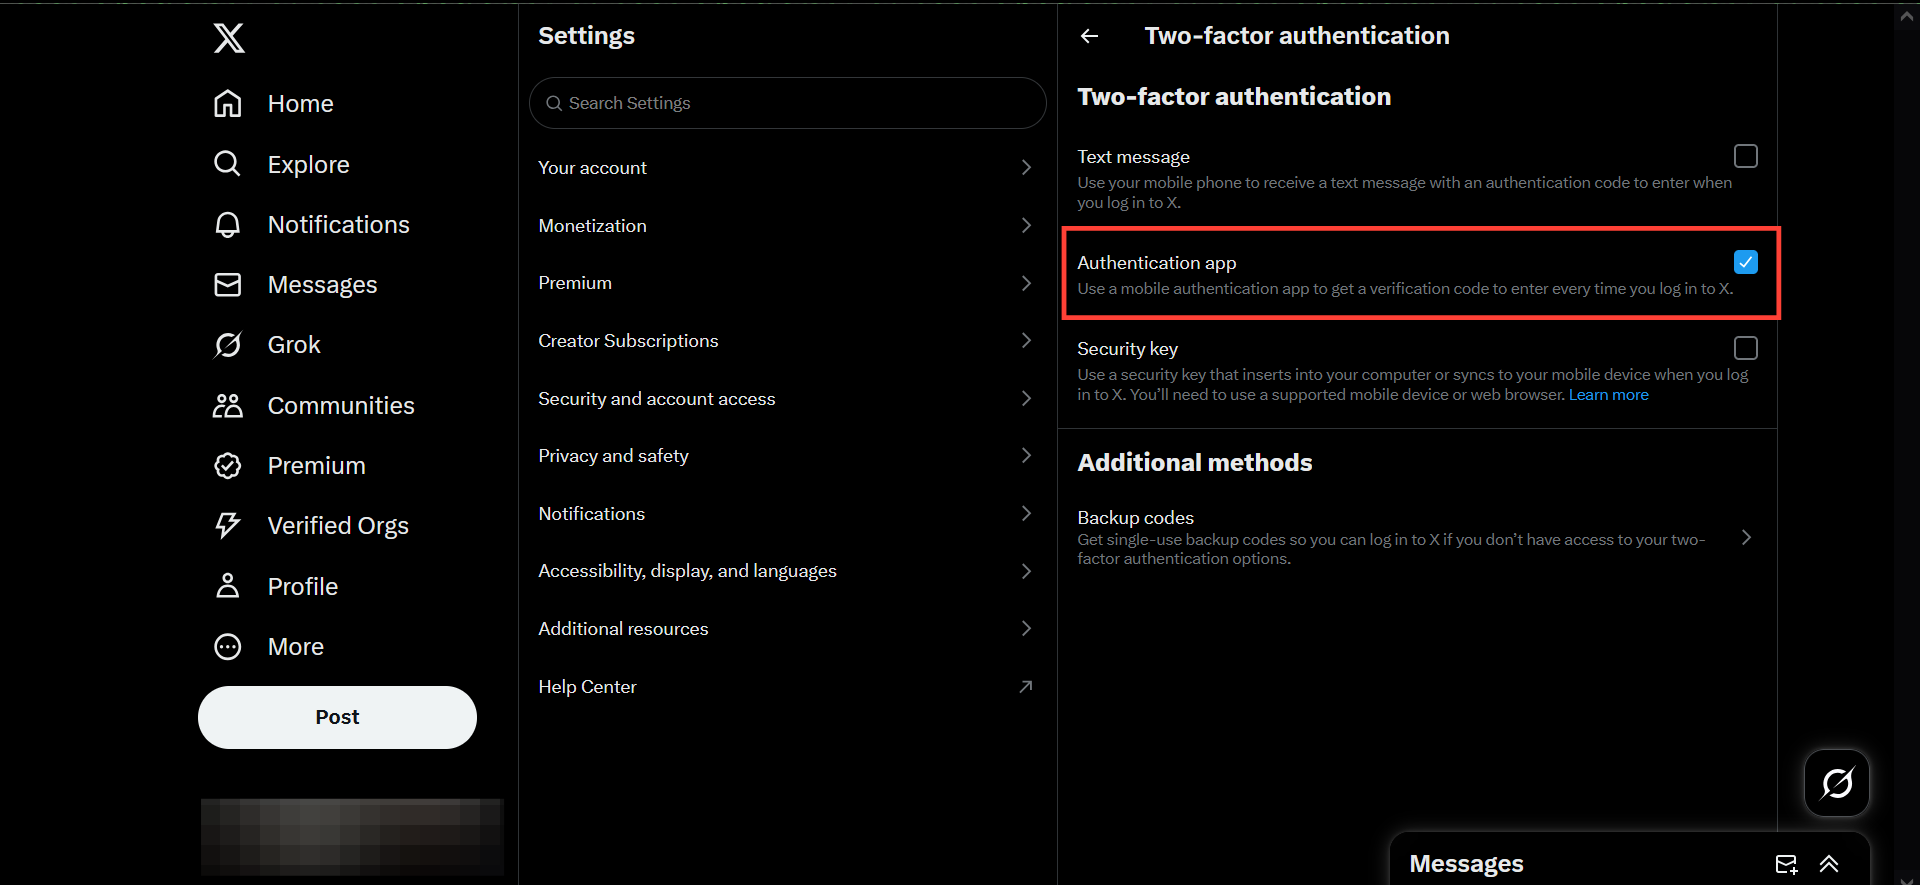
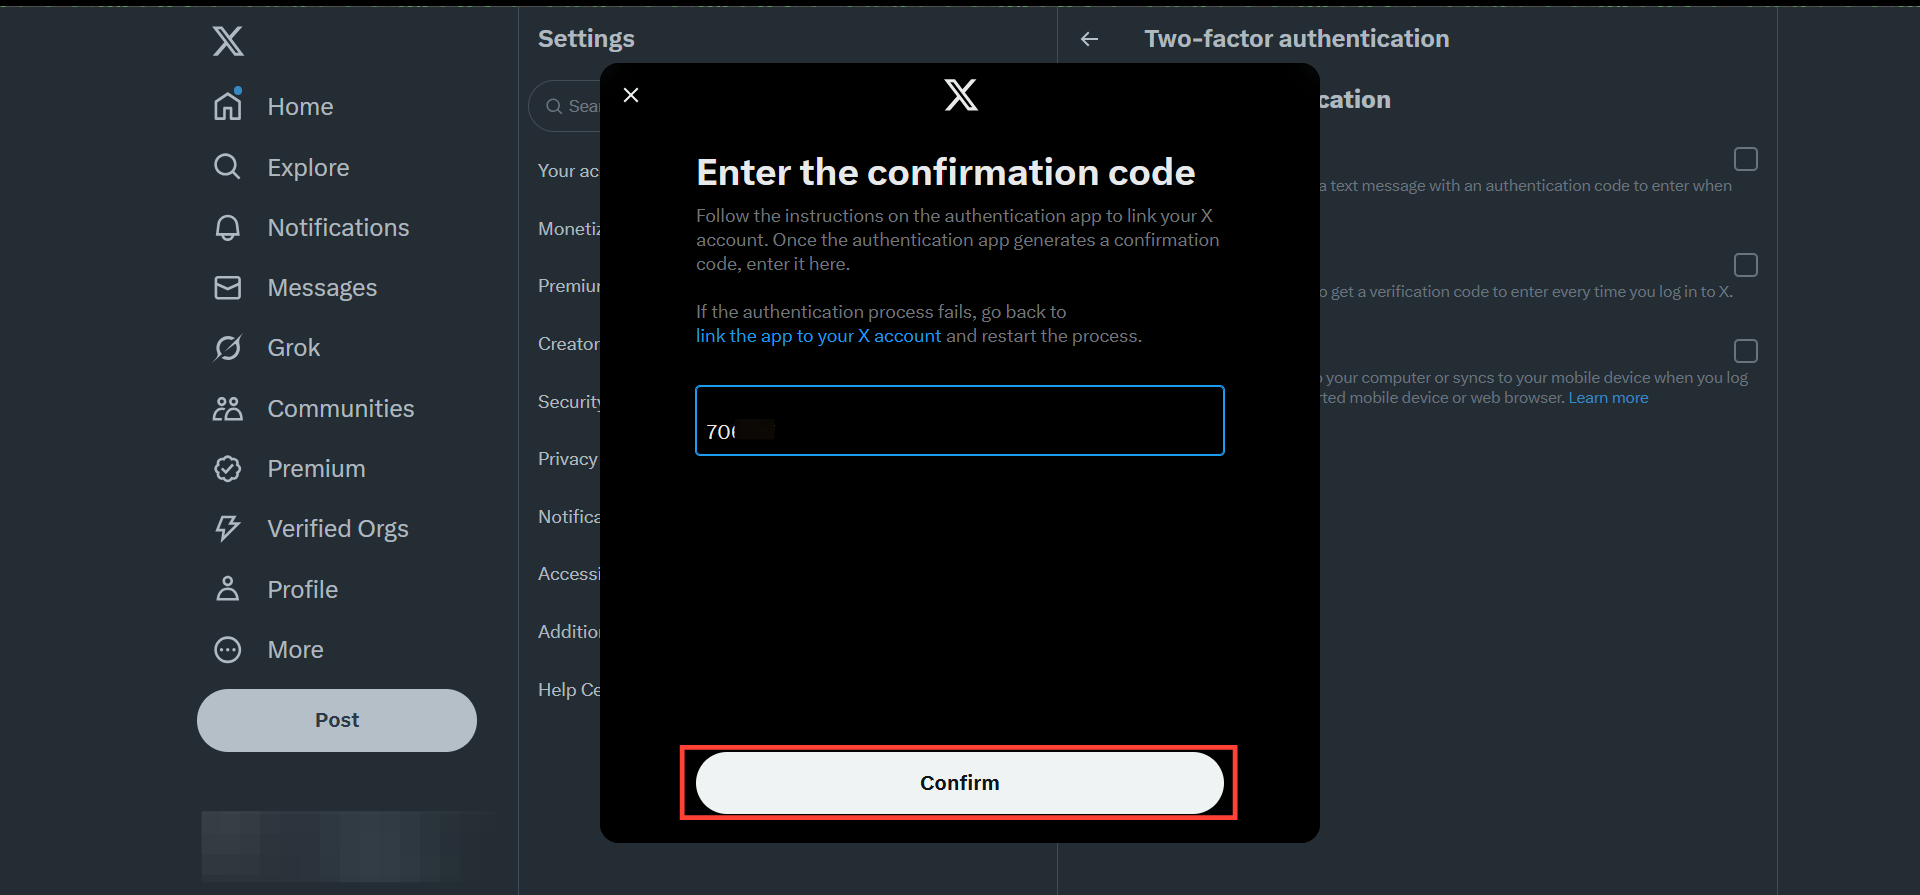
- Check the "Authentication app" checkbox, and enter your password when the prompt comes up.
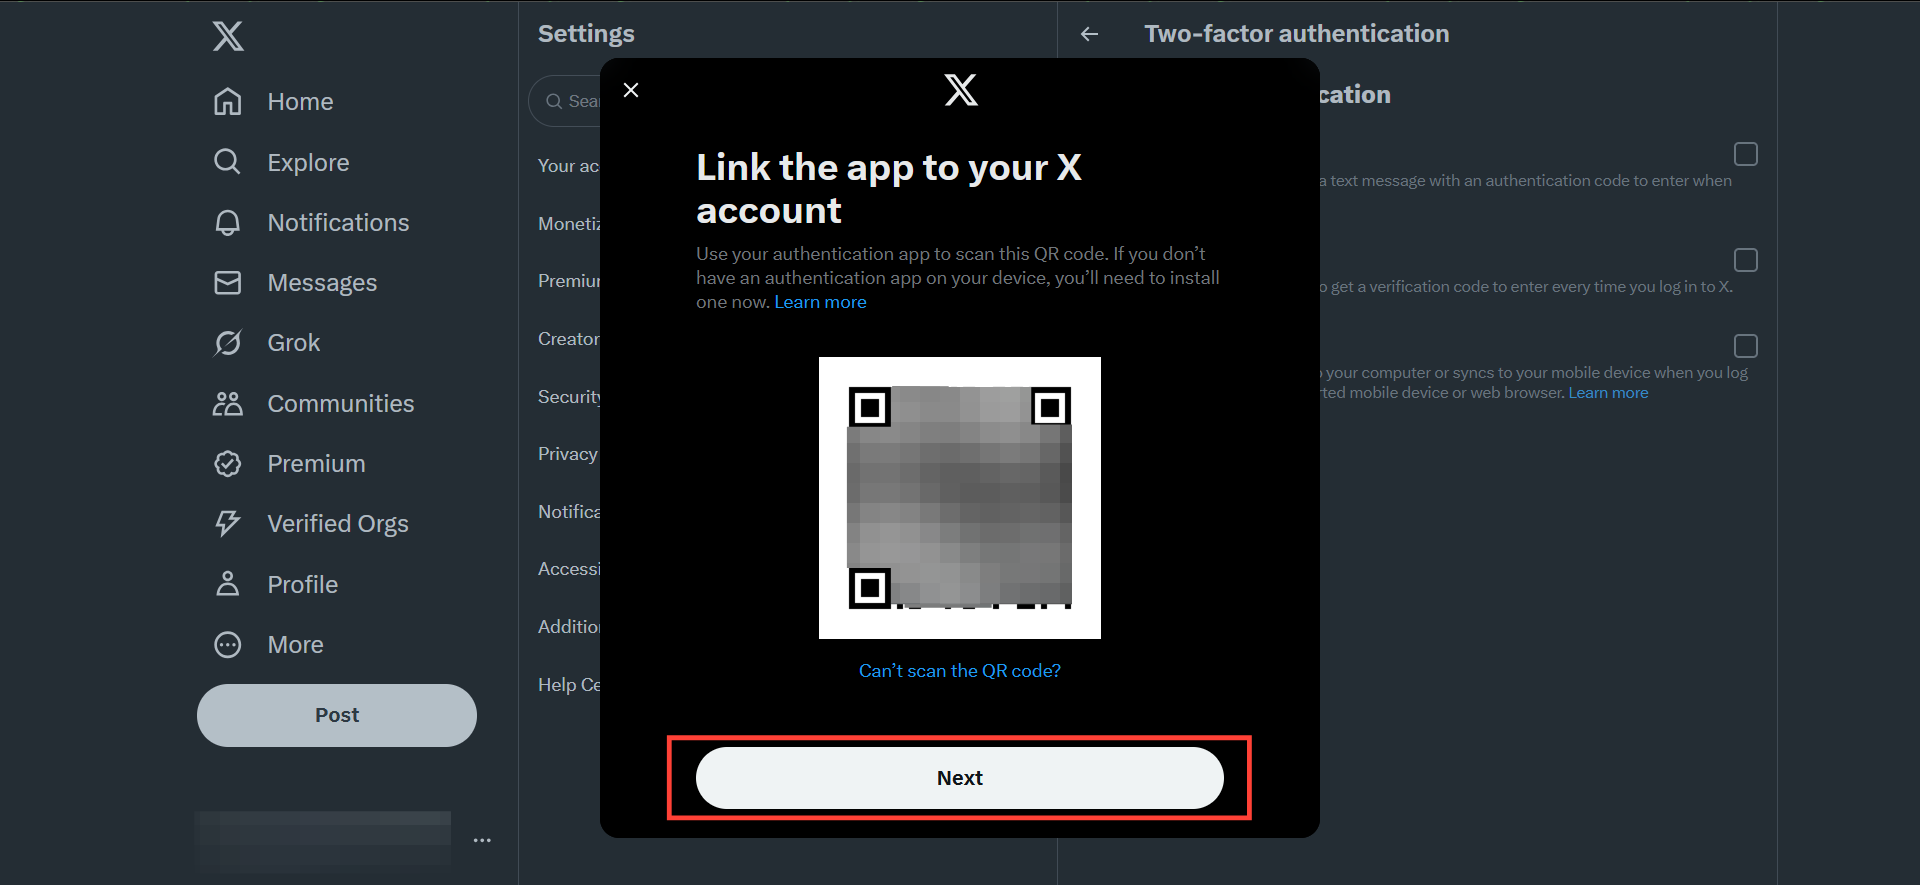
- Scan the code click with the authenticator app and click "Next"
- A code will be sent to your Google Authenticator app, enter the code and click "Confirm"
Step 5: Now that your 2-factor authentication code is set, when next you log in, depending on the application, you'll need the Google Authenticator 6-digit code to Sign In. The code regenerates every 30 seconds, so you can't reuse a code.

How to Delete your Google Authenticator codes
- Step 1: Swipe right on the code you want to delete to show the delete option.
- Step 2: Confirm the deletion prompt to delete the code from your authenticator app.
Conclusion
With the increasing rate of cyber threats, we can no longer rely solely on just passwords to keep our applications safe. Authenticator apps like Google Authenticator provide an extra layer of security, making it significantly harder for attackers to access your accounts, even if they obtain your password.
Setting up Google Authenticator is a crucial step toward better online protection. While it may seem daunting at first, the process is straightforward, and once implemented, it ensures a more robust safeguard for your accounts
Image credit: Oyinebiladou Omemu/techloy.com


